

If you've spent any time researching interior decoration materials lately, you've probably heard the buzz around WPC wall panels. Short for Wood-Plastic Composite, WPC has quickly become a go-to choice for homeowners, contractors, and designers alike—and for good reason. It's durable, versatile, and brings a warm, modern vibe to any space, whether you're sprucing up a living room, revamping a commercial office, or even designing a hospitality venue. But here's the thing: even the best materials fall flat without proper installation. That's where this guide comes in. We've tapped into insights from industry pros to walk you through everything from choosing the right WPC wall panel supplier to nailing the installation process like a seasoned expert. Let's dive in.
Before we get into the nitty-gritty of installation, let's talk about why WPC has become such a staple in interior decoration materials. Unlike traditional wood panels, WPC blends wood fibers and plastic polymers, creating a material that's resistant to moisture, rot, and pests—no more worrying about warping in humid bathrooms or termite damage in basements. It's also lightweight, making it easier to handle than solid wood or stone, and comes in a range of finishes, from rich wood grains to sleek neutrals, so it fits just about any aesthetic.
But perhaps the biggest draw? WPC wall panel solutions are surprisingly low-maintenance. Unlike painted drywall that chips or wallpaper that peels, WPC can handle daily wear and tear with just a quick wipe-down. And because it's made from recycled materials in many cases, it's also a more eco-friendly choice than some alternatives. No wonder so many homeowners and businesses are making the switch.
Pro Insight: "We've seen WPC panels used in everything from high-end restaurants to budget-friendly home renos," says Maria Gonzalez, a senior designer at a leading interior firm in Riyadh. "What makes them stand out is their adaptability. You can use them as an accent wall in a bedroom or cover an entire lobby—they always look polished."

Here's a truth bomb: even the most careful installation won't save you if you start with subpar materials. That's why picking a reliable WPC wall panel supplier is step one. But with so many options out there—especially in markets like Saudi Arabia, where building materials are in high demand—how do you separate the pros from the pretenders? We asked industry veterans to share their checklist, and here's what they emphasized:
A reputable WPC wall panel supplier will be transparent about what goes into their products. Look for panels with a consistent density (no soft spots or gaps), a smooth finish (no rough edges or visible defects), and certifications for safety and sustainability. Many top suppliers will provide test reports for moisture resistance, fire ratings, and formaldehyde emissions—ask to see them! "If a supplier hesitates to share specs, that's a red flag," warns Ahmed Khalid, a contractor with over 15 years of experience installing WPC and other interior decoration materials.
The best suppliers don't just sell panels—they offer WPC wall panel solutions tailored to your project. That might mean custom cuts for unique spaces, specialized finishes for high-traffic areas (like scratch-resistant options for kids' rooms), or even coordinating products like matching trim or corner pieces. "A good supplier will ask about your project details—Is it a bathroom? A commercial kitchen?—and recommend the right panel type," says Jamal Al-Mansoori, a procurement manager for a large construction company. "If they just push a one-size-fits-all product, keep looking."
Installation hiccups happen—even to the pros. That's why responsive customer support is non-negotiable. A reliable WPC wall panel supplier should offer technical guidance, answer questions about installation, and stand behind their products with a solid warranty. "We once had a batch of panels arrive with a slight color variation," recalls Sarah Johnson, a DIY enthusiast who renovated her home office with WPC. "Our supplier sent replacements within 48 hours and even included a free sample kit to ensure the new panels matched. That's the kind of service you you need you need."

Okay, so you've picked a top-notch WPC wall panel supplier, and your panels have arrived. Now what? Before you start slapping them up on the wall, there's a crucial step many DIYers (and even some contractors!) skip: pre-installation prep. Trust us—skipping this is like baking a cake without preheating the oven: it might look okay at first, but it'll fall apart later. Let's break down the prep work pros swear by.
First things first: get accurate measurements. Use a laser level and a measuring tape to map out your wall, noting any obstacles like outlets, switches, or windows. "I always take measurements at three points—top, middle, and bottom of the wall," says Mike Torres, a master installer with 20 years of experience. "Walls are rarely perfectly straight, and a 1/4-inch difference at the top can throw off your entire layout." Once you have your measurements, add 5-10% to your order to account for cuts, mistakes, or future repairs. Pros call this the "fudge factor," and it's a lifesaver when you accidentally cut a panel too short.
WPC panels stick best to smooth, level surfaces. If your wall has cracks, holes, or bumps, fill them with spackle and sand them flat. If it's painted, give it a light sanding to rough up the surface—this helps the adhesive grip better. And whatever you do, check for moisture! Even though WPC is moisture-resistant, installing it over a damp wall is a recipe for mold and mildew. Use a moisture meter to test for humidity levels—aim for below 12%. If you're working in a bathroom or basement, consider adding a vapor barrier before installing the panels.
Here's a pro move you might not have heard of: let your WPC panels acclimate to the room for 48-72 hours before installation. WPC expands and contracts with temperature and humidity changes, and if you install it right out of the box, it might warp or buckle later. "I once had a client who insisted on installing panels the same day they arrived," Torres remembers. "Three months later, there were gaps between every panel. We had to redo the whole wall. Don't be that client." Store the panels flat (not stacked on their sides) in the room where they'll be installed, and keep them away from direct heat or AC vents.
| Tool | Purpose | Pro Tip |
|---|---|---|
| Cordless Circular Saw | Cutting panels to size | Use a fine-tooth blade (60-80 teeth) to avoid chipping the finish. |
| Laser Level | Ensuring panels are straight | Mark horizontal and vertical reference lines—this keeps panels aligned, even on uneven walls. |
| Construction Adhesive | Securing panels to the wall | Use a high-quality, moisture-resistant adhesive (pros prefer polyurethane-based options). |
| J-Channel Trim | Covering edges and seams | Install trim first to hide raw panel edges—this gives a polished, professional look. |
| Spacers | Creating expansion gaps | Use 1/4-inch spacers between panels and at the top/bottom to allow for movement. |

Now that your space is prepped and your tools are ready, it's time to start installing. We'll walk you through the process step by step, with insights from the pros to help you avoid common mistakes.
Pros never start installing without a reference line—it's your roadmap for straight panels. Use your laser level to draw a horizontal line around the room at the height where your first panel will go (usually 1/4 inch above the floor to allow for expansion). This line ensures that even if your floor isn't perfectly level, your panels will be.
Apply a bead of construction adhesive to the back of the first panel, focusing on the edges and corners (this is where most panels fail to stick). Press the panel firmly against the wall, aligning the bottom edge with your reference line. Use a rubber mallet to tap it into place—this ensures full contact with the adhesive. If you're using mechanical fasteners (like nails or screws), drill pilot holes first to avoid splitting the panel, and countersink the heads so they sit flush.
Here's a secret pros use to make walls look seamless: stagger the seams. Instead of starting each row with a full panel, cut the first panel of every other row to half-length. This creates a brick-like pattern that hides gaps and makes the wall stronger (think of how a brick wall is built—staggered joints prevent cracks). "Staggering also helps with expansion," explains Torres. "If all the seams line up, any movement in the panels will be more noticeable."
Cutting holes for outlets and switches is one of the trickiest parts of installation, but it's manageable with the right technique. First, mark the location of the outlet on the panel (use a pencil to trace around the cover plate). Then, drill a pilot hole in one corner of the marked area and use a jigsaw to cut out the opening. "Go slow around the edges," advises Gonzalez. "It's easier to trim a little extra than to fix a cut that's too big." Once the panel is installed, use a trim ring (available from your WPC wall panel supplier) to cover any gaps around the outlet.
The final step is adding trim and caulk to hide seams and edges. Install J-channel trim along the top and bottom of the wall, and use corner trim for outside corners. Then, run a bead of paintable silicone caulk along all seams and trim edges—this prevents dust and moisture from getting behind the panels. "Caulk is your best friend," says Johnson. "It makes the wall look seamless, and it's easy to touch up if it gets dirty."
Even with careful prep, mistakes happen. Here are the ones pros see most often—and how to steer clear:
WPC panels expand and contract with temperature changes, and if you nail or glue them tightly to the wall without room to move, they'll warp or buckle. Always leave a 1/4-inch gap at the top, bottom, and sides of the wall—this space is hidden by trim, so it won't be visible.
Not all adhesives are created equal. Using a cheap, water-based adhesive in a humid room like a bathroom will cause panels to peel. Pros recommend polyurethane-based adhesives, which are waterproof and create a stronger bond. "I've seen panels fall off walls because someone used basic craft glue," Torres says. "Don't cut corners here."
If your wall is bumpy or uneven, your panels will be too. Take the time to sand down high spots and fill low spots with spackle. "A little extra prep now saves hours of frustration later," says Al-Mansoori. "You can't hide a lumpy wall with panels—they'll just follow the contours."
One of the best things about WPC wall panels is how low-maintenance they are, but that doesn't mean they're completely hands-off. Here's how to keep them looking fresh:
For day-to-day cleaning, just wipe panels with a soft cloth and warm, soapy water (avoid harsh chemicals like bleach or ammonia, which can damage the finish). For tougher stains (think kid fingerprints or food splatters), use a non-abrasive sponge and a mild detergent. "I once had a client who used a scouring pad on their WPC panels to remove a grease stain," Gonzalez recalls. "It left permanent scratches. Stick to soft materials!"
Minor scratches can often be buffed out with a soft cloth and a little furniture polish. For deeper dents, try this trick: place a damp cloth over the dent and apply a hot iron (on low heat) for 10-15 seconds. The heat and moisture can cause the WPC to expand slightly, reducing the appearance of the dent. For really bad damage, contact your WPC wall panel supplier—many offer replacement panels for just this reason.
Avoid placing heavy furniture directly against WPC walls, as this can cause indentations. If you're hanging artwork or shelves, use picture hangers instead of drilling into the panels (most WPC is strong enough to hold lightweight items with just adhesive hooks). And keep an eye on the seams—if you notice gaps forming over time, a little touch-up caulk can fix the issue.
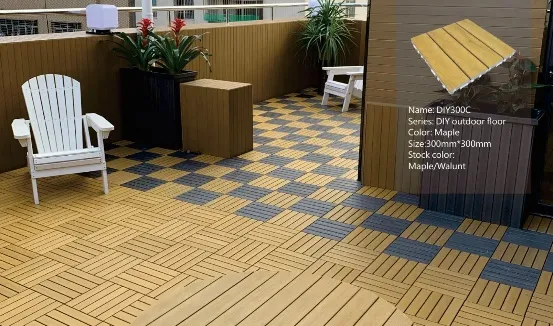
WPC wall panels don't exist in a vacuum—they're part of a larger design ecosystem. To create a cohesive look, consider coordinating them with other materials in your space. For example, many WPC wall panel suppliers also offer WPC flooring solutions, which means you can match your wall panels to your floors for a seamless, unified look. "We often recommend pairing WPC walls with WPC flooring in bathrooms and kitchens," says Johnson. "It creates a water-resistant barrier that's both practical and stylish."
If you're going with a different flooring type, like hardwood or tile, choose a WPC finish that complements (not clashes with) the floor. For example, a light oak WPC panel pairs beautifully with dark walnut flooring, creating contrast without overwhelming the space. And don't forget about trim! Many WPC wall panel suppliers offer matching trim pieces in the same finishes as their panels, so you can keep the look consistent from floor to ceiling.
And if you're working with a flooring supplier, be sure to mention your WPC wall plans. They might have insights on how to transition between the two materials (like using a T-molding or threshold) to create a polished, professional look.
Installing WPC wall panels is a project that can transform your space, but it all starts with choosing the right WPC wall panel supplier. Look for a partner who offers high-quality materials, technical support, and a range of WPC wall panel solutions to fit your needs. Then, take your time with prep work, follow the installation steps we've outlined, and don't be afraid to ask for help if you need it. With the right materials and a little pro know-how, you'll have a wall that looks amazing and lasts for years to come.
So, what are you waiting for? Whether you're a DIY enthusiast tackling a home reno or a contractor looking to up your installation game, WPC wall panels are a smart, stylish choice. And with this guide in hand, you're ready to make it happen. Happy installing!
Recommend Products











