

So, you've decided to upgrade your space—maybe a cozy living room refresh, a home office makeover, or even a full residential renovation. You've heard the buzz around WPC wall panels: durable, low-maintenance, and with that perfect blend of natural wood look and modern resilience. But here's the million-dollar question: how many panels do you actually need to buy? It's a common puzzle, whether you're a first-time homeowner or a seasoned contractor. Order too few, and you'll face delays and extra shipping costs. Order too many, and you're throwing money away on unused materials. As a trusted wpc wall panel supplier with years of experience supporting residential building materials supplier projects, we're breaking down the process step by step. No guesswork, no stress—just a clear, actionable guide to help you calculate material quantities like a pro.
Before diving into calculations, let's make sure we're all on the same page about what WPC wall panels are. WPC stands for Wood-Plastic Composite, a blend of wood fibers, plastic, and additives. The result? A material that's tough enough to handle moisture, scratches, and daily wear, but still warm and inviting like real wood. Unlike traditional drywall or solid wood panels, WPC panels resist warping, rotting, and fading—making them ideal for kitchens, bathrooms, basements, and high-traffic areas. Plus, they're eco-friendly, often made from recycled materials, and require minimal upkeep (goodbye, endless painting or staining!).
At our core, we're not just a wpc wall panel supplier —we're providers of wpc wall panel solutions tailored to your space. Whether you're aiming for a rustic cabin vibe, a sleek industrial look, or a minimalist modern feel, WPC panels come in a range of textures, colors, and sizes. From narrow planks to wide-format sheets, each option affects how you'll calculate the quantity needed. So, let's start by understanding your project's unique needs.
Calculating WPC wall panel quantities isn't rocket science, but it does require some prep work. Grab these tools before you start, and you'll save yourself hours of frustration later:
Once you've got your tools, it's time to measure the space. Let's walk through this step by step, using a typical residential living room as an example. Don't worry—we'll adapt for tricky areas like bathrooms, kitchens, or rooms with sloped ceilings later!
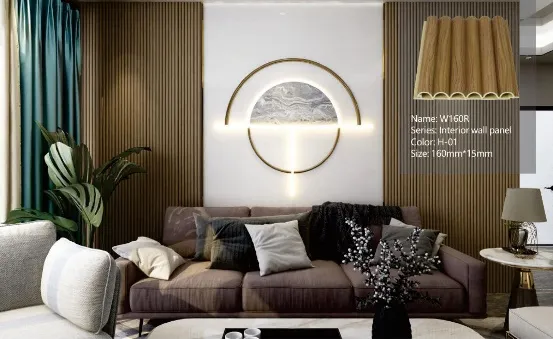
Start by measuring the total area of the wall(s) you plan to cover. For a single flat wall, this is straightforward: multiply the height by the width. Let's say your living room wall is 12 feet wide and 8 feet tall. Total area = 12ft x 8ft = 96 square feet (sq ft). Simple enough.
But walls rarely come without obstacles. Windows, doors, built-in shelves, or even fireplaces will take up space that doesn't need panels. You'll need to subtract these areas from the total to avoid overordering. Here's how:
Pro tip: If there are multiple obstacles (e.g., a door and a window), measure each one separately and subtract all their areas from the total. For irregularly shaped obstacles (like a curved niche), break them into simpler shapes (rectangles or triangles) and calculate each area individually. It might feel tedious, but accuracy here saves you money later!
| Wall/Obstacle | Width (ft) | Height (ft) | Area (sq ft) |
|---|---|---|---|
| Total Wall | 12 | 8 | 96 |
| Window | 4 | 5 | -20 |
| Door | 3 | 7 | -21 |
| Net Wall Area | — | 55 | |
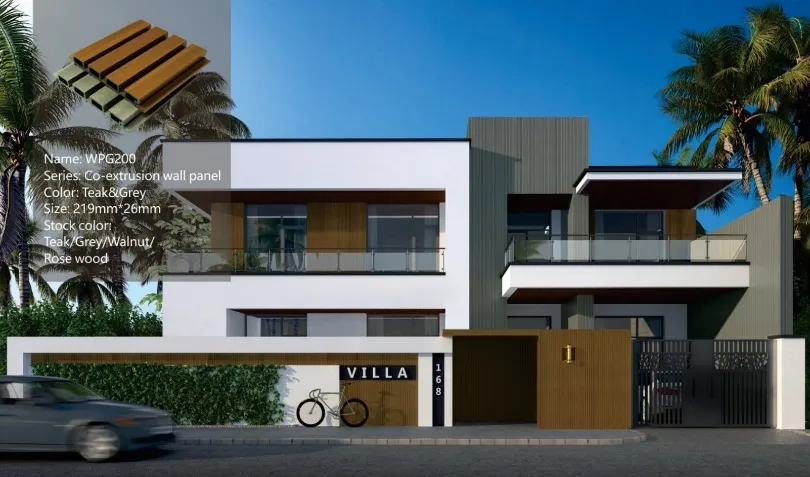
Now that you have your net wall area, the next step is figuring out how many WPC panels fit into that space. But first, you need to know the size of the panels you're buying. WPC panels come in various dimensions, and as a wpc wall panel supplier , we offer options to suit different projects. Common sizes include:
Let's stick with the narrow plank example (4ft x 0.5ft = 2 sq ft per panel) for our living room project. To find out how many panels you need, divide your net wall area by the area of one panel:
Number of panels = Net wall area ÷ Area per panel
Using our earlier example: 55 sq ft (net area) ÷ 2 sq ft (per panel) = 27.5 panels. Since you can't buy half a panel, you'd round up to 28 panels. But wait—we're not done yet! This is just the starting point.
Here's a secret no one tells you: even the most careful DIYer or contractor needs to account for waste. Panels get cut wrong, edges chip, or you might decide to adjust the layout mid-project. Skipping the waste factor is how you end up making emergency runs to the supplier (or worse, waiting weeks for a single panel to ship). So, how much waste should you add?
As a rule of thumb:
For our living room example (medium project), we'll add 15% waste. Let's calculate that:
Total panels with waste = Initial panels x (1 + waste percentage)
28 panels x 1.15 = 32.2 panels. Round up to 33 panels. That extra 5 panels might seem like overkill now, but trust us—you'll thank yourself when you accidentally cut a panel 2 inches too short.
Not all walls are perfect rectangles. Maybe your attic conversion has a sloped ceiling, or your home has a quirky angled wall leftover from a previous renovation. These areas require a bit more math, but they're totally manageable. Let's break down two common scenarios:
For a wall with a sloped ceiling (e.g., a bedroom in an attic), the wall area is a trapezoid (a rectangle with one slanted side). To calculate this, measure the height at the tallest point (A) and the shortest point (B), then find the average height. Multiply that by the wall width to get the area:
Area of sloped wall = Width x [(A + B) ÷ 2]
Example: A wall 10 feet wide, with a tallest height of 8 feet and shortest height of 4 feet. Average height = (8 + 4) ÷ 2 = 6 feet. Area = 10ft x 6ft = 60 sq ft. Then add waste as usual.
Curved walls are less common, but they're not impossible. Treat the curved section as a semicircle (or half-ellipse) and calculate its area separately. For a semicircle: Area = (πr²) ÷ 2, where r is the radius (half the width of the curve). Add this area to the rectangular part of the wall, then calculate panels and waste as usual.
Calculating quantities is important, but none of it matters if you're working with a supplier who cuts corners on quality or can't deliver on time. As a residential building materials supplier specializing in wpc wall panel solutions , we've seen too many projects derailed by subpar suppliers. Here's what to look for when choosing your supplier:
Ask for samples! A reputable supplier will send you free or low-cost samples so you can check the panel's thickness, texture, and durability. Look for panels with a consistent finish, no visible cracks, and a solid weight (flimsy panels are a red flag).
Your project might need more than just standard panels. Do they offer custom sizes? Fire-resistant options for kitchens? Moisture-proof panels for bathrooms? A good wpc wall panel supplier will have wpc wall panel solutions for every room, not just one-size-fits-all products.
Even with this guide, you might have questions. Does the supplier offer a project consultant or technical team to help with measurements? Will they review your calculations and suggest adjustments? We offer free quantity checks for all our clients—because we want your project to succeed as much as you do.
Nothing kills momentum like waiting 6 weeks for panels to arrive. Ask about lead times and shipping options. Local suppliers often have faster delivery, but national suppliers might offer better pricing—weigh the pros and cons based on your timeline.
Let's put all this into practice with a real example. Meet Sarah, a homeowner in Riyadh who wanted to upgrade her 3-bedroom villa's living room and master bedroom with WPC wall panels. She reached out to us as her wpc wall panel supplier , and here's how we walked her through the process:
Sarah's living room had two walls to panel: a main wall (15ft wide x 8ft tall) with a fireplace (4ft wide x 5ft tall) and a smaller accent wall (8ft wide x 8ft tall) with no obstacles. Her master bedroom had one wall (12ft wide x 8ft tall) with a large window (5ft wide x 4ft tall).
Sarah chose our wide planks (8ft tall x 1ft wide = 8 sq ft per panel). Initial panels needed: 240 sq ft ÷ 8 sq ft = 30 panels. Adding 15% waste (medium project with multiple walls): 30 x 1.15 = 34.5 → 35 panels.
We delivered 35 panels to Sarah's home within 5 days. During installation, she realized the fireplace required more custom cuts than expected, but the extra 5 panels covered the waste. The result? A sleek, modern space that exceeded her expectations—and she even had 2 panels left over for future touch-ups!
"I was so nervous about ordering the wrong amount," Sarah told us later. "But your team walked me through every step, and the extra panels saved the day when my installer made a mistake. I'll definitely use you again for my kitchen renovation!"
Even with careful planning, it's easy to slip up. Here are the top mistakes we see—and how to avoid them:
Still have questions? We've got answers. Here are the most common ones we get from clients:
A: Most residential panels are 8mm, 10mm, or 12mm thick. 8mm is great for low-traffic areas (e.g., bedrooms), while 12mm is better for high-traffic spaces (e.g., living rooms or hallways).
A: It depends on the supplier. Some offer returns within 30 days (as long as panels are unopened), while others have a no-return policy. Ask upfront—we offer a 20-day return window for unused panels!
A: For a circular wall, calculate the circumference (C = πd, where d is diameter) and multiply by height to get area. Then divide by panel area and add waste. It's trickier, but your supplier can help with the math!
A: Standard WPC panels are fire-retardant, but for high-risk areas (hospitals, schools, or commercial kitchens), look for Class A fireproof options. As a residential building materials supplier , we also offer specialized fire-rated panels for commercial projects.
Calculating WPC wall panel quantities might seem intimidating at first, but break it down into steps—measure, subtract obstacles, choose panels, add waste—and it becomes manageable. The key is to take your time with measurements, account for the unexpected, and partner with a supplier who has your back.
Whether you're a homeowner tackling a weekend DIY project or a contractor managing a full renovation, remember: accurate calculations save time, money, and stress. And when in doubt, reach out to your wpc wall panel supplier —we're here to turn your vision into reality, one panel at a time.
Ready to get started? Grab your tape measure, sketch out those walls, and let's make your space shine with WPC wall panels. You've got this—and we've got you.
Recommend Products











