
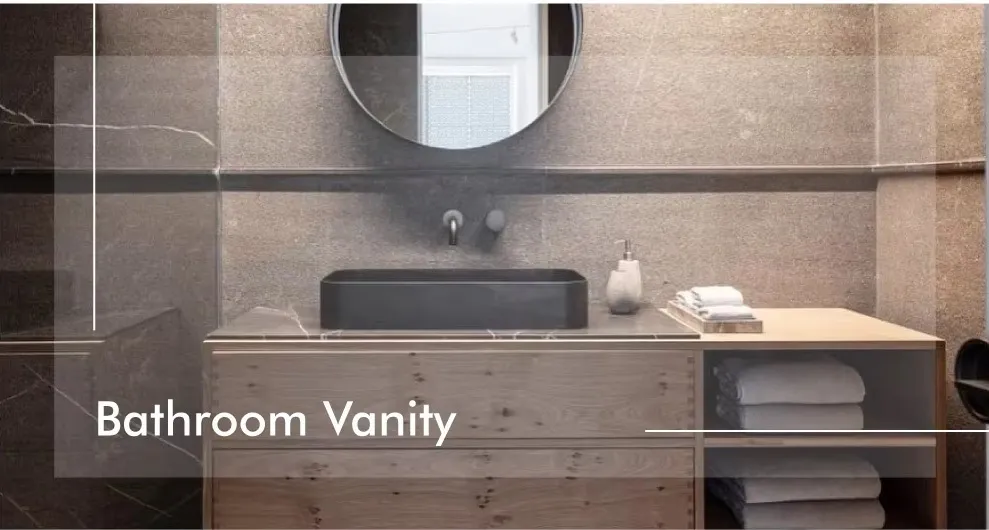
Transforming your bathroom with a wall-mounted vanity isn't just about saving floor space—it's about creating a personalized sanctuary where everyday routines become moments of calm. Whether you're working with solid walls or gypsum board partitions, this guide holds your hand through the process like a friend who's been there, helping you build something beautiful that'll make you smile every morning.
Picture yourself leaning against that cool, solid bathroom wall on a hot day—that reassuring sturdiness is exactly why we love solid walls. When you're mounting a vanity here, it feels like hanging a picture frame on a fortress wall. You'll need:
That smooth canvas of drywall hiding the skeleton of your home needs a gentle but confident approach. Unlike their solid cousins, these walls require special consideration for hidden studs:
Run your knuckles gently along the wall—where the sound changes from hollow to solid? That's your stud waving hello! Double-check with a stud finder if you need reassurance. Feeling that stud's position is like finding buried treasure behind the drywall.
In modern bathrooms, you might encounter integrated wall panel systems that combine waterproofing and structure. These systems require specific anchors designed for their unique layered construction.
Measure your space as if you're tailoring a custom suit:
Clear away tile or wall covering until you've uncovered the raw wall surface—think of it as preparing canvas for your masterpiece. Apply construction adhesive in serpentine patterns across the wall surface where the vanity will live, feeling the satisfying resistance as you squeeze the tube. Then, drill pilot holes through the vanity's mounting rail, letting your masonry bit bite into concrete like a determined beaver. insert anchors that spread outward when tightened, creating their own little fortress inside your wall. Finally, drive in concrete screws with steady pressure—that snug tightening feeling will tell you everything's locking into place.
If your studs don't align perfectly behind your vanity's mounting points? No panic—we throw a block party! Install horizontal 2x6 blocks between existing studs using 3" screws. Feel how that block sits perfectly snug? Now run construction adhesive along where the blocks meet the drywall—your invisible security blanket. Position the vanity and drive 3" wood screws through its mounting rail into the blocks. Hear that satisfying "zing" sound as each screw sets? That's the sound of secure friendship between your vanity and the wall.
Waterlines dancing their way to your sink are beautiful but demand precision:
Trace your plumbing layout on the vanity's back panel as if you're drawing treasure maps. Drill 1-3/4" holes for drains and 3/4" holes for supply lines using spade bits—imagine yourself as a surgeon making precise incisions. Add rubber grommets to each hole to prevent splintering and vibration wear. Position the vanity flush against the wall and pause—this is your moment to admire how all the pieces fit together before securing.
When walls hug your vanity so tight you can't reach plumbing connections? Welcome to the world of offset drain kits and flexible supply lines! These clever inventions curve around obstacles like gymnasts, turning tight spots into manageable spaces. And that satisfying "click" of a push-to-connect fitting? Pure plumbing bliss.
This is where you enlist your partner, friend, or a helpful neighbor. Lift together on the count of three—"Up... and... LIFT!" Slide temporary support under with one hand while reaching for the first screw with the other. Feel that weight settle onto the bracket? That's your vanity nestling into its forever home.
Place your level along the vanity front edge like a jeweler examining gems. See that bubble drift left? Tighten the right mounting screw a quarter turn. Watch it float back center? That tiny adjustment feels like solving a Rubik's cube one-handed. Shim gaps at the wall contact points with composite shims—they won't compress like wood over time.
Time to put the jewel in the crown—your sink and countertop:
Trace your sink outline on the counter's underside like an artist signing their work. Drill a starter hole inside the outline—feel the drill bite through with satisfying ease. Using a jigsaw with a fine-tooth blade, cut along your line with steady pressure. Notice how the blade follows your guidance like a dance partner? That smooth curve is craftsmanship happening.
Run a continuous silicone bead around the cutout—make it thick enough to form a tiny dome when untouched. Lower the sink slowly into position, squeezing out a perfect bead of excess silicone around the edge. Grab a popsicle stick or your finger wrapped in a damp rag and gently smooth the seam. This moment—seeing that perfect water seal appear under your fingers—feels like sealing an envelope holding precious dreams.
Discover your wall slopes away at the top? Don't despair—this is shimming's grand moment:
Stand back—what once was problematic now gives your vanity a custom-fit embrace.
When plumbing openings don't align perfectly:
Channel your inner sculptor: Use a rotary tool with a carbide bit to gently expand holes in small increments. Feel the bit carving space millimeter by millimeter—patience here prevents heartbreaking cracks. Then caulk the gaps with waterproof sealant once pipes are connected. What felt like a problem becomes invisible craftsmanship.
Apply caulk along the vanity's upper back edge where it meets the wall. Press the backsplash into place firmly, feeling the caulk squish out evenly on both sides. Smooth away excess with a wet fingertip—that perfect concave seal appears. Matching this material to your wall makes the vanity look like it grew there naturally.
Position wall sconces at eye level (about 60" from floor) flanking your mirror. That soft glow when you turn them on for the first time? Pure bathroom magic. Consider an anti-fog mirrored cabinet—watching clear reflection appear through steam feels like a tiny miracle.
Running your hand along your new vanity's edge, you'll remember the frustrations—the moments when measurements didn't align, when drill bits wandered, when your arms ached from holding things in position. But these pale against the simple satisfaction of knowing you built this. Every morning as you stand at this vanity, you'll remember how problems became solutions through patience and persistence. And somewhere, someone facing their own wall-hugging vanity project will stand where you once stood—and they'll find courage in knowing that if you could make this happen, so can they.
Recommend Products












