
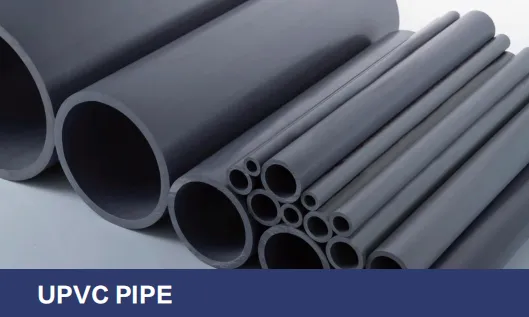
Walk into any home, office, or commercial building in Saudi Arabia, and you'll likely find UPVC pipes quietly doing the heavy lifting. They're in the walls carrying water to your taps, under the floors draining away waste, and even outside in irrigation systems keeping gardens green. What makes UPVC pipe solutions so ubiquitous? Their durability, resistance to corrosion, lightweight design, and affordability—traits that make them a top choice for both residential and commercial building materials suppliers. But here's the thing: installing UPVC pipes might seem like a straightforward task, but without the right tools, that "simple" project can quickly turn into a leaky, frustrating mess. Whether you're a seasoned contractor or a DIY enthusiast tackling a bathroom renovation, having the right tools isn't just about getting the job done—it's about getting it done right, the first time.
Let's start with a little reality check. I once visited a homeowner who'd attempted to install a UPVC drain line under his kitchen sink using nothing but a hacksaw, a roll of Teflon tape, and a prayer. The result? A slow leak that went undetected for months, rotting the cabinet base and costing him hundreds in repairs. When I asked why he didn't use proper tools, he shrugged and said, "How hard can it be? It's just a pipe." Spoiler: It's not the pipe that's hard—it's ensuring every cut is straight, every joint is sealed tight, and every connection can withstand years of water pressure. That's where the right tools come in. In this guide, we'll break down the essential tools you need for installing UPVC pipe solutions, why they matter, and how to use them like a pro. We'll even touch on how these tools differ when working with related solutions like PVC DWV pipe solutions or PPR pipe and fitting solutions, so you're prepared no matter the project.
If you've ever tried to hang a picture with a butter knife instead of a hammer, you know the feeling: frustration, wasted time, and a result that's less than perfect. Installing UPVC pipes is no different. The tools you use directly impact the quality, safety, and longevity of your plumbing system. Let's dive into three key reasons why skimping on tools is never a good idea.
UPVC pipes rely on tight, seamless connections to keep water (or waste) where it belongs. A crooked cut, for example, can leave gaps in the joint, even if you apply solvent cement perfectly. Over time, those gaps turn into leaks—and leaks turn into mold, water damage, and expensive repairs. A quality pipe cutter, designed specifically for plastic pipes, ensures clean, square cuts every time. Compare that to a dull hacksaw, which can leave jagged edges or angle the cut off by just a few degrees—enough to weaken the joint. I once inspected a commercial building where a contractor used a miter saw meant for wood to cut UPVC pipes. The saw's teeth were too aggressive, causing micro-cracks in the pipe walls that only became apparent six months later when the system failed a pressure test. The fix? Tearing out sections of drywall and redoing 20 feet of piping. All because of the wrong tool.
Installing pipes involves sharp edges, chemical solvents (like primer and cement), and sometimes heavy materials. Without proper safety tools, you're putting yourself at risk. A pair of cut-resistant gloves can prevent a slip of the pipe cutter from slicing your hand. Safety goggles shield your eyes from flying plastic shards when cutting or deburring. And a ventilation mask is non-negotiable when working with solvent cement, which releases fumes that can irritate your lungs. But safety isn't just about you—it's about the pipes, too. Over-tightening a clamp with a standard wrench can crack the pipe, while using a torque wrench (set to the manufacturer's specs) ensures a secure hold without damage. Even something as simple as a pipe clamp can prevent a joint from slipping while the cement dries, avoiding misalignment that could lead to leaks down the line.
UPVC pipes are designed to last 50 years or more—if installed correctly. The wrong tools can cut that lifespan in half. Take deburring, for example: when you cut a pipe, the inner and outer edges often get sharp, ragged burrs. If you leave those burrs, they can scrape against O-rings, gaskets, or valves, wearing them down over time and causing leaks. A simple pipe deburrer (a small tool with a blade that smooths edges) removes those burrs in seconds, ensuring a smooth flow and protecting components. Similarly, using a level during installation ensures pipes run straight, preventing stress on joints that can cause cracks over time. Professionals know this: that's why most commercial building materials suppliers recommend investing in quality tools as part of the project budget. It's not an extra expense—it's an investment in a system that won't need replacing in a decade.
Now that we've covered why tools matter, let's get into the specifics. Below is a detailed list of the tools you'll need, organized by category, along with when and how to use them. We'll focus on UPVC pipe solutions first, then note where tools differ for PVC DWV pipe solutions (drain, waste, vent systems) and PPR pipe and fitting solutions (hot and cold water systems).
Cutting is the first step in any pipe installation, and it's critical to get it right. A clean cut ensures the pipe fits snugly into fittings and prevents leaks. Here are the must-have cutting tools:
You can't cut or join pipes correctly if you don't measure them first. These tools ensure every mark is precise:
Never skip these—solvent fumes, sharp edges, and heavy pipes can cause serious injury:
For advanced projects, these tools can make a big difference:
Not all piping solutions are created equal—and neither are the tools needed to install them. While UPVC, PVC DWV, and PPR pipes might look similar, their uses and materials require slight adjustments in your toolkit. The table below breaks down the key differences:
| Tool Category | UPVC Pipe Solutions | PVC DWV Pipe Solutions | PPR Pipe and Fitting Solutions |
|---|---|---|---|
| Cutting Tools | Ratchet pipe cutters, wheel cutters, hacksaws | Same as UPVC (PVC DWV has thicker walls; use sharp blades) | Same cutting tools, but ensure blades are clean (no solvent residue) |
| Joining Tools | Solvent cement applicators, primer brushes, clamps | Solvent cement (different formula—check for DWV-specific cement) | Heat fusion machine, fusion clamps, temperature gauge |
| Measuring Tools | Tape measure, level, deburrer, marker | Same as UPVC (DWV requires slope measurements for drainage) | Same, plus fusion depth gauge (to ensure proper heating) |
| Safety Tools | Gloves, goggles, ventilation mask (for solvent fumes) | Same as UPVC (more ventilation for large DWV projects) | Gloves, goggles, heat-resistant gloves (for fusion machine) |
| Specialty Tools | Pipe benders, pressure testers | Soil pipe cutters (for cast-iron to PVC DWV transitions) | Pressure testers, fusion iron cleaners (to remove plastic residue) |
Key Takeaway: UPVC and PVC DWV share most tools, but always use DWV-specific solvent cement for drain lines—it's designed to handle higher temperatures and chemical exposure from waste. PPR pipe and fitting solutions require heat fusion tools instead of solvent, so if you're switching between systems, invest in a fusion machine for PPR projects. Either way, a good set of cutting and measuring tools will serve you across all three.
Now that you have your tools, let's walk through installing a simple UPVC pipe section. We'll focus on a residential water line, but the process is similar for most UPVC applications. Remember: Practice makes perfect, so start with a small project (like a garden hose line) before tackling indoor plumbing.
Start by mapping out your pipe route. Use a tape measure to determine the length of pipe needed, adding ½ inch for each fitting (this is called the "socket depth"). Mark the pipe with a marker—double-check the measurement to avoid cutting too short. For horizontal runs, use a level to ensure a slight slope (¼ inch per foot) if needed for drainage; for supply lines, keep it straight.
Secure the pipe in a vice or with a clamp to prevent movement. If using a ratchet cutter: Open the cutter, place it around the pipe at your mark, and squeeze the handles until the blade cuts through. For a hacksaw: Hold the pipe steady and saw slowly, following the mark. After cutting, use a deburrer to remove burrs from the inside and outside edges—run your finger along the edge to ensure it's smooth.
Clean the pipe end and fitting with a dry cloth to remove dirt or moisture. Apply primer to the outside of the pipe (up to the socket depth) and the inside of the fitting using a primer brush. Let the primer sit for 10-15 seconds until it softens the plastic slightly. Then, apply a thin, even coat of solvent cement to both surfaces—don't glop it on, as excess can weaken the joint.
Push the pipe into the fitting with a twisting motion until it bottoms out. Hold it firmly for 30 seconds to prevent it from slipping—this is where pipe clamps come in handy if you're working alone. Wipe away excess cement with a rag—don't let it dry on the pipe, as it can leave stains.
Let the cement cure for at least 24 hours (check the manufacturer's instructions for cure time). Once cured, turn on the water and check for leaks. If you spot a drip, tighten the fitting slightly or reapply cement (after draining the system first). For larger projects, use a pressure tester to simulate high water pressure and ensure the joints hold.
The steps are similar, but instead of primer and cement, you'll use a heat fusion machine: 1) Cut and deburr the pipe. 2) Set the fusion machine to the recommended temperature (usually 260°C for PPR). 3) Place the pipe and fitting on the heated plates for the specified time (10-30 seconds, depending on diameter). 4) Remove the plates, align the pipe and fitting, and push them together firmly. 5) Hold for 10-15 seconds to cool and fuse. Let the joint cure for 30 minutes before testing.
Even with the best tools, things can go wrong. Here are the most common installation headaches and how to solve them using the tools you have:
Cause : Uneven cuts, insufficient cement, or dirty surfaces. Solution : Use a pipe cutter for straight cuts, clean pipes with a rag before priming, and apply cement evenly with an applicator. If a leak occurs, drain the system, cut out the joint, and redo it with fresh cement.
Cause : Not using a level during installation. Solution : A 4-foot level is your best friend—check alignment every few feet. For vertical runs, use a plumb bob or laser level to ensure straightness.
Cause : Over-tightening clamps or using a dull cutter that crushed the pipe. Solution : Use adjustable clamps with rubber pads and tighten until just snug. For cutting, replace dull blades or use a ratchet cutter instead of a hacksaw for less pressure.
Cause : Burrs left inside the pipe. Solution : Always deburr after cutting! A pipe deburrer takes seconds to use and prevents plastic shavings from clogging valves or reducing water flow.
Cause : Incorrect temperature or fusion time. Solution : Use a fusion machine with a built-in temperature gauge and timer. If the joint is week, cut it out and refuse—don't try to patch it.
At the end of the day, installing UPVC pipe solutions (or any piping system) is a mix of skill and the right equipment. You wouldn't build a house with a single hammer, and you shouldn't install pipes with just a hacksaw and a prayer. The tools we've covered here—from ratchet cutters to heat fusion machines—are more than just gadgets; they're insurance against leaks, water damage, and costly repairs. As a building materials supplier, we've seen firsthand the difference between a job done with care (and the right tools) and one rushed with whatever's on hand. The former lasts decades; the latter becomes a punchlist item six months later.
So, whether you're a DIYer upgrading your home's plumbing or a contractor working on a commercial project, take the time to assemble your toolkit. Start with the essentials: a good pipe cutter, primer and cement applicators, a level, and safety gear. As you tackle more projects, add specialty tools like pressure testers or fusion machines. Remember, quality tools don't just make the job easier—they make it right. And when it comes to your home or building, "right" is worth every penny.
Finally, don't hesitate to reach out to your UPVC pipe supplier or commercial building materials supplier for tool recommendations. Many suppliers offer tool rental or can point you to trusted brands that stand behind their products. After all, your success is their success—and a well-installed pipe system is a testament to both your skill and the tools you used to get there.
Recommend Products


