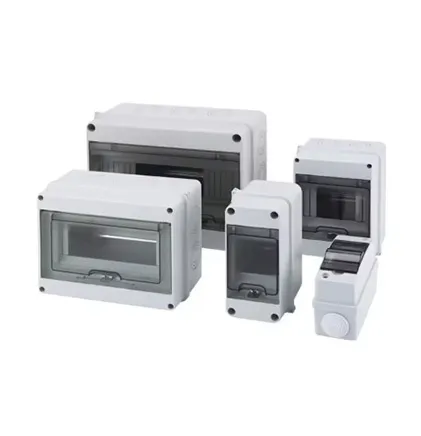
Practical Guidance for Safe and Efficient Electrical Distribution
Let's talk distribution boxes – those unsung heroes of our electrical systems. If you're an electrician, a DIY enthusiast, or just someone who wants to understand the heartbeat of your building's electrical infrastructure, you know how crucial these metal boxes are. But here's the thing many people overlook: the incoming lines feeding the distribution box are just as important as the box itself. Get this part wrong, and you're setting yourself up for all kinds of troubles down the line.
Think of the incoming line as the main artery bringing lifeblood to the entire system. Just like you wouldn't want a weak or clogged artery in your body, you don't want subpar incoming lines feeding your distribution box. We'll walk through everything you need to consider, from choosing the right wiring approach to avoiding those costly installation mistakes that so many people make.
Why Incoming Line Decisions Matter
Before we dive into technical details, let's establish why this matters so much. That cable running from your main service entrance to your distribution box isn't just another wire – it's the critical link that determines how safely and efficiently power flows through your entire building. Make poor choices here, and you're potentially looking at:
-
Persistent voltage drops that cause equipment malfunctions
-
Overheating issues that create fire hazards
-
Nuisance tripping that drives everyone crazy
-
Expensive retrofits when you need to upgrade capacity
-
Complete system failures during peak demand periods
Electrical systems are like a chain – only as strong as their weakest link. And trust me, if that weak link is the incoming supply to your distribution box, everything downstream suffers. I've seen too many cases where beautiful new distribution boxes become useless because they were fed by inadequate
cables installed with shortcuts. Don't be that person.
The Fundamentals of Incoming Line Wiring
So what's actually happening inside those
cables? Electrical power enters a distribution box through the incoming lines using what we call a
five-wire system
. Each of these wires has a specific, non-negotiable purpose:
The Phase Lines
: You've got three of these bad boys – A, B, and C phases. By convention, we use yellow for A phase, green for B phase, and red for C phase. These carry the main electrical current from the source to your distribution system. Together, they form the three-phase power system that handles heavy loads efficiently.
The Neutral Line
: This is the electrical "return path," usually in cool blue. Ever heard of unbalanced loads? This is the wire that handles those gracefully, keeping your system stable when different circuits are drawing unequal power.
The Ground Wire
: The safety superhero with distinctive yellow-green stripes. During normal operation, it just hangs out doing nothing. But when something goes wrong – say a live wire touches metal – this hero springs into action, creating a safe path to earth and preventing you from becoming part of the circuit.
Professional Tip
: Those color codes aren't just suggestions – they're standardized for safety. Mix them up, and you're creating a nightmare for anyone who works on the system later. I once saw a technician spend two days troubleshooting what turned out to be switched phase wires. Don't be the reason someone has that awful day.
Navigating Distribution Box Types Like a Pro
Not all distribution boxes are created equal, and the type you choose fundamentally impacts your incoming line approach. Each category has its own personality and preferred connection methods. Let's break them down:
Fixed Panel Switchgear: The Old Faithful
If you're working on older industrial facilities or locations where reliability trumps fancy features, you'll run into these classics. They're like the pickup trucks of distribution gear – rugged and straightforward. But here's the deal: their open-back design means your entire incoming line setup needs careful guarding. In a busy factory setting? You'll need proper barriers to keep workers from accidentally touching live parts.
Protected/Enclosed Switchgear: The Practical Choice
For most commercial and industrial applications, these steel-enclosed boxes strike the right balance between safety and accessibility. What you should know about their incoming lines: they usually feature comprehensive busbar compartments and clearly separated terminals. Working with these? Pay extra attention to torque specs on those main lugs – unlike the open boxes, mistakes here might not show up until it's too late.
These are especially important where safety standards demand fire-rated separation between line voltage and control circuits. That thermal barrier between compartments isn't just regulatory compliance – it's what keeps your system running when neighboring equipment overheats.
Drawer-Type Switchgear: Precision Systems
Found in hospitals, data centers, or any mission-critical operation? These sophisticated systems separate function like a well-organized toolbox. When you're feeding these, remember each functional unit maintains isolation not just from others, but from the busbars too. Your incoming line installation needs to respect that three-zone architecture: main bus,
cables, and functional units.
Power/Lighting Control Boxes: Everyday Heroes
These are the boxes you'll see mounted on walls in schools, office buildings, and apartments. What they lack in flashiness they make up in versatility. Since they're often installed right where people work, your incoming line installation absolutely must maintain separation between different circuits. Mix power and lighting feeds? Kiss your clean voltage curves goodbye.
Mastering Installation Techniques
How you physically install that cable matters just as much as what cable you choose. I've seen more electrical failures from bad installation practices than from equipment defects. Let's fix that:
The Art of Wall Mounting
Mounting a box to a wall seems simple, right? Until that box full of copper starts sagging because someone used undersized anchors. Here's your winning formula:
-
Anchor Selection
: Expansion bolts beat plastic plugs every time for heavy boxes. Your rule of thumb? Bolt length should equal embed depth (min 75mm) plus box thickness plus hardware stack.
-
Leveling Matters
: A visibly crooked box isn't just ugly – it strains conductors. Use your level like it's sacred and keep vertical deviation under 3mm. Yes, I know contractors who got fired over 4mm offsets.
-
Surface Prep
: Concrete walls need proper sealing around boxes. That gap you thought was small? It'll suck moisture like a sponge. I once cut out a box corroded from the inside out due to capillary action through microscopic gaps.
Concealed Installation Nuances
Recessed installations look cleaner but come with their own headaches. That opening in your block wall needs to be 20mm larger than the box dimensions all around. Why? Enough space for proper anchoring compound and final plastering that seals properly.
And please – seal between box and wall with fire-rated compound. That cheap silicone won't cut it during actual fire separation tests. I've seen installations fail inspection because sealant shrunk away creating gaps.
Safety First in Terminations
How you land those heavy
cables determines the system's safety and longevity:
Fuse Termination Wisdom
: Connect power to the center contact terminal in spiral fuses – it prevents accidental shocks during maintenance when someone inevitably swaps fuses while energized because "it'll just take a minute."
Busbar Discipline
: That N and PE busbar in lighting boxes? Actually use them. Twisting wires together behind the panel is a fire waiting to happen. I traced an industrial fire to twisted neutrals that corroded and overheated.
Strain Relief
: Large cable needs proper clamps within 12" of termination. That copper is heavy – without support, vibration and thermal cycling will eventually loosen terminals. I promise that ground lug you didn't clamp tight will haunt you someday.
Essential Configuration Rules
Good distribution doesn't happen by accident – it follows specific logical rules. Violate these at your peril:
Separation of Power and Lighting
Combining lighting and power circuits in one box might seem efficient until your fluorescent lights dim every time a saw starts. Physics doesn't care about convenience. Either use separate boxes or maintain true segregation within combined units with properly sized barriers.
Location Optimization
That main distribution box needs to live close to where power enters – usually within 5 meters for most installations. Each sub-distribution box should serve equipment within 30 meters. Want to know why? Voltage drop calculations become nightmares beyond that distance for general circuits.
Above all, keep boxes away from moisture sources and allow proper ventilation clearance. That 0.8-1.2m clearance zone in front isn't just code – it's survival space for technicians working on live gear.
Component Installation Philosophy
Mounting components directly to metal boxes creates potential paths for faults. Instead:
-
Use non-conductive mounting plates where possible
-
Bond metal plates directly and permanently to the box
-
Verify continuity of grounding paths with low-resistance ohmmeter
-
Apply dielectric grease on busbar connections after torque verification
Sizing Wisdom – Getting It Right
Underestimating your box size is a recipe for disaster. Too small means dangerous overcrowding that leads to overheating. Here's how to calculate properly:
For Smaller Loads
(< 10mm²
cables):
Box width = total switch width + 40mm (20mm each side)
Box height = switch height + 40mm
Box depth = switch depth + 10mm
For Multi-Row Installations
(More than 20 breakers):
Add vertical spacing rows at least 150% of switch height for proper heat dissipation and wire routing. Those tiny gaps look fine until thermal imaging shows hot spots at 140°F.
Power Distribution Boxes
:
When you exceed 80mm²
cables, you enter cabinet territory. Why? The bend radius alone for thick
power cables requires space. Skimp here, and you'll damage cable insulation during installation, which might not show immediately but fails spectacularly later.
Maintenance Mindset
Your job isn't done when the wires stop moving. Good systems need ongoing care:
Lockout Discipline
: That power-off lock? Actually use it during maintenance. I've seen "just a quick tap" turn into arc flash incidents too many times.
Thermal Monitoring
: Twice yearly infrared scans catch hot spots before they become fires. That slightly warm terminal today becomes melted plastic tomorrow.
Load Reviews
: Equipment gets added. What was properly sized when installed might be overloaded now. Annual load checks prevent creeping capacity issues.
Label Updates
: Handwritten labels fade. Permanent engraved labels last. That ten minutes spent properly labeling today saves hours of headache later.
Conclusion
Getting distribution box incoming lines right comes down to respecting both science and art. The science gives us rules for safety and performance – proper sizing, separation, grounding, and materials. The art shows in the careful workmanship – clean terminations, precise torque, smart layout that breathes.
You wouldn't build a house on weak foundations. So why risk an electrical system with subpar incoming lines? Do it right the first time – choose robust materials like fire-rated conduit where needed, calculate generously, install meticulously, and maintain diligently. That box doesn't just distribute power – it protects everything downstream.
Final Tip
: Always work with a partner when dealing with live distribution gear. Safety isn't just gear – it's habits. That second pair of eyes sees what fatigue blinds you to.