
Building a home is more than just choosing paint colors or picking out flooring—it's about creating a space that works seamlessly, where every hidden system supports the daily rhythms of life. Among these unsung heroes, residential plumbing stands tall, and at its core lies the Drain-Waste-Vent (DWV) system. Often overlooked, this network of pipes is the backbone of a healthy home, responsible for carrying away wastewater, preventing harmful gases from entering living spaces, and ensuring proper drainage. Today, we're diving deep into one of the most reliable solutions for modern DWV systems: PVC DWV pipes. From understanding their role in home construction to choosing the right supplier and exploring the latest solutions, let's unpack why PVC DWV pipes have become the go-to choice for homeowners and builders alike.
Before we get into the specifics of PVC DWV pipes, let's clarify what a DWV system actually does. DWV stands for Drain-Waste-Vent, and as the name suggests, it has three critical jobs: Drain (carry wastewater from sinks, showers, toilets, and appliances to the sewer or septic system), Waste (remove solid and liquid waste efficiently), and Vent (allow air to enter the system, preventing suction that could trap water in drains and letting harmful gases escape safely through the roof). Without a properly functioning DWV system, you'd be dealing with slow drains, foul odors, and even backed-up sewage—scenarios no homeowner wants to face.
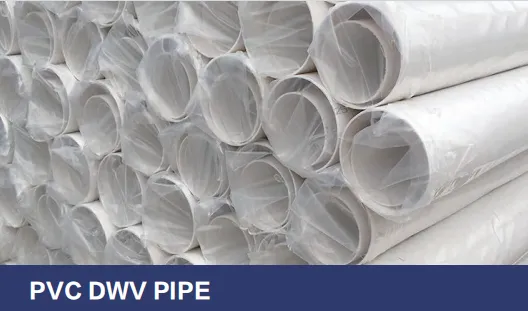
In older homes, DWV systems were often made from heavy materials like cast iron or copper. While durable, these materials came with downsides: cast iron was prone to rust, copper was expensive, and both were tricky to install due to their weight. Enter PVC—polyvinyl chloride—a synthetic plastic polymer that revolutionized plumbing when it was introduced in the mid-20th century. Lightweight, affordable, and resistant to corrosion, PVC quickly became the material of choice for DWV systems, and today, PVC DWV pipes dominate residential construction. Let's explore why.
PVC DWV pipes have earned their reputation for good reason. Let's break down their key benefits, which make them ideal for homes of all sizes and styles:
To truly appreciate why PVC DWV pipes stand out, let's compare them to other common DWV materials. The table below highlights key factors like cost, durability, installation ease, and more:
| Material | Cost (per foot) | Durability (Lifespan) | Installation Ease | Corrosion Resistance | Noise Level | Best For |
|---|---|---|---|---|---|---|
| PVC DWV | $0.50–$3.00 | 50+ years | High (lightweight, solvent-welded) | Excellent (resists rust, chemicals) | Low | Most residential homes, new construction, renovations |
| Cast Iron | $10–$20 | 80+ years | Low (heavy, requires special tools) | Poor (prone to rust and corrosion) | High (loud water flow, clanging) | Historic homes (for aesthetic preservation) |
| Copper | $5–$15 | 70+ years | Medium (requires soldering, skilled labor) | Good (resists corrosion, but vulnerable to acidic water) | Medium (metallic sound) | Luxury homes, areas with strict building codes |
| ABS (Acrylonitrile Butadiene Styrene) | $1.00–$4.00 | 40–50 years | High (similar to PVC, cemented joints) | Good (resists chemicals, but prone to UV damage) | Low | Cold climates (more impact-resistant than PVC) |
As the table shows, PVC DWV pipes strike the perfect balance between cost, durability, and practicality for most residential settings. While cast iron and copper may last longer, their high cost and installation challenges make them impractical for the average homeowner. ABS is a close competitor, but PVC's superior resistance to UV rays (making it suitable for both indoor and outdoor use) and wider availability give it the edge.
Now that you're sold on PVC DWV pipes, the next step is finding a reliable supplier. A pvc dwv pipe supplier isn't just someone who sells pipes—they're a partner in your home construction journey, providing quality products and expertise to ensure your DWV system works flawlessly for decades. Here's what to consider when selecting a supplier:
Not all PVC DWV pipes are created equal. Look for suppliers who offer pipes that meet industry standards, such as ASTM D2665 (the standard specification for PVC DWV pipe and fittings). These certifications ensure the pipes have been tested for strength, durability, and safety. A reputable supplier will gladly share certification documents and test reports—don't hesitate to ask for them.
A good pvc dwv pipe supplier should offer more than just pipes. They should stock a full range of fittings (tees, elbows, couplings, P-traps, vent caps) and accessories (solvent cement, primer, cutting tools) to complete your DWV system. This one-stop shopping saves you time and ensures all components are compatible—a critical factor in preventing leaks.
Every home is unique, and your DWV system may have specific requirements based on the number of fixtures, layout, or local building codes. The best suppliers offer pvc dwv pipe solutions tailored to your project. This could include custom pipe lengths, specialized fittings for tight spaces, or technical guidance on system design. Look for suppliers with knowledgeable staff who can answer questions about slope calculations, venting requirements, or code compliance.
Construction timelines wait for no one, so you need a supplier who can deliver products when you need them. Check reviews or ask for references to ensure the supplier has a track record of on-time deliveries and consistent stock. Avoid suppliers with frequent backorders—delays in plumbing can hold up the entire construction process.
Even after the sale, a great supplier stands by their products. Look for warranties on pipes and fittings, and inquire about post-purchase support. Will they help troubleshoot if you encounter issues during installation? Do they offer training for contractors or DIYers? A supplier that prioritizes customer support is invested in your success.
While pipes are the stars of the DWV system, fittings are the unsung heroes that hold everything together. Fittings connect pipes at angles, join multiple drains, and create the bends needed to navigate around structural elements. Without high-quality fittings, even the best pipes can fail—leading to leaks, clogs, and costly repairs. That's where a trusted pipes fittings supplier comes in. These suppliers offer a wide range of fittings designed specifically for PVC DWV systems, ensuring a tight, leak-free seal.
Common PVC DWV fittings include:
A top pipes fittings supplier will offer fittings in the same diameter as their pipes (e.g., 1.5-inch, 2-inch, 3-inch) and ensure they're made from the same high-quality PVC. Many also provide pipes fittings solutions like pre-packaged kits for common projects (e.g., a bathroom renovation kit with all necessary fittings) or color-coded systems to simplify installation. By choosing fittings from the same supplier as your pipes, you reduce the risk of compatibility issues and ensure a cohesive, reliable system.
Installing a PVC DWV system is manageable with the right tools, preparation, and know-how. Here's a step-by-step guide to help you (or your contractor) get the job done right:
Start by mapping out the DWV system based on your home's floor plan. Identify the location of each fixture (toilet, sink, shower, washing machine), the path of the main drain line, and the vent stack (which should extend through the roof). Check local building codes for requirements like minimum pipe size (e.g., toilets typically require 3-inch pipes), vent distances (how far a fixture can be from a vent), and slope (most horizontal drains need a slope of 1/4 inch per foot to ensure proper flow).
You'll need PVC DWV pipes, fittings, solvent cement (PVC glue), primer (to clean and prepare pipes for bonding), a hacksaw or PVC cutter, a deburring tool (to smooth rough edges after cutting), measuring tape, level, and pipe hangers/clamps (to secure pipes to walls or joists). If you're working with large pipes, a miter saw can speed up cutting, but a hacksaw works for smaller jobs.
Measure and mark the pipes to the desired length, then cut them straight using a saw or cutter. Use the deburring tool to remove any burrs from the inside and outside of the cut—this ensures a tight fit with fittings and prevents clogs from rough edges. Dry-fit all pipes and fittings first to ensure they align correctly; make adjustments before applying cement.
PVC DWV pipes are joined using solvent cement, which chemically melts the plastic, creating a permanent bond. First, apply primer to the outside of the pipe and the inside of the fitting—this cleans the surface and softens the PVC. Wait 10–15 seconds, then apply a thick, even coat of cement to both surfaces. Push the pipe into the fitting firmly, twisting it a quarter-turn to spread the cement, and hold it for 30 seconds to set. Wipe away excess cement with a rag. Let the joint cure for at least 24 hours before testing the system (follow the cement manufacturer's instructions for cure times).
Once the cement is dry, secure the pipes to walls, floors, or joists using hangers or clamps. This prevents sagging (which can slow drainage) and protects pipes from damage. After installation, test the system by filling sinks and tubs and letting the water drain—check for leaks around joints. You can also perform a smoke test (with a smoke machine) to ensure vents are working properly (smoke should exit through the roof vent, not into the home).
Pro tip: If you're unsure about any step, don't hesitate to consult a licensed plumber. While PVC DWV installation is DIY-friendly, mistakes (like incorrect slope or poor joint bonding) can lead to major issues down the line. It's better to invest in professional help upfront than to pay for repairs later.
PVC DWV pipes are low-maintenance, but a little care goes a long way in extending their lifespan. Here are some tips to keep your system in top shape:
Even with proper installation and maintenance, DWV systems can run into problems. Here are some common issues and solutions:
Cause: Partial clog, improper slope, or a clogged vent. Solution: Use a plunger or drain snake to clear the clog. If multiple fixtures are slow, check the vent stack. For slope issues, adjust pipe supports to ensure a 1/4 inch per foot slope.
Cause: Dry P-trap (water in the trap evaporates, allowing sewer gases in), clogged vent, or a cracked pipe. Solution: Run water in rarely used sinks/showers to refill P-traps. Clear the vent stack if needed. If odors persist, inspect pipes for cracks (replace damaged sections).
Cause: Improper cement application, damaged fittings, or pipe movement. Solution: If the leak is small, dry the area and reapply solvent cement. For larger leaks or damaged fittings, turn off the water, cut out the faulty section, and replace it with new pipe and fittings.
Cause: Tree roots growing into outdoor pipes through cracks or loose joints. Solution: Use a root killer chemical (follow label instructions) to kill roots. For severe cases, hire a professional to hydro-jet the pipes (high-pressure water) or replace damaged sections.
As technology advances, so do PVC DWV solutions. Here are some trends shaping the future of residential plumbing:
When it comes to residential plumbing, the DWV system is too important to overlook. PVC DWV pipes offer the perfect blend of durability, affordability, and ease of installation, making them the ideal choice for modern homes. By partnering with a reputable pvc dwv pipe supplier and investing in quality pvc dwv pipe solutions —along with reliable pipes fittings from a trusted pipes fittings supplier —you can ensure your home's plumbing system works quietly and efficiently for decades. Whether you're building a new home, renovating an older one, or simply upgrading your plumbing, PVC DWV pipes deliver the performance and peace of mind every homeowner deserves. After all, a happy home starts with a healthy, well-functioning foundation—and that includes the pipes you can't see.
Recommend Products


