


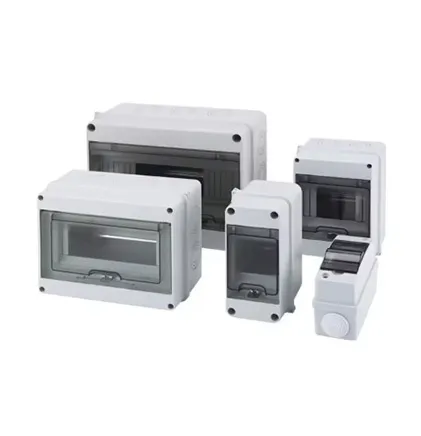
A Practical Guide to Streamlining Your Electrical Setup
Hey there, fellow installers and DIY enthusiasts! If you're diving into the world of modular distribution boxes, you've made a smart choice. These versatile units are like the Swiss Army knives of electrical systems – compact, adaptable, and incredibly efficient. But let's be honest, even the best tools can turn into headaches if we don't install them right. That sinking feeling when wires won't cooperate or brackets refuse to align? We've all been there.
Today, I want to walk you through a stress-free installation journey. I'll share not just textbook instructions, but the kind of practical wisdom that only comes from hands-on experience. We'll cover everything from prep work that actually matters to those clever little hacks that save hours of frustration. By the end, you'll feel like you've got a seasoned pro leaning over your shoulder!
Pre-Installation Essentials
Before you even glance at that shiny new modular enclosure, take a moment. Rushing into installation is like baking without preheating the oven – things just won't turn out right.
Get intimate with your environment:
- Is this going into a humid basement? A dusty workshop? An outdoor spot exposed to rain? These conditions dramatically impact your enclosure choice. That waterproof modular enclosure isn't just a suggestion if moisture's involved – it's your lifeline
- Measure clearance zones like your job depends on it (because it does). Account for door swings, maintenance access, and that bulky HVAC duct nobody noticed until the box was mounted
Tools you'll actually need:
- A laser level – sounds fancy, but it eliminates "eyeballing" disasters
- Non-metallic fish tapes (your fingers will thank you later)
- Torque screwdriver with preset clutch – over-tightening terminal blocks is heartbreakingly common
Golden Rule: Test-fit everything before final mounting! Those pre-drilled holes in the mounting plates don't always align with your wall studs. Dry-run the whole assembly – you'll spot interference issues that diagrams never reveal.
Your Step-by-Step Installation Roadmap
Mounting Mastery
How you anchor your distribution box determines its entire lifespan. Ever seen one of those leaning enclosures with doors that won't close? Let's avoid becoming that meme.
The Weight Trap: Modular systems add up fast. That empty box feels light until you load it with breakers and cables. Double your estimated weight capacity – future expansions always happen. For concrete walls, use sleeve anchors instead of plastic plugs. For drywall, toggle bolts are amateur hour; install plywood backers between studs.
Alignment Secrets:
- Start from the center unit when stacking modules – peripheral units can drift
- Use shim sets for uneven surfaces (almost all surfaces are secretly uneven)
- Check plumb with a level every 5 minutes as you work. Gravity never takes coffee breaks
⚠️ Critical Safety Note: Assume every wire is live until proven dead. No exceptions. I keep a non-contact voltage tester in my pocket like a talisman – it's saved me from jolts more times than I care to admit.
Rail & Component Installation
DIN rails are the backbone of your modular system. But they're surprisingly temperamental if mishandled.
The Snap-Together Dance: Most modular boxes come with clip-together rails. Apply pressure near clip points, not rail centers. You'll feel a satisfying click when they seat properly. If it takes Batman-level force, something's misaligned.
Load Distribution Matters: Heavy components? Place them at the rail ends rather than centers. Those little rail supports aren't decoration – use them every 10-12 inches. I once witnessed a transformer slowly bend a rail over six months like metal taffy. Not pretty.
Breaker Installation Tricks:
- Number breakers clockwise from top left before installing. Sounds OCD until you're troubleshooting at 2 AM
- Leave breathing room between hot components – heat sinks need airflow
- Color-code terminal connectors with heat-shrink tubes. Future-you will send past-you gratitude
Wire Management Wizardry
Messy wires aren't just ugly – they're thermal hazards and troubleshooting nightmares. This is where pros separate from amateurs.
Stranded vs. Solid Drama: For modular boxes, stranded wire is more flexible but needs proper ferrules. Use insulated fork connectors for terminal blocks. And please – never twist stranded wires together under screws. I've seen entire blocks melted from this shortcut.
Zonal Philosophy: Divide your enclosure into zones:
- Power input zone (top-right is intuitive for most right-handers)
- Control wiring zone (group sensors and low-voltage together)
- Grounding zone – isolate this visibly. Green wires deserve their own neighborhood
Bundling Techniques: Velcro beats zip ties for modular systems. Why? When you inevitably add a wire, slicing zip ties risks nicking insulation. Reusable Velcro lets you adjust without hazard. Loop bundles with a finger-width gap between wires – tight bundles trap heat.
Human Touch: Label both ends of every wire clearly. Use industrial-grade labels or printed sleeves. Ballpoint pen on masking tape turns to mush after a few humid months – trust me, I've wept over such ghosts.
Beyond Installation: Ensuring Longevity
Your work isn't done when the last screw is tightened. Modular systems thrive on foresight.
Stress-Testing Like a Pro
Power-on isn't a fireworks moment. Do it methodically:
- Energize circuits sequentially using a checklist
- Check for warmth in wires/connectors after 15 minutes of operation
- Smell test – any whiff of ozone or hot plastic means immediate shutdown
For critical setups, do weekend-long test runs before final sign-off. Cycling devices on/off reveals weak points commercial testing misses.
Maintenance Made Easy
Modular boxes beg for planned neglect. A little love prevents catastrophe.
Every six months:
- Torque-check terminal screws with a calibrated driver (they loosen!)
- Vacuum dust using anti-static nozzles – dust bunnies conduct electricity when moist
- Test ground continuity with a proper meter, not circuit testers
Create simple diagrams showing component locations and keep them inside the enclosure door. Future technicians won't just appreciate this – they might name their firstborn after you.
The Evolution Plan
Here's where modular systems outshine conventional boxes: adaptability.
Intentionally leave 25% space and rail capacity. When upgrading, you can add modules like building blocks rather than wrestling with "Frankensteined" systems. And consider cable routing access – installing waterproof modular enclosure ports for future conduit runs during initial installation saves brutal rework later.
Common Pitfalls & How to Dodge Them
- The Voltage Mix-Up: Installing low-voltage components alongside high-power circuits without separation. Result? Fried boards from induced voltages. Always maintain separation gaps or use partitioned cabinets.
- Grounding Amnesia: Assuming the enclosure body grounds components automatically. Dedicate a ground busbar and verify its connection back to source.
- Overstacking: MAX component capacity ≠ recommended capacity. Follow the 75% rule like it's sacred.
These lessons came from bitter experience. I once had an entire production line go down because a coolant sensor shared space with a 400V drive. The electromagnetic interference made sensor readings dance like Saturday Night Fever – an expensive lesson in segregation philosophy.
The Human Factor
Even perfect boxes fail when humans interact poorly. Simple remedies:
- Add laminated quick-reference guides showing emergency shutdown procedures
- Use color-blocked zones (red for danger, blue for comms, green for ground)
- Install see-through doors when possible – visibility prevents wrong switch throws
Parting Wisdom
Installing modular distribution boxes feels intimidating because you're essentially building a miniature power plant. But that complexity is also its beauty – each component's purpose is clear, each connection intentional. Unlike old-school rigid cabinets, these systems grow with you, forgiving mistakes and inviting improvements.
Approach it methodically but don't be afraid to innovate. Some of my best layout ideas came from "what if?" moments during installations. Document your process religiously, especially deviations from manuals. And please – help the next electrician by leaving your work better than you found it.
So next time you open that modular enclosure kit, take a breath. You've got this. Now go make something safe and magnificent.










