Now that we've covered the challenges, let's get to the good stuff: the techniques that will give you smooth, invisible seams. The right method depends on your project—whether it's an interior accent wall or an exterior facade, a textured panel or a smooth one. Here are the five most effective techniques, tried and tested by professionals:
1. Dry Seaming: Best for Textured Panels and Interior Spaces
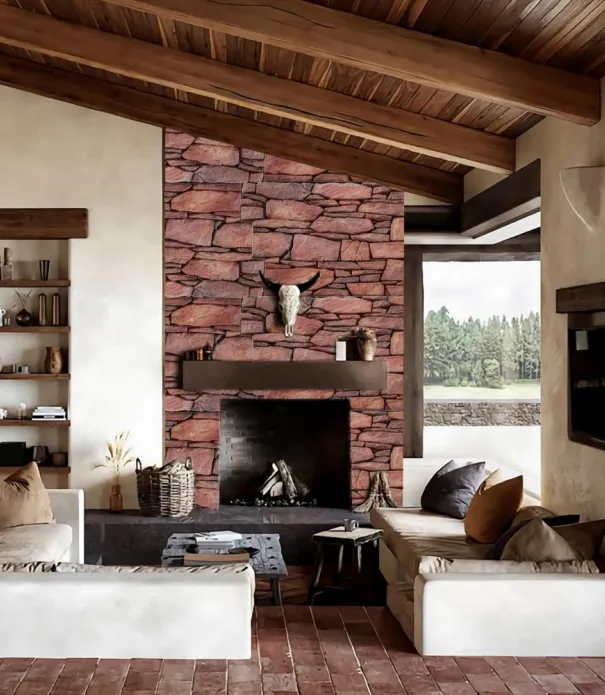
Dry seaming is the simplest technique, ideal for panels with deep textures (like stacked stone or fieldstone) where gaps can be hidden in the grooves. Here's how to do it:
-
Prepare the Panels:
Cut panels to size, ensuring edges are straight and smooth. Sand any rough spots with 120-grit sandpaper.
-
Apply Adhesive:
Use a notched trowel to apply a thin, even layer of construction adhesive to the back of each panel. Focus on the edges—this is where most gaps occur.
-
Align and Press:
Place the first panel on the wall, using a level to ensure it's straight. Then, position the second panel so its edge overlaps slightly with the first, aligning the texture patterns. Gently press the panels together, using a rubber mallet to tap them into place (be careful not to damage the surface).
-
Secure with Fasteners (Optional):
For added stability (especially on ceilings or upper walls), use finish nails or screws along the top and bottom edges of the panels, countersinking them slightly. Fill the holes with a color-matched putty.
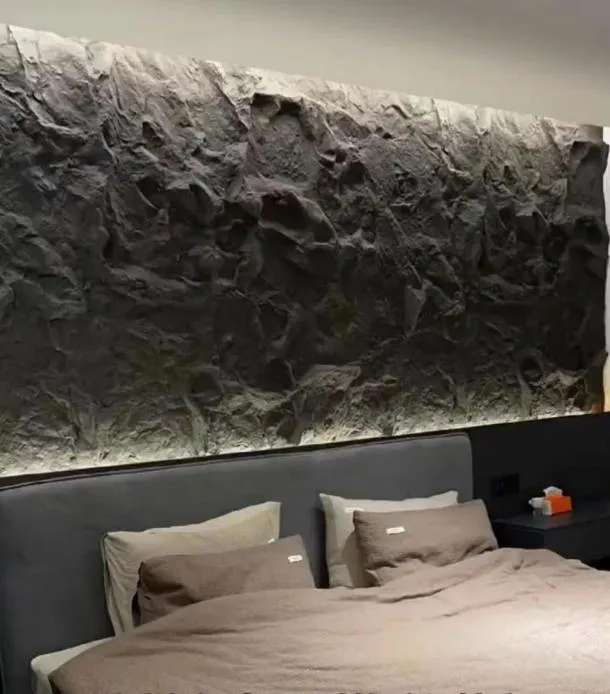
Pro tip: Dry seaming works best when the panel texture is irregular. The grooves and indentations naturally hide small gaps, so you don't need to worry about a perfect fit. Save this technique for interior decoration materials like living room accent walls or bedroom headboards.
2. Wet Seaming: Ideal for Exteriors and Smooth Panels
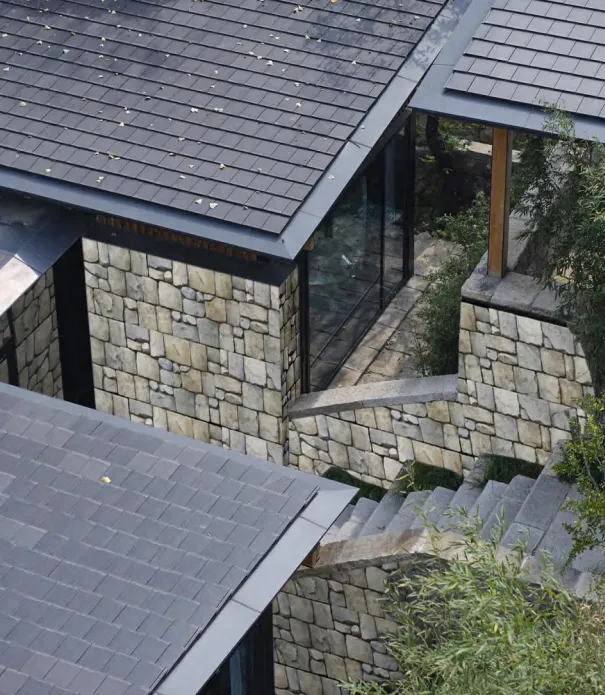
For smooth or slightly textured panels (like slate or limestone) or exterior applications, wet seaming is the way to go. This technique uses a color-matched sealant or mortar to fill seams, creating a waterproof, seamless finish. Here's the step-by-step:
-
Install Panels with Gaps:
Leave a 1/8-inch gap between panels to accommodate expansion. Apply adhesive to the back of each panel and press firmly into place, using shims to keep panels aligned.
-
Mix the Sealant:
Choose a flexible, weather-resistant sealant (silicone or polyurethane-based) that matches the panel color. For exterior projects, opt for a sealant rated for UV resistance. Some pu stone wall panel suppliers even offer custom color-matched sealants—ask yours!
-
Fill the Seams:
Load the sealant into a caulking gun and apply a continuous bead along the gap, making sure to fill it completely. Use a wet finger or a caulking tool to smooth the sealant, removing excess and creating a flush finish with the panel surface.
-
Clean Up:
Wipe away any smudges with a damp cloth before the sealant dries. Let it cure for 24-48 hours (check the manufacturer's instructions) before exposing it to water.
Pro tip: For exterior walls, add a backer rod (a foam rod that fills the gap) before applying sealant. This reduces the amount of sealant needed and helps it adhere better, preventing water from seeping behind the panels.
3. Mitered Edges: Perfect for Corners and Accent Pieces
Corners are where seams are most visible—unless you use mitered edges. This technique involves cutting the edges of two panels at 45-degree angles, creating a clean, seamless corner joint. Here's how:
-
Mark and Cut:
Measure the corner and mark each panel at a 45-degree angle, ensuring the cuts will meet perfectly. Use a miter saw or a hand saw with a miter box for precision.
-
Sand the Edges:
Smooth the mitered edges with sandpaper to remove burrs and ensure a tight fit.
-
Apply Adhesive and Sealant:
Apply adhesive to the back of each panel and a thin bead of sealant along the mitered edge. Press the panels together at the corner, wiping away excess sealant with a damp cloth.
-
Secure with Clamps:
Use corner clamps to hold the panels in place while the adhesive dries (usually 1-2 hours). Remove clamps and touch up any remaining sealant as needed.
Pro tip: Mitered edges require precise cutting—even a 1-degree error can create a gap. Practice on scrap panels first to get the hang of it!
4. Back-Buttering: For a Tighter Bond and Hidden Seams
Back-buttering is a technique used to ensure full contact between panels and the wall, reducing the risk of gaps caused by uneven adhesive application. It's especially useful for large panels or walls with minor irregularities:
-
Apply Adhesive to the Wall:
Use a notched trowel to spread a 1/4-inch layer of adhesive over the wall area where the panel will go, creating ridges for better adhesion.
-
Back-Butter the Panel:
Apply a thin layer of adhesive to the back of the panel (this is the "back-buttering"). Focus on the edges and corners, where gaps are most likely to form.
-
Press and Align:
Place the panel on the wall, starting at the bottom and working your way up. Use a level to ensure it's straight, then press firmly to squeeze out excess adhesive. Wipe away any adhesive that oozes out of the seams with a damp cloth.
Pro tip: Back-buttering works best with a high-quality construction adhesive designed for PU panels. Avoid generic adhesives, which may not bond as strongly or may yellow over time.
5. Overlapping Seams: A Trick for Textured or Rustic Panels
For highly textured panels (like stacked stone or "rustic" styles), overlapping seams can create a natural, organic look while hiding gaps. Here's how to do it:
-
Cut Panels with Overlaps:
Instead of cutting panels to straight edges, follow the natural contour of the texture. For example, if one panel has a "stone" that juts out, cut the adjacent panel to have a corresponding indentation.
-
Stagger the Seams:
Like laying brick, stagger the vertical seams between rows to avoid creating a straight line that draws the eye. This mimics the random pattern of natural stone walls.
-
Secure with Adhesive and Nails:
Apply adhesive to the back of the panel and press into place. Use finish nails to secure overlapping edges, countersinking them and filling with putty if needed.
Pro tip: Overlapping works best with panels that have deep, irregular textures. For smooth panels, stick to dry or wet seaming to avoid creating bulky, unnatural-looking joints.
|
Seaming Technique
|
Difficulty Level
|
Best For
|
Tools Needed
|
|
Dry Seaming
|
Easy
|
Interior, textured panels
|
Saw, sandpaper, adhesive
|
|
Wet Seaming
|
Moderate
|
Exteriors, smooth panels
|
Caulking gun, sealant, backer rod
|
|
Mitered Edges
|
Advanced
|
Corners, accent walls
|
Miter saw, clamps, sealant
|
|
Back-Buttering
|
Moderate
|
Large panels, uneven walls
|
Notched trowel, adhesive
|
|
Overlapping Seams
|
Easy-Moderate
|
Rustic/textured panels
|
Saw, adhesive, finish nails
|