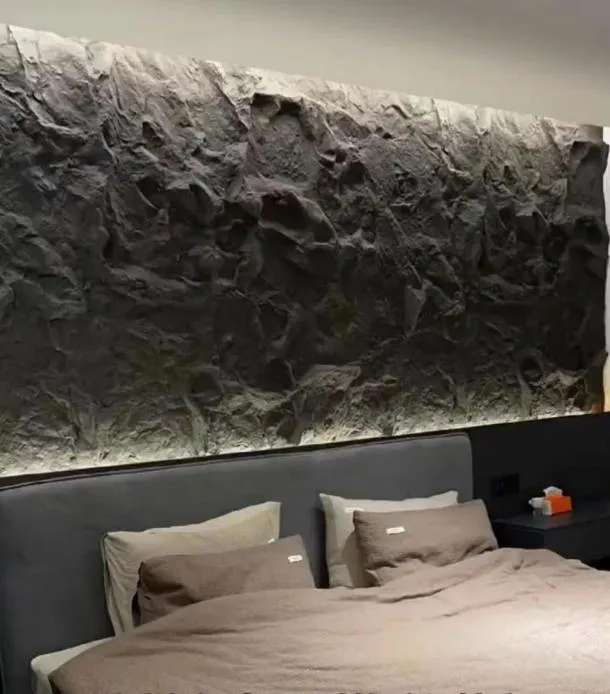
In recent years, PU stone wall panels have surged in popularity among homeowners, designers, and contractors alike. Offering the timeless beauty of natural stone with added benefits like lightweight construction, flexibility, and resistance to moisture and impacts, these panels have become a go-to choice for anyone looking to elevate interior or exterior spaces. But here's the thing: even the highest-quality panels—sourced from a trusted
pu stone wall panel supplier
—won't deliver that polished, professional finish without the right tools. Installation isn't just about sticking panels to a wall; it's about precision, care, and using equipment designed to handle the unique properties of PU materials. Whether you're a seasoned installer or a DIY enthusiast tackling your first project, having the essential tools on hand can mean the difference between a seamless, long-lasting result and a frustrating, uneven mess. In this guide, we'll walk you through every tool you need, why it matters, and how to use it effectively—because great
pu stone wall panel solutions
start with great preparation.
Why Tools Matter for PU Stone Wall Panel Installation
Before diving into the tool list, let's take a moment to understand why the right equipment is non-negotiable. PU (polyurethane) stone wall panels are engineered to mimic the look of natural stone but with a lighter weight (often 70-80% lighter than real stone) and more flexibility. This makes them easier to handle, but it also means they require specific tools to avoid damage during cutting, ensure proper adhesion, and maintain alignment. For example, using a dull blade might crack the panel's surface, while an ill-fitting trowel could leave gaps in the adhesive, leading to loose panels over time. Even the most experienced installer can't compensate for subpar tools—so think of this list as your roadmap to success, whether you're working on a small accent wall or a full exterior renovation.
Pro Tip:
Always check with your
pu stone wall panel supplier
for tool recommendations specific to their products. Some suppliers offer panels with unique textures or thicknesses that may require specialized equipment.
Essential Tools: A Detailed Breakdown
We've organized the tools into categories to make it easy to navigate. From measuring to cutting, adhesion to safety, each group plays a critical role in the installation process. Let's start with the foundation: getting your measurements right.
Installing PU stone wall panels is all about alignment. A panel that's even a quarter-inch off can throw off an entire wall, creating unsightly gaps or uneven edges. These tools ensure every cut and placement is accurate from the start.
-
Tape Measure (25-foot or longer):
A sturdy, retractable tape measure is your first line of defense against guesswork. Look for one with clear markings in both inches and centimeters, and a locking mechanism to hold measurements in place. When measuring for PU panels, always double-check dimensions—walls are rarely perfectly straight, so accounting for irregularities (like bulges or dips) is key. For example, if you're installing panels around a window, measure the height and width at three points (top, middle, bottom) to find the smallest dimension—this prevents cutting panels that are too large to fit.
-
Carpenter's Square (Speed Square):
This triangular tool is indispensable for marking 90-degree and 45-degree angles, which is crucial when cutting panels for corners or edges. PU panels often need precise miter cuts to create seamless joints, and a speed square ensures those angles are sharp and consistent. Hold the square firmly against the panel's edge, align the lip with the edge, and draw your line—no more wobbly angles!
-
Spirit Level (2-foot and 4-foot options):
A level checks for both horizontal and vertical alignment. Use the 4-foot level to ensure your first row of panels is perfectly straight (this sets the tone for the entire wall), and the 2-foot level for smaller sections or individual panels. Look for a level with at least two vials (one for horizontal, one for vertical) and clear bubble markers. When placing a panel, rest the level across its surface—if the bubble is centered, you're good to go. If not, adjust the panel slightly until it's level; this prevents the "leaning" look that can make even beautiful panels appear shoddy.
-
Chalk Line:
For long, straight lines (like the top edge of a panel row), a chalk line is a game-changer. Snap a line between two marked points to create a visual guide, ensuring all panels align along the same plane. To use it, hook the end on one mark, stretch the line taut to the other mark, and pull the string straight up and let it snap back—this leaves a crisp, temporary chalk line. PU panels are lightweight, so they're easy to shift during installation; referencing the chalk line keeps them on track.
-
Fine-Tipped Pencils or Markers:
Avoid thick markers that bleed or smudge—opt for sharpened pencils or ultra-fine-tip markers in a color that contrasts with the panel (e.g., white for dark panels, black for light ones). This ensures your marks are visible but won't show through once the panel is installed. Always mark on the back of the panel when possible to hide any accidental smudges.
PU stone wall panels are easier to cut than natural stone, but they still require the right tools to avoid cracking, chipping, or rough edges. The goal is to create clean, precise cuts that fit seamlessly together—here's what you'll need.
-
Circular Saw with a Fine-Tooth Blade:
A circular saw is ideal for straight cuts on large panels. Choose a blade with 40-60 teeth (carbide-tipped for durability) to minimize splintering. PU panels are soft compared to wood or natural stone, so a high-tooth-count blade ensures a smooth finish. Always cut with the panel face-down to prevent surface damage, and secure the panel to a workbench with clamps to avoid movement. Set the saw depth to just slightly more than the panel thickness—this prevents cutting into your work surface.
-
Jigsaw with a T-shank Blade:
For curved cuts, notches, or cutouts (e.g., around outlets or light switches), a jigsaw is your best friend. Use a blade designed for cutting plastic or soft materials (look for "low-tension" or "fine-cut" blades). Start by drilling a pilot hole in the waste area of the panel, then insert the jigsaw blade and follow your marked line. Go slow around curves to avoid veering off course—PU panels are forgiving, but sudden movements can still cause rough edges.
-
Utility Knife with Snap-Off Blades:
For scoring and breaking thinner panels (under 1/2 inch thick), a utility knife works wonders. Score the panel along your marked line using firm, even pressure, then gently bend the panel downward— it should snap cleanly along the score. replace blades often; a dull blade will tear the panel instead of cutting it. This method is perfect for quick, straight cuts when you don't want to fire up a power tool.
-
Miter Saw:
If you're working with a lot of angled cuts (e.g., for corners or decorative edges), a miter saw is worth the investment. Set the saw to your desired angle (45 degrees for most corners), secure the panel, and make a slow, steady cut. The key here is to support the panel fully—any sagging can cause the saw to bind, resulting in uneven edges.
-
Sanding Block or Orbital Sander:
Even the cleanest cuts can have minor burrs or rough spots. A sanding block with 120-180 grit sandpaper smooths edges, ensuring panels fit together tightly. For larger projects, an orbital sander speeds up the process. Sand in the direction of the panel's texture to avoid creating new scratches.
Safety First:
When using power tools, always wear safety glasses, ear protection, and a dust mask. PU dust is fine and can irritate lungs, so work in a well-ventilated area or use a shop vac to capture debris as you cut.
PU stone wall panels rely on a combination of adhesive and mechanical fasteners to stay in place, especially in high-traffic areas or exterior applications. Using the right tools here ensures panels bond properly and stay secure for years.
-
Construction Adhesive (Polyurethane or Solvent-Based):
Not all adhesives are created equal—choose one specifically formulated for PU or lightweight panels. Look for products labeled "exterior-grade" if installing outdoors, and "water-resistant" for bathrooms or kitchens. A 10-ounce tube is standard, and you'll need a caulking gun to apply it (more on that below). The adhesive should have a thick, gel-like consistency to prevent sagging—run a bead along the back of the panel, spacing beads 6-8 inches apart, and add extra around the edges for reinforcement.
-
Notched Trowel:
For larger panels or uneven wall surfaces, a notched trowel helps spread adhesive evenly. Choose a trowel with 1/4-inch or 3/8-inch notches (the size depends on panel weight—heavier panels need larger notches to hold more adhesive). Hold the trowel at a 45-degree angle and spread the adhesive in a "U" pattern, ensuring full coverage. This method creates ridges that collapse when the panel is pressed, filling gaps and creating a strong bond.
-
Brad Nailer or Finish Nailer:
While adhesive is the primary bonding agent, brad nails add extra security, especially for panels on vertical surfaces. Use 18-gauge brad nails (1-1/4 to 2 inches long) and drive them into the panel's edges or into wall studs (if applicable). The nails should sit just below the panel's surface—use a nail set to countersink them if needed. Avoid over-nailing, as this can crack the panel.
-
Self-Tapping Screws (Stainless Steel):
For exterior panels or areas with high moisture (like basements), screws provide superior holding power. Opt for #6 or #8 stainless steel screws with flat heads to prevent rust. Pre-drill small pilot holes (slightly smaller than the screw diameter) to avoid splitting the panel, then drive the screws in until they're flush with the surface.
-
Caulking Gun:
A smooth, drip-free caulking gun is essential for applying adhesive and sealant. Look for one with a thumb release to stop the flow of adhesive instantly—this prevents messy oozing. Load the adhesive tube, cut the tip at a 45-degree angle (the size of the opening controls bead thickness), and squeeze the trigger slowly and evenly.
Even the best panels won't adhere well to a dirty, uneven, or damaged wall. These tools ensure your substrate (the wall surface) is clean, flat, and ready for installation.
-
Wire Brush:
Use a wire brush to remove loose paint, dust, or debris from the wall. Focus on corners and crevices where dirt tends to accumulate—any grime between the wall and panel will weaken the adhesive bond.
-
Putty Knife or Scraper:
For stubborn residue (like old wallpaper glue or peeling paint), a putty knife with a sharp, flexible blade does the trick. Hold the knife at a 30-degree angle and scrape gently to avoid damaging the wall itself. For larger areas, a paint scraper with a wider blade saves time.
-
Cleaning Cloth and Mild Detergent:
After scraping, wipe the wall with a damp cloth and mild detergent (like dish soap) to remove remaining dust and oils. Avoid harsh chemicals, as they can interfere with adhesive bonding. Let the wall dry completely before installing panels—even slight moisture can cause the adhesive to fail.
-
Leveling Compound (for Uneven Walls):
If your wall has dips or small holes, a self-leveling compound smooths the surface. Mix the compound according to the manufacturer's instructions, apply with a trowel, and let it dry fully (usually 24 hours) before proceeding. For larger gaps (over 1/2 inch), use a patching compound instead.
-
Sandpaper (80-120 Grit):
Lightly sand the wall to create a slightly rough texture—this helps the adhesive grip better. Focus on glossy surfaces, which can be too smooth for proper adhesion. Wipe away sanding dust with a tack cloth before installing panels.
Never skimp on safety! Installing PU panels involves cutting tools, dust, and potential trips or falls—these items keep you protected throughout the process.
-
Safety Glasses:
Flying chips or dust can damage your eyes—always wear shatterproof safety glasses when cutting or sanding panels.
-
Work Gloves:
Gloves protect your hands from sharp edges, adhesive, and splinters. Opt for nitrile gloves for handling adhesive (they resist chemicals) and leather gloves for cutting or lifting heavy panels.
-
Dust Mask or Respirator:
PU dust is fine and can irritate your lungs. A N95 respirator is recommended for cutting or sanding, especially in enclosed spaces.
-
Ear Protection:
Power tools like circular saws or jigsaws can reach decibel levels that damage hearing over time—use earplugs or earmuffs to reduce noise exposure.
-
Knee Pads:
If you're installing panels near the floor, knee pads save your joints from soreness and bruising.
Once the panels are installed, these tools help clean up excess adhesive, fill gaps, and add those final touches that make the wall look professionally done.
-
Grout Float:
For panels with grout lines (some PU stone designs mimic natural stone with intentional gaps), a rubber grout float applies grout smoothly. Hold the float at a 45-degree angle and spread the grout diagonally across the gaps, pressing firmly to ensure full coverage.
-
Sponge (Damp, Not Wet):
After applying grout, a damp sponge wipes away excess without pulling grout out of the gaps. Rinse the sponge frequently in clean water to avoid smearing. Let the grout dry slightly (15-20 minutes) before sponging for the best results.
-
Silicone Sealant (Matching Panel Color):
Use clear or color-matched silicone sealant to fill small gaps between panels or around edges (e.g., where panels meet the ceiling or floor). Apply a thin, even bead with a caulking gun, then smooth it with a wet finger or a sealant tool for a clean finish.
-
Touch-Up Paint (If Needed):
Some PU panels come with touch-up paint from the
pu stone wall panel supplier
. Use a small brush to cover nail holes or minor scratches, dabbing gently to blend the paint with the panel's surface.
Quick Reference Tool Table

Troubleshooting Common Tool-Related Issues
Even with the right tools, problems can arise. Here's how to fix common issues:
-
Panel Won't Stick:
Check if the wall was damp or dirty during installation. Clean the surface and reapply fresh adhesive. If the adhesive is old (past its expiration date), replace it—fresh adhesive is critical for a strong bond.
-
Uneven Cuts:
Ensure the panel is clamped securely before cutting. A wobbly panel leads to crooked cuts. If using a jigsaw, go slower around curves and use a new blade if the current one is dull.
-
Gaps Between Panels:
This is often due to inaccurate measuring. Use a carpenter's square to ensure panels are square before cutting, and reference your chalk line during installation to keep panels aligned.
-
Adhesive Oozing:
Use a caulking gun with a thumb release to stop adhesive flow instantly. Wipe away excess with a damp cloth before it dries (most adhesives become hard to remove once cured).
Final Thoughts: Tools as the Key to Great
Walls Solutions
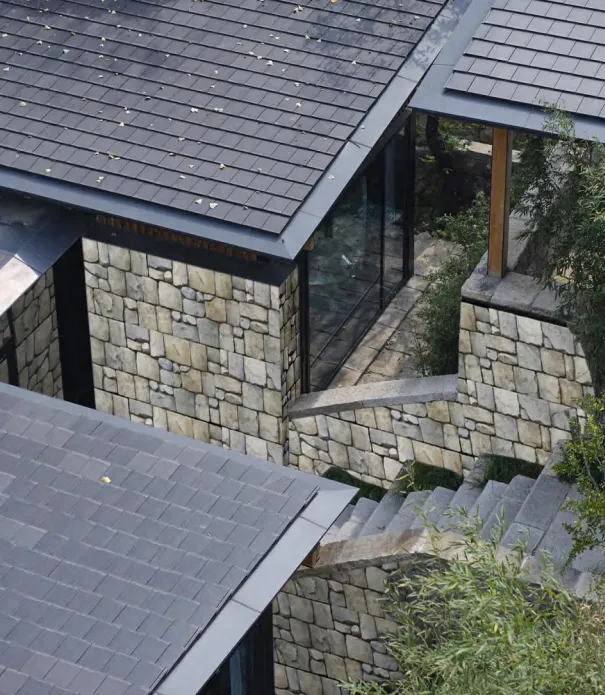
Investing in the right tools isn't just about making installation easier—it's about ensuring your PU stone wall panels look their best for years to come. From measuring to finishing, each tool plays a role in creating a seamless, durable result that showcases the beauty of your panels. Remember, even the most innovative
pu stone wall panel solutions
depend on careful craftsmanship and the right equipment. So gather your tools, double-check your measurements, and get ready to transform your space—one panel at a time.













