PU Stone Wall Panel Installation Time: How Long Does It Take?
Walk into any modern home, boutique hotel, or trendy restaurant these days, and you'll likely spot a feature that steals the show: walls with the timeless charm of natural stone, but with a surprisingly lightweight, easy-to-install twist. We're talking about PU stone wall panels—one of the most sought-after
interior decoration materials and
exterior decoration materials in today's construction and design world. As a go-to wall solution, they've become a favorite for homeowners and contractors alike, blending aesthetic appeal with practicality. But if you're considering adding them to your space, there's one question that's probably top of mind:
How long does installation actually take?
Whether you're a homeowner planning a weekend renovation or a contractor managing a commercial project, understanding installation timelines is key to budgeting, scheduling, and setting realistic expectations. In this article, we'll dive deep into the factors that influence PU stone wall panel installation time, break down the process step by step, compare it to other wall solutions, and share real-world insights to help you plan like a pro. Let's start by exploring why these panels have become such a staple for anyone looking to elevate their space—quickly.
Why PU Stone Wall Panels Are Taking the Market by Storm
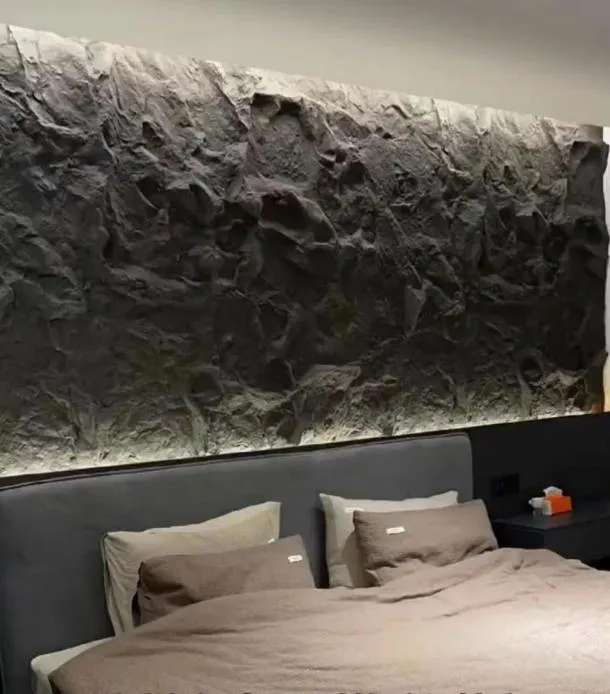
Before we get into installation times, let's quickly unpack why PU stone wall panels have become a go-to choice for designers and builders. PU, or polyurethane, is a synthetic material that's engineered to mimic the look and texture of natural stone—think granite, limestone, or slate—without the heavy weight or high maintenance. As a leading
pu stone wall panel supplier will tell you, these panels are designed to offer the best of both worlds: durability, weather resistance (for exteriors), and a fraction of the installation hassle compared to real stone.
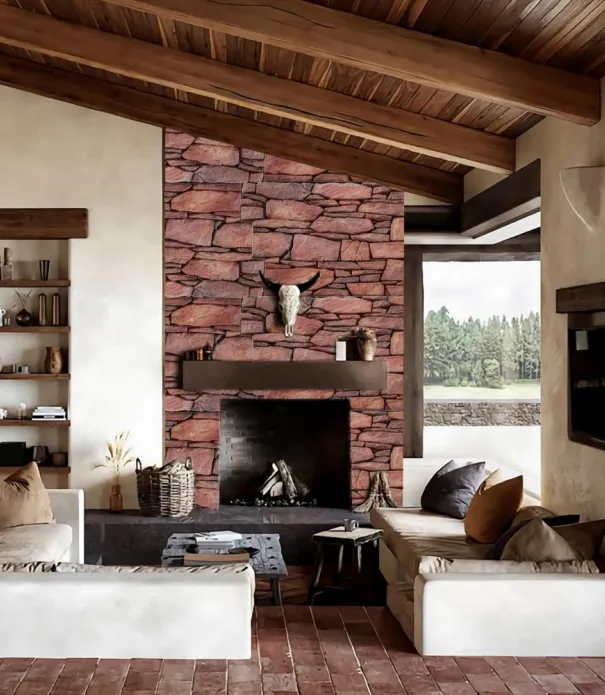
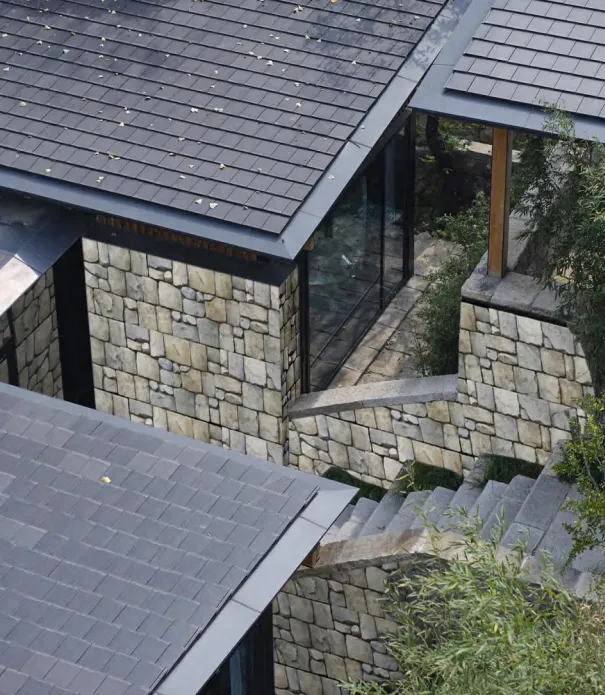
For interior spaces, they add warmth and character to living rooms, bedrooms, or accent walls. For exteriors, they stand up to rain, UV rays, and temperature swings, making them ideal for facades, patios, or garden walls. And because they're part of a broader range of wall solutions, they pair seamlessly with other materials like bamboo charcoal board or WPC wall panels, giving designers endless creative freedom. But perhaps their biggest selling point? How quickly they can transform a space from drab to fab. Let's explore what makes that speed possible.
Key Factors That Influence Installation Time
Installing PU stone wall panels isn't a one-size-fits-all process. The time it takes can vary widely based on a few critical factors. Let's break them down so you can estimate how long your project might take:
1. Panel Size and Design Complexity
PU panels come in a range of sizes—from small 12x12-inch tiles to large 4x8-foot sheets. Larger panels cover more area quickly, but they may require two people to handle, which can slow things down if your team is small. Additionally, panels with intricate designs (like stacked stone or irregular edges) might need more precise cutting to fit around corners, windows, or outlets, adding extra minutes per panel.
2. Surface Preparation: The Foundation Matters
The condition of the wall you're covering is probably the biggest wild card in installation time. If you're working with a brand-new, perfectly flat drywall or concrete wall, you might just need a quick cleaning and primer coat—maybe 4-6 hours. But if the surface is uneven (think old brick, cracked plaster, or a wall with existing tiles that need removal), you're looking at extra time for repairs, leveling, or even reboarding. For example, removing old ceramic tiles could take half a day, and fixing a bowed wall with joint compound might add another 24 hours (including drying time).
3. Installation Team Experience
There's no substitute for expertise. A seasoned crew that's installed PU panels dozens of times will work faster and more efficiently than a team trying it for the first time. An experienced installer knows how to handle tricky cuts, align panels perfectly, and avoid common mistakes (like misapplying adhesive) that can lead to do-overs. For a 100-square-foot project, a pro team might finish in a day, while a novice team could take 2-3 days.
4. Project Scope: Residential vs. Commercial
A small residential project—say, a 50-square-foot accent wall in a bedroom—will obviously take less time than a commercial project like cladding an entire restaurant facade (500+ square feet). Commercial jobs often involve more complex layouts, higher ceilings, or the need to coordinate with other trades (electricians, plumbers), which can add delays. For example, a residential accent wall might take 1-2 days, while a commercial exterior could take 1-2 weeks.
5. Weather (for Exterior Installations)
If you're installing PU panels outdoors, weather can throw a wrench in your timeline. Rain, high humidity, or extreme temperatures (below 40°F or above 90°F) can slow down adhesive curing times or make handling panels slippery. Most manufacturers recommend installing in dry, mild conditions, so if the forecast calls for storms, you might need to pause—adding a day or two to your schedule.
Step-by-Step Installation Process: A Time Breakdown
Now that we know what influences installation time, let's walk through the typical process step by step, with rough time estimates for a 100-square-foot residential wall (a common size for a living room accent wall or bedroom feature). Keep in mind that these times are for a team of 2-3 experienced installers—adjust accordingly for smaller teams or more complex projects.
Step 1: Pre-Installation Planning (1-2 Hours)
Before any panels go up, you'll need to measure the wall, calculate how many panels you need (plus 10% extra for cuts and waste), and gather tools: a tape measure, level, saw (a jigsaw or circular saw with a fine-tooth blade works best), adhesive, caulking gun, and a rubber mallet. This step is quick but crucial—skipping it can lead to ordering too few panels or using the wrong tools, which causes delays later.
Step 2: Surface Preparation (4-8 Hours, or More if Repairs Are Needed)
This is where the wall's condition comes into play. Start by cleaning the wall thoroughly to remove dust, dirt, or grease—any debris will prevent the adhesive from sticking. If the wall is painted, lightly sand it to create a rough surface (this takes about 1 hour for 100 sq ft). For new drywall, apply a primer to seal the surface (another 1-2 hours, plus drying time if the primer needs to set).
If repairs are needed—like filling cracks, patching holes, or leveling uneven areas—add extra time. For example, fixing a few small holes with spackle might take 30 minutes, but reboarding a water-damaged section could take half a day. Pro tip: Always let repairs dry completely before moving on—rushing this step leads to panels that bubble or fall off later.
Step 3: Cutting Panels to Size (1-3 Hours)
Once the wall is prepped, it's time to cut the panels. Most panels come in standard sizes, but you'll need to trim them to fit around windows, doors, outlets, or corners. Using a straightedge and pencil, mark the cuts on the back of the panel (to avoid damaging the front), then cut slowly with a saw. For 100 sq ft, you might need to cut 5-10 panels, depending on the layout—this takes 1-3 hours, depending on how many cuts are needed.
Step 4: Applying Adhesive and Mounting Panels (1-2 Days)
Now for the main event: mounting the panels. Start at the bottom corner of the wall and work your way up, using a level to ensure each panel is straight. Apply adhesive to the back of the panel in a zigzag pattern (about 1/4-inch thick), then press it firmly against the wall. Use a rubber mallet to tap it into place and remove air bubbles. For extra security, some installers add finishing nails at the top and bottom edges (though this isn't always necessary with strong adhesive).
For 100 sq ft, a team of 2 can typically mount all panels in 1-2 days. The key here is working efficiently: one person cuts panels while the other mounts them, so there's no downtime. If you're working alone, expect this step to take 2-3 days.
Step 5: Finishing Touches (1-2 Hours)
Once all panels are up, let the adhesive cure for at least 24 hours (check the manufacturer's instructions—some adhesives set faster). Then, fill any gaps between panels with matching caulk to create a seamless look. Wipe away excess caulk with a damp cloth, and touch up any scuffs or scratches with paint that matches the panel color. Finally, clean the panels with a soft, damp cloth to remove dust from installation.
Total Time for 100 Sq Ft: 2-4 Days
Adding it all up: planning (1-2 hours) + surface prep (4-8 hours) + cutting (1-3 hours) + mounting (1-2 days) + finishing (1-2 hours) = roughly 2-4 days for a 100-square-foot residential wall. For larger projects, multiply accordingly—e.g., 500 sq ft might take 5-7 days with a team of 3.
How PU Panels Stack Up: Installation Time vs. Other Wall Solutions
To truly understand how fast PU stone wall panels are, let's compare their installation time to other popular wall solutions. The table below looks at average times for installing 100 square feet of different materials, based on industry data and feedback from contractors specializing in
interior decoration materials.
|
Wall Solution Type
|
Average Installation Time (100 sq ft, 2-3 Installers)
|
Key Factors Slowing Installation
|
|
PU Stone Wall Panels
|
2-4 days
|
Surface prep, cutting for complex layouts
|
|
MCM Flexible Cladding Stone Wall Panels
|
3-5 days
|
Heavier panels (require more labor to lift), specialized mounting systems
|
|
WPC Wall Panels
|
2-3 days
|
Similar to PU, but some WPC panels require tongue-and-groove fitting, which can slow alignment
|
|
Bamboo Charcoal Board Wall Panels
|
3-4 days
|
More brittle than PU, requiring careful cutting to avoid chipping
|
|
Natural Stone (e.g., Granite, Slate)
|
5-7 days
|
Extremely heavy (requires lifting equipment), precise cutting with diamond blades, mortar curing time
|
As you can see, PU panels are among the fastest to install, second only to WPC panels in some cases. Natural stone, by contrast, takes more than twice as long—making PU panels a clear winner for projects with tight deadlines. And when you factor in that PU panels are often more affordable than natural stone or even MCM cladding, their appeal becomes even stronger.
Pro Tips to Speed Up Installation (Without Cutting Corners)
Want to get your PU stone wall panels up even faster? Here are some expert tips from seasoned installers that can shave hours (or even days) off your timeline—without compromising quality:
Tip #1: Hire Experienced Installers
It might be tempting to save money by DIY-ing or hiring a general handyman, but PU panel installation is a skill. Experienced installers know how to handle tricky cuts, apply adhesive evenly, and avoid common mistakes (like misaligning panels). A pro team can cut your installation time by 30-50% compared to a novice crew.
Tip #2: Pre-Order and Stage Materials
Nothing kills momentum like waiting for panels to arrive mid-project. Order materials 1-2 weeks in advance, and store them in a dry, climate-controlled space near the installation area. This way, you won't waste time driving to the supplier or letting panels acclimate to temperature changes on-site.
Tip #3: Use the Right Adhesive
Not all adhesives are created equal. Look for a polyurethane-based construction adhesive designed for lightweight panels—these set faster (some in as little as 4 hours) and bond stronger than generic adhesives. Your pu stone wall panel supplier can recommend a specific product that works best with their panels.
Tip #4: Schedule Exterior Projects in Dry Weather
For exterior installations, check the weather forecast and plan for 2-3 consecutive dry days. This avoids delays from rain or humidity, which can slow adhesive curing. If you must install in slightly damp conditions, use a moisture barrier between the wall and panels to prevent water damage.
Tip #5: Simplify the Design
Intricate patterns, curved walls, or panels with custom shapes look stunning but add installation time. If speed is a priority, opt for a simple stacked or staggered layout with minimal cuts. You can still create visual interest with panel color or texture without the extra hassle.

Real-World Case Studies: How Long Did These Projects Take?
Numbers on a page are helpful, but real-world examples show how installation time plays out in practice. Let's look at two case studies—one residential, one commercial—to see how factors like project size and complexity impact timelines.
Case Study 1: Residential Accent Wall (Riyadh, Saudi Arabia)
Project:
80-square-foot accent wall in a family's living room, using PU stone panels designed to look like stacked limestone.
Team:
2 experienced installers from a local pu stone wall panel supplier.
Timeline:
- Day 1: Surface prep (wall was new drywall, so primer applied in the morning; dried by afternoon). Cutting panels (1 hour). Mounted first row of panels (2 hours).
- Day 2: Mounted remaining panels (3 hours). Applied caulk to gaps and cleaned up (1 hour).
Total Time:
1.5 days.
Why It Was Fast:
Small project size, new wall with minimal prep, and a simple stacked layout meant few cuts. The team also used fast-curing adhesive, which set in 4 hours, allowing them to continue mounting panels the same day.
Case Study 2: Commercial Restaurant Facade (Dubai, UAE)
Project:
600-square-foot exterior facade for a Mediterranean restaurant, using large-format PU stone panels (4x8 ft) to mimic the look of old-world stone.
Team:
3 installers, plus a helper to move materials.
Timeline:
- Days 1-2: Surface prep (existing concrete wall required pressure washing, minor crack repairs, and primer—2 full days).
- Days 3-4: Cutting panels (large sheets meant fewer cuts, but needed to fit around windows and signage—6 hours total).
- Days 5-7: Mounting panels (3 days, as the facade was 12 feet high, requiring ladders and careful alignment).
- Day 8: Finishing (caulking, touch-ups, and cleaning).
Total Time:
8 days.
Why It Took Longer:
Larger size, high exterior wall (slower to navigate), and the need to coordinate with the electrician installing outdoor lighting (which paused work for half a day). Weather also played a role—one afternoon of rain delayed mounting by 4 hours.
These case studies show that while small residential projects can be done in a weekend, larger or more complex commercial jobs require more planning and time. But even the restaurant facade, at 600 sq ft, was completed in under two weeks—far faster than if they'd used natural stone, which would have taken 3-4 weeks.
Final Thoughts: PU Panels = Speed + Style
At the end of the day, the question "How long does PU stone wall panel installation take?" has a simple answer:
It depends—but it's almost always faster than traditional stone or other heavy wall solutions.
For small residential projects, you're looking at 1-3 days; for larger commercial jobs, 1-2 weeks. And with the right planning, team, and materials, you can trim even those timelines.
As a versatile wall solution, PU panels offer the perfect balance of aesthetics, durability, and efficiency—making them a top choice for anyone looking to transform a space without the long wait. Whether you're a homeowner tackling a weekend project or a contractor managing a commercial build, partnering with a reputable
pu stone wall panel supplier (who can provide not just panels but also expert advice on installation) is key to keeping things on track.
So, if you're ready to give your space a stone-inspired makeover—without the hassle of real stone—PU panels might just be the answer. With their quick installation time, you'll be enjoying your new wall sooner than you think.













