
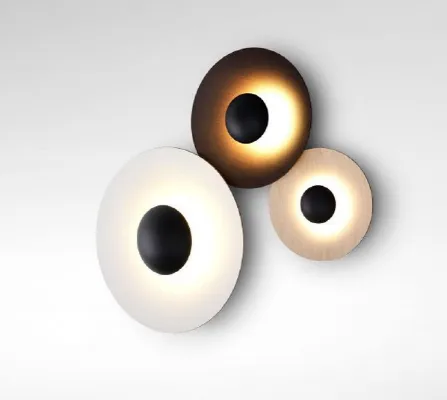
Let's be honest - when you get those shiny new LED wall lamps, the excitement can make you want to rush the installation. I get it! But here's the thing: skipping proper waterproofing and wiring steps is like buying a raincoat but never zipping it up. It might look good, but when the storms come? You'll be soaked and regretful.
Outdoor lighting isn't just about creating ambiance; it's an investment in safety and functionality. Do it right, and you'll enjoy gorgeous, reliable lighting for years. Cut corners, and you might find yourself knee-deep in expensive repairs down the line. I've seen it happen too many times - beautifully designed outdoor spaces ruined by flickering lights or worse, electrical hazards.
Reality Check: Did you know that moisture damage accounts for nearly 75% of premature LED fixture failures? And get this - improper wiring causes more landscape lighting fires than any other single factor. Scary stuff, right?
Waterproofing isn't just slapping on some silicone and calling it a day. It's a multi-layered defense system that keeps your lights shining through torrential downpours and coastal humidity. Think of it like sealing a ship's hull - every layer matters.
Don't just grab any "waterproof" fixture. Look for the real deal: IP (Ingress Protection) ratings. For outdoor wall lights, you'll want nothing less than IP65. That means:
If you're in heavy weather zones or near oceans? Aim for IP67. That extra protection means your lights can handle temporary submersion.
That rubbery ring between the lens and housing? Treat it like gold. Before installation:
Don't let your wiring hang out naked! Weatherproof conduit is a must:
Pro Tip: When sealing connections with silicone, apply it like you're frosting a cake - generous but neat. Wait until it's tacky (about 10-15 minutes) before pressing fixtures together. That waiting period creates a far superior seal.
I've lost count of how many DIY wiring jobs I've had to rescue. Common pitfalls? Oversized transformers, mismatched wire gauges, and those awful scotch-lock connectors that seem destined to fail when the weather turns.
Here's how to make sure your wiring not only works but stands the test of time:
Undersize your wire, and you'll get voltage drop. Oversize it, and you're wasting money. Goldilocks rules apply:
Transformers are like the heart of your system. Give them:
Those junction boxes are lifesavers:
Listen Up: Use only outdoor-rated wiring certified for wet locations (look for "W" in designation like THWN-2). Indoor-rated cables rapidly degrade outdoors - I've seen insulation crumble within 6 months in sunny climates.
You've got your gear prepped and your plan ready - now let's get those lights up safely and effectively.
Measure twice, drill once is the golden rule. Consider:
Don't skip this step - it determines long-term adhesion and sealing:
This is where most mistakes happen. Remember:
Now for the waterproof magic:
Work Smarter: Installing on humid days? Keep a portable hair dryer handy to pre-warm surfaces. Just 30 seconds of heat greatly improves adhesion for tapes and sealants.
Installing your lights properly is just the beginning. Like any outdoor equipment, LED wall lamps need periodic love to keep performing at their best.
| When | Checkpoint | Quick Fixes |
|---|---|---|
| Bi-Annually | Gasket condition | Apply silicone gasket conditioner (specialized products) |
| After Heavy Storms | Moisture in housings | Use compressed air & silica gel packets temporarily |
| Annually | Connection corrosion | Clean with electrical contact cleaner; reapply dielectric grease |
| Every 2 Years | Sealant integrity | Reseal with UV-resistant silicone; tape edges with painter's tape |
The Forgotten Upgrade: If your lighting system is more than 5 years old, seriously consider replacing mechanical timers with smart controllers. The modern options include moisture sensors that automatically cut power during heavy rains - brilliant insurance against water intrusion.
Installing outdoor LED wall lamps with proper waterproofing and wiring might seem daunting at first. But approach it like assembling a great meal - gather quality ingredients, follow proven techniques, and take your time. The payoff is spectacular: beautiful, durable lighting that turns heads and stands up to whatever Mother Nature delivers.
Remember the most crucial lesson: shortcuts in outdoor lighting always reveal themselves eventually. Water has incredible patience - it'll find weaknesses you never imagined. But get the fundamentals right, and your lighting won't just survive outdoor conditions; it'll thrive for years, creating welcoming environments that showcase your architectural features beautifully while ensuring safety and compliance.
Recommend Products












