
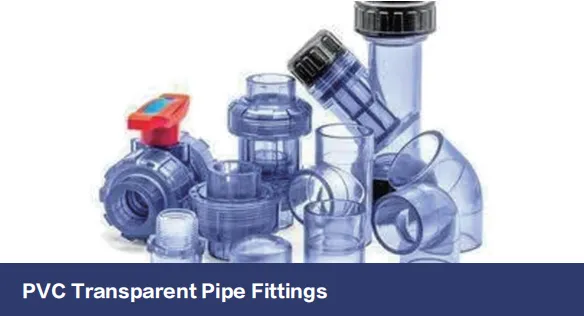
So you've decided to install PVC transparent pipe fittings - great choice! These clear pipes let you monitor fluid flow and easily spot any potential issues. But here's the thing: they're notoriously finicky when it comes to scratches and deformation. One wrong move and suddenly your pristine installation looks like it survived a rock tumbler. But don't sweat it - I've installed miles of these clear pipes over the years, and I'm about to share every trick in my playbook to keep your installation looking professional and crystal clear.
Transparent PVC behaves differently than its opaque cousins. It's more prone to showing imperfections, and chemical reactions during installation can actually cause clouding or hazing if you're not careful. That's why standard PVC installation techniques need some serious tweaking when working with transparent versions. We'll cover everything from handling and storage to specific cutting and cementing techniques that'll keep your pipes looking factory-fresh long after installation.
Think of transparent PVC like that friend who shows every emotion on their face - it just can't hide anything. Every scratch, every pressure point, every chemical reaction registers visibly on its surface. I've seen installations where people treated clear pipes exactly like standard PVC, and the results were heartbreaking - cloudy joints, visible stress marks, and deep scratches that catch the light every time you walk by.
The material science behind this is fascinating. Transparent PVC often uses different plasticizers that make it more flexible but also less resistant to surface abrasion. When you apply solvents or primers, they can actually penetrate the surface layer differently than with opaque PVC. That beautiful optical clarity also means UV light penetrates deeper, accelerating degradation if the surface is compromised. So those scratches aren't just cosmetic - they're potential failure points waiting to happen.
I can't stress this enough - how you handle pipes before installation makes all the difference. I keep all my transparent pipes and fittings in their original protective sleeves until the moment they're ready to be installed. And I never, ever stack anything on top of them in storage. That "quick toss" of tools onto a pipe? That subtle indentation will look like a canyon once light passes through it.
Temperature control matters too. Store pipes at room temperature - too cold and they become brittle, too warm and they start to sag under their own weight. I've seen pipes left in a hot truck bed that developed permanent curves. If you must store vertically, use wide supports at multiple points to distribute weight evenly. And please, for the love of all things clear, never hang pipes by hooks that pinch them.
Cutting transparent PVC requires finesse. I always reach for my fine-toothed handsaw (at least 24 teeth per inch) or a high-quality ratcheting cutter specifically designed for clear plastics. The trick? Go slow and let the tool do the work. If you see any whitening at the cut site - that's stress deformation already setting in.
Here's my step-by-step cutting ritual: First, mark cut lines with watersoluble marker rather than regular pen. Securely support the pipe on all sides close to the cut point. Make sure your blade is razor-sharp - I touch mine up before every major project. Apply light, consistent pressure throughout the cut. And always leave about 1/8" extra to clean up later with precise sanding.
Deburring isn't just a quick swipe - it's where you save your project from microscopic disasters. With transparent PVC, the slightest rough edge will refract light like a prism, calling attention to itself. Worse still, these rough spots become starting points for stress cracks down the road.
My toolkit includes several specialty items: A fine-grit sanding sponge (120-grit minimum), a deburring tool with replaceable ceramic blades, and a set of needle files. Work systematically - first remove the outer burr with the deburring tool using feather-light pressure. Then switch to sanding, working perpendicular to the pipe axis to avoid creating grooves. Finish with needle files on the inner edge. The goal isn't just smooth - it's optically transparent. Hold cut ends up to the light to check your work.
This is where most beginners fail spectacularly. Regular PVC cement will almost always haze or cloud transparent sections near joints. I learned this the hard way on my first transparent installation - woke up to joints that looked like they'd been packed with cotton.
You need low-VOC, specifically formulated cement for clear PVC. These solvents evaporate cleaner and slower, reducing the "blushing" effect. Apply with natural bristle brushes, not foam applicators which leave tiny air bubbles. Timing is critical - wait until the primer is tacky but not dry before applying cement. Work in moderate temperatures (65-75°F is ideal) with good ventilation but no direct airflow across joints which causes uneven curing.
Assembly requires surgeon-like hands and an eagle eye. First, never dry fit transparent PVC - those insertion marks will haunt you. Instead, use a section of scrap opaque pipe for test fits. When joining, apply cement evenly but sparingly - drips down clear pipe sides are permanent eyesores.
Push fittings together with steady pressure until bottomed out, then hold completely still for twice as long as you think necessary (check manufacturer specs). I count to 45 seconds for 1" pipe. Any wobble during curing creates optical distortion patterns that look like cracks under bright light. Support joints during cure time with specialized foam-lined clamps that don't mar surfaces.
Even properly joined transparent PVC systems can develop deformation if stress points aren't addressed. Standard pipe supports and hangers become optical defects in clear pipe, acting like magnifying glasses to distort light transmission.
I use UV-resistant silicone-lined hangers that distribute pressure over wider areas. Always allow for thermal expansion - transparent PVC expands more visibly than opaque. Install supports at no more than 50% of recommended spacing for opaque pipe. And never let pipes rest directly against other structures - vibration transfer creates those spiderweb-looking micro-fractures over time.
Pay special attention to bends. If using pre-formed clear elbows, support both arms evenly. Creating bends through heating requires extreme care - use liquid sand bath heaters rather than naked flames, rotate constantly, and never heat beyond 250°F. Quench slowly in air, not water.
Transparent PVC brings unique opportunities - and challenges - that regular installations don't face. The ability to see through the pipe means flow patterns become visible, but so do any imperfections. When installing drainage systems using clear PVC fittings , position joints where turbulent flow won't cause particulate swirling against visible sections. Those debris patterns will eventually erode the surface.
Lighting presents both challenges and opportunities. UV exposure accelerates degradation in scratched areas - I always specify UV-stabilized transparent PVC for sun-exposed locations. But strategic lighting can turn your pipe runs into stunning visual features - use warm LEDs to avoid UV damage and position lights to wash across surfaces rather than shining directly through pipes which highlights every imperfection.
The first pressure test is make-or-break for transparent systems. Unlike opaque pipes that hide internal stress patterns, transparent PVC will show every ripple of strain. Pressurize gradually - no more than 10 psi increments every 15 minutes. I watch the entire system under pressure with a bright flashlight, looking for any haze development at joints or faint stress whitening along pipe lengths.
For long-term clarity, maintenance differs dramatically from standard PVC. Never use abrasive cleaners - stick to pH-neutral solutions. Install removable protective sleeves in high-traffic areas. And conduct annual inspections with polarized light - it reveals hidden stress patterns before they become fractures. With proper care, a well-installed transparent PVC system will remain optically clear for decades rather than becoming that cloudy mess we've all seen in neglected installations.
Installing transparent PVC is equal parts science and artistry. Every step from unloading the truck to final pressure testing requires mindfulness about preserving optical clarity. By using the specialized techniques I've outlined - microfiber handling, precision cutting, chemical selection designed for clarity, stress-free installation, and gentle maintenance - you'll create installations that are both functional and beautiful, showcasing rather than hiding your expert craftsmanship for years to come.
Remember: those extra minutes spent on careful handling and preparation aren't wasted time - they're investments in an installation that maintains its pristine appearance for its entire service life. When done right, transparent PVC installations become conversation pieces rather than cautionary tales. Now go create something brilliant!
Recommend Products












