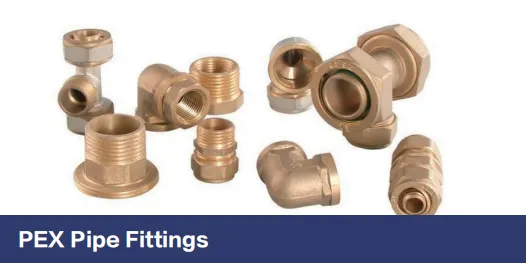
PEX Pipe Fittings Sizing: A Practical Guide for Project Planning

When it comes to plumbing projects—whether you're renovating a bathroom, building a new home, or upgrading a commercial space—few details are as critical as getting the sizing of your PEX pipe fittings right. A tiny miscalculation can lead to frustrating issues: low water pressure in the shower, noisy pipes that keep you up at night, or even leaks that cause costly water damage down the line. As someone who's worked with homeowners, contractors, and residential building materials supplier teams alike, I've seen firsthand how proper sizing transforms a stressful project into a smooth, efficient process. In this guide, we'll walk through everything you need to know about sizing PEX pipe fittings, from understanding the basics of PEX tubing to matching fittings to your specific project needs. By the end, you'll feel confident tackling sizing like a pro—whether you're a DIY enthusiast or collaborating with a commercial building materials supplier on a large-scale job.
First Things First: What Even Is PEX, and Why Does It Matter?
Before diving into sizing, let's make sure we're all on the same page about what PEX is. PEX, short for cross-linked polyethylene, is a flexible plastic piping material that's revolutionized plumbing over the past few decades. Unlike rigid copper or PVC pipes, PEX bends easily, resists corrosion, and handles temperature fluctuations like a champ—making it ideal for both hot and cold water systems. It's also more affordable and quicker to install, which is why it's become a go-to for everything from residential kitchens to commercial buildings like hospitals and schools.
But here's the thing: PEX isn't a one-size-fits-all solution. There are three main types—PEX-A, PEX-B, and PEX-C—each with slightly different flexibility and durability traits. PEX-A, for example, is the most flexible and can be expanded to fit over fittings, while PEX-B is stiffer but often cheaper. The type you choose will influence the fittings you need, so it's worth noting this upfront, especially if you're sourcing materials from a pex pipe and fitting supplier who might offer all three variants.
The Big Four: Key Factors That Dictate PEX Fitting Sizing
Sizing PEX fittings isn't just about picking a diameter that "looks right." It's a balancing act between four critical factors. Let's break them down one by one:
1. Flow Rate: How Much Water Do You Need?
Flow rate, measured in gallons per minute (GPM), is the amount of water that needs to pass through a pipe at any given time. Think about it: A single bathroom sink might only need 1 GPM, but a commercial kitchen with multiple faucets and a dishwasher could require 5 GPM or more. If your fittings are too small, the flow rate drops, leading to weak showers or slow-filling tubs. Too large, and you're wasting money on unnecessary material.
To calculate flow rate, start by listing all the fixtures connected to the PEX line. Each fixture has a "fixture unit" (FU) rating—a standard measure of how much water it uses. For example: a toilet is 1.6 FUs, a showerhead is 2.5 FUs, and a kitchen faucet is 2 FUs. Add up the FUs for your system, then use a flow rate chart (most pex pipe and fitting solutions providers offer these) to convert total FUs to GPM. This number will be your starting point for sizing.
2. Water Pressure: Don't Let It drop Too Low
Water pressure, measured in pounds per square inch (PSI), is the force pushing water through your pipes. Even if your flow rate is correct, low pressure can still cause problems. As water travels through pipes and fittings, friction slows it down—a phenomenon called "pressure drop." Longer pipe runs and smaller fittings increase pressure drop. For example, a 1/2-inch PEX pipe might work for a 20-foot run to a bathroom, but if that same pipe has to stretch 50 feet to a second-floor shower, the pressure could drop below the recommended 40-60 PSI range.
Most PEX manufacturers provide pressure drop tables that show how much pressure you'll lose based on pipe diameter, length, and flow rate. When in doubt, err on the side of a slightly larger diameter to keep pressure steady.
3. Pipe Diameter: The "Size" in Sizing
PEX pipes and fittings come in standard diameters: 3/8 inch, 1/2 inch, 3/4 inch, 1 inch, and larger. For residential projects, 1/2 inch and 3/4 inch are the most common. A 1/2-inch line typically handles individual fixtures (like a bathroom sink or toilet), while 3/4 inch is better for main lines feeding multiple fixtures (like a whole-house water supply). Commercial projects, like office buildings or hotels, often use 1-inch or larger pipes to meet higher flow demands.
Pro tip: When connecting different diameters (e.g., a 3/4-inch main line splitting into 1/2-inch branches), use reducing fittings to ensure a smooth transition. Your pex pipe and fitting supplier can help you find the right adapters here.
4. Fitting Type: Crimp, Clamp, Push-to-Connect… Oh My!
PEX fittings come in several styles, and each has unique sizing quirks. Let's break down the most common types:
- Crimp Fittings: These use a metal ring (copper or stainless steel) crimped onto the PEX pipe with a tool. Sizing here is straightforward—match the fitting diameter to the pipe diameter (e.g., 1/2-inch fitting for 1/2-inch PEX). Just ensure the crimp ring is the correct size for the fitting; a ring that's too loose won't seal, and one that's too tight can crack the pipe.
- Clamp (Cinch) Fittings: Similar to crimp fittings but use a stainless steel clamp instead of a ring. They're often easier for DIYers since they use a single cinch tool. Sizing rules are the same as crimp fittings: diameter must match the pipe.
- Push-to-Connect (PTC) Fittings: These "snap" onto PEX pipes without tools, making them popular for quick repairs. While convenient, PTC fittings have stricter sizing tolerances—even a tiny burr on the pipe end can prevent a tight seal. Always check the manufacturer's specs for pipe OD (outer diameter) compatibility.
- Expansion Fittings: Used with PEX-A tubing, these require expanding the pipe with a special tool before inserting the fitting. Sizing here is critical because over-expanding can weaken the pipe, while under-expanding won't let the fitting seat properly. Most expansion fittings are labeled with the pipe size (e.g., "1/2-inch PEX-A") for clarity.
PEX Fitting Sizing Cheat Sheet: Common Types & Applications
To make sizing easier, I've put together a table of the most widely used PEX fittings, their typical sizes, and the projects they're best suited for. This is based on data from leading pex pipe and fitting solutions providers and real-world project:
| Fitting Type | Common Sizes (Inches) | Best For | Key Sizing Note |
|---|---|---|---|
| Crimp Elbow | 1/2, 3/4, 1 | Residential bathrooms, kitchens, short pipe runs | Use crimp rings labeled for the fitting size (e.g., 1/2-inch ring for 1/2-inch elbow) |
| Clamp Tee | 3/4 x 3/4 x 1/2, 1 x 1 x 3/4 | Splitting main lines to multiple fixtures (e.g., a 3/4-inch main feeding two 1/2-inch branches) | Branch size must match the fixture's flow rate needs |
| Push-to-Connect Coupling | 1/2, 3/4 | Emergency repairs, temporary setups | Ensure pipe OD is within ±0.005 inches of the fitting's spec |
| Expansion Reducer | 3/4 to 1/2, 1 to 3/4 | Transitioning from main lines to fixture lines in PEX-A systems | Expansion tool must match the larger pipe size (e.g., use a 3/4-inch tool for a 3/4-to-1/2 reducer) |
| Crimp Valve (Ball or Gate) | 1/2, 3/4 | Shutting off water to individual fixtures (e.g., under-sink valves) | Valve port size must equal pipe size to avoid restricting flow |
Step-by-Step: How to Size PEX Fittings for Your Project
Let's walk through a real-world example to put all this into practice. Imagine you're building a small residential home with two bathrooms, a kitchen, and a laundry room. Here's how you'd size the PEX fittings:
Step 1: List All Fixtures and Calculate Total Fixture Units (FUs)
Start by mapping out every fixture that uses water. For this home, we have:
- 2 bathrooms: Each has a toilet (1.6 FUs), a shower (2.5 FUs), and a sink (2 FUs) → 2 x (1.6 + 2.5 + 2) = 12.2 FUs
- Kitchen: 1 sink (2 FUs) + 1 dishwasher (2 FUs) → 4 FUs
- Laundry room: 1 washer (2 FUs) → 2 FUs
- Total FUs: 12.2 + 4 + 2 = 18.2 FUs
Step 2: Convert FUs to GPM
Using a flow rate chart, 18.2 FUs translates to roughly 10 GPM. This means our main water line needs to deliver 10 GPM to the house.
Step 3: Choose Main Line Diameter
A 1-inch PEX pipe can handle 10-12 GPM with minimal pressure drop over 50 feet or less. Since this home's main line runs about 40 feet from the water meter to the house, 1-inch PEX (PEX-B, in this case) is a safe bet.
Step 4: Size Branch Lines and Fittings
The main line splits into branches: one to the first floor (kitchen, laundry) and one to the second floor (two bathrooms). Let's size the first-floor branch first:
- First-floor fixtures: Kitchen (4 FUs) + laundry (2 FUs) = 6 FUs → ~5 GPM. A 3/4-inch PEX pipe handles 5-7 GPM over 30 feet, so we'll use 3/4-inch PEX here.
- Fittings for first-floor branch: A 1-inch to 3/4-inch reducing tee (to split the main line), 3/4-inch elbows for corners, and 3/4-inch to 1/2-inch reducers at the sink and washer (since those fixtures only need 1/2-inch lines).
- Second-floor branch: 12.2 FUs → ~8 GPM. A 3/4-inch PEX pipe can handle 8 GPM over 20 feet (the distance from the main line to the second floor), so we'll use 3/4-inch here too. Fittings include another 1-inch to 3/4-inch tee, 3/4-inch elbows, and 3/4-inch to 1/2-inch reducers for each bathroom fixture.
Step 5: Verify with Local Codes
Before finalizing, check your local plumbing code. Some areas require 1-inch main lines for homes over 1,500 sq ft, or mandate specific fitting types (e.g., crimp fittings only). Your residential building materials supplier should have copies of local codes on hand, or you can find them online through your city's building department.
Residential vs. Commercial: Sizing Differences You Need to Know
While the basics of sizing apply to both residential and commercial projects, there are key differences to keep in mind—especially if you're working with a commercial building materials supplier on a hotel, hospital, or office space.
Residential Projects: Smaller Scale, Simpler Needs
Most homes have lower flow rates (10-15 GPM max) and shorter pipe runs, so 1/2-inch, 3/4-inch, and 1-inch PEX pipes are standard. Fittings are often crimp or clamp types, which are affordable and easy to install. The main challenge here is balancing fixtures (e.g., ensuring the shower and dishwasher don't fight for water pressure). A good rule of thumb: group high-demand fixtures (like showers and washing machines) on separate branches to avoid bottlenecks.
Commercial Projects: Higher Volume, Tougher Standards
Commercial spaces—think hospitals, schools, or stadiums—have drastically higher flow demands. A single restaurant kitchen might need 20+ GPM, while a hotel with 100 rooms could require 50+ GPM. This means larger pipes (1.5-inch to 2-inch PEX) and more robust fittings, often made from brass or stainless steel for durability.
Commercial projects also face stricter regulations. For example, hospitals require class a fireproof cpl inorganic board for walls, but their plumbing systems must also meet lead-free standards (under the Safe Drinking Water Act) and have redundancy (backup lines in case of failure). pex pipe and fitting solutions for commercial use often include pressure-balancing valves and flow restrictors to meet these codes.
Another key difference: commercial PEX systems often use manifold systems, where a central manifold feeds individual lines to each fixture. This allows for precise control over flow and pressure, but it requires careful sizing of manifold ports and fittings. Your commercial building materials supplier can help design a manifold layout tailored to your project's needs.
Oops! Common Sizing Mistakes and How to Fix Them
Even pros make sizing errors. Here are the most frequent issues I've encountered, plus how to solve them:
Problem: Low Water Pressure in Fixtures
Why it happens: Undersized pipes or fittings, or a pressure drop from long pipe runs. For example, using 1/2-inch PEX for a 40-foot run to a master bathroom instead of 3/4-inch.
Fix: Upgrade to a larger pipe size for the affected branch. If that's not possible (e.g., pipes are already behind walls), install a booster pump to increase pressure. Consult your pex pipe and fitting supplier for pump sizing recommendations.
Problem: Leaks at Fittings
Why it happens: Fitting size doesn't match the pipe, or the pipe wasn't cut straight. For PTC fittings, a misaligned O-ring can also cause leaks.
Fix: Cut the pipe square with a PEX cutter (never use a hacksaw, which leaves burrs). Check that the fitting diameter matches the pipe (e.g., 3/4-inch fitting for 3/4-inch PEX). For crimp/clamp fittings, use a gauge to verify the crimp is tight but not over-crimped.
Problem: Noisy Pipes (Water Hammer)
Why it happens: Oversized pipes or fittings allow water to flow too fast, causing it to slam against valves when they close.
Fix: Install water hammer arrestors near fixtures (these absorb shock) or downsize the pipe/fittings to slow flow. A 1/2-inch pipe instead of 3/4-inch for a single fixture often quiets things down.
Wrapping Up: Sizing Success Starts with Preparation
Sizing PEX pipe fittings might seem intimidating at first, but it's really just about understanding your project's needs: how much water you need, how far it has to travel, and what fixtures it's feeding. By following the steps in this guide—calculating FUs, converting to GPM, choosing the right pipe diameter, and verifying with local codes—you'll avoid the most common pitfalls.
And remember, you don't have to do it alone. Whether you're working with a residential building materials supplier on a home renovation or a commercial building materials supplier on a hospital project, their experts can provide flow rate charts, pressure drop calculators, and even on-site consultations to ensure your sizing is spot-on. After all, the best pex pipe and fitting solutions aren't just about the products—they're about the support that helps you get the job done right.
So grab your measuring tape, list out your fixtures, and start sizing. Your future self (and your plumbing system) will thank you.
Tags:
Recommend Products


