
If you've ever stood in a hardware store, staring at a wall of pipes and fittings, wondering how on earth you're going to replace that leaky bathroom pipe or install a new kitchen sink, you're not alone. Plumbing projects can feel intimidating—especially if you're new to DIY. But here's the good news: PEX (cross-linked polyethylene) pipe has revolutionized home plumbing, making it easier than ever for beginners to tackle projects with confidence. Flexible, durable, and affordable, PEX pipes and fittings are designed to simplify installations, even if you've never held a pipe cutter before. In this guide, we'll walk you through everything you need to know to install PEX pipe fittings like a pro, from choosing the right materials to testing your finished system. Let's dive in.
First things first: What exactly is PEX, and why has it become so popular? PEX is a type of plastic pipe made from cross-linked polyethylene, a material that's been treated to create strong chemical bonds, making it resistant to heat, cold, and corrosion. Unlike rigid copper or galvanized steel pipes, PEX bends easily around corners, eliminating the need for multiple elbows and joints. This flexibility not only saves time but also reduces the risk of leaks—fewer connections mean fewer potential problem spots.
PEX pipes are used in both residential and commercial settings, from small bathroom renovations to whole-house plumbing systems. They work with hot and cold water, making them versatile for kitchens, bathrooms, laundry rooms, and even radiant floor heating systems. And here's a win for beginners: PEX installations require minimal tools compared to traditional plumbing. You won't need a torch (goodbye, fire risk!) or specialized soldering skills. With the right fittings and a little patience, you can have a functional plumbing system up and running in no time.
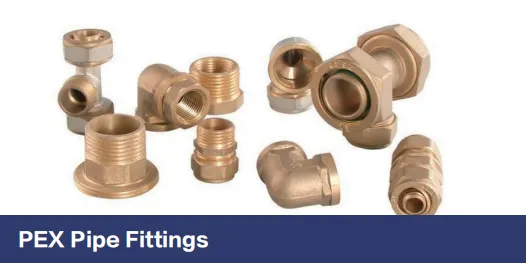
But PEX pipes are only as good as the fittings that connect them. PEX fittings are designed to create secure, watertight connections between pipes, fixtures, and appliances. They come in a variety of styles to suit different installation methods, and choosing the right one depends on your project, budget, and skill level. Later in this guide, we'll break down the most common fitting types and help you decide which is best for your needs. For now, rest assured that PEX pipe and fitting solutions are designed with DIYers in mind—so even if you're a complete beginner, you've got this.
Before you start shopping for materials, it's important to understand the different types of PEX pipes and fittings available. Not all PEX is created equal, and choosing the right one will ensure your installation lasts for decades. Let's break it down.
PEX pipes are categorized into three main types: PEX-A, PEX-B, and PEX-C. The difference lies in the manufacturing process, which affects flexibility, durability, and cost.
For most home projects, PEX-B is the way to go. It strikes the perfect balance between cost, flexibility, and ease of use—exactly what a beginner needs.
PEX fittings come in a range of styles, each designed for a specific connection method. The three most common are crimp, clamp (or "cinch"), and push-fit fittings. Let's compare them:
| Fitting Method | Tools Needed | Difficulty Level | Best For |
|---|---|---|---|
| Crimp Fittings | Crimp tool, PEX cutter, deburring tool | Moderate (requires practice to get the crimp tight enough) | Residential plumbing, long runs of pipe |
| Clamp (Cinch) Fittings | Cinch tool, PEX cutter, deburring tool | Beginner-friendly (one-size-fits-all tool) | Small projects, tight spaces, quick repairs |
| Push-Fit Fittings | PEX cutter, deburring tool (no special tools needed!) | Easy (simply push the pipe into the fitting) | Emergency repairs, temporary installations, or anyone who hates tools |
Each method has its pros and cons. Crimp fittings are the most affordable but require a specialized tool for each pipe size (e.g., ½-inch vs. ¾-inch). Clamp fittings use a single tool that works for all sizes, making them more versatile for beginners. Push-fit fittings, like SharkBite or Viega PureFlow, are the quickest and easiest—no tools required—but they're also the most expensive. For most DIY projects, clamp fittings are a great middle ground: affordable, easy to use, and reliable.
When shopping for fittings, you'll also notice they come in different shapes: tees (for branching lines), elbows (for corners), couplings (for extending pipes), and adapters (for connecting PEX to copper or threaded fixtures). Make sure to choose fittings that match your pipe type (e.g., PEX-B fittings for PEX-B pipe) and the connection method you've selected. Reputable pex pipe and fitting suppliers will clearly label their products, so don't hesitate to ask for help if you're unsure.
Before you start cutting pipes, it's critical to gather all the tools and materials you'll need. There's nothing more frustrating than getting halfway through a project only to realize you're missing a deburring tool or a pack of fittings. Let's create your checklist.
You don't need a fully stocked workshop, but these tools are non-negotiable:
| Tool Name | Purpose | Tips for Use |
|---|---|---|
| PEX Cutter | To cut PEX pipes cleanly and straight | Look for a ratcheting cutter—it makes cutting thick pipes easier. Avoid using a hacksaw, which can leave jagged edges. |
| Deburring Tool | To remove burrs (rough edges) from cut pipe ends | Run the tool around the inside and outside of the pipe to prevent damage to O-rings in fittings. |
| Measuring Tape & Marker | To measure and mark pipe lengths | Measure twice, cut once! Add an extra inch to your measurements to account for insertion into fittings. |
| Crimp Tool or Cinch Tool | To secure crimp or clamp fittings | For crimp tools, match the tool size to your pipe (e.g., ½-inch tool for ½-inch pipe). Cinch tools work for all sizes. |
| Pipe Clamp or Hanger | To secure pipes to walls or joists | Use plastic or metal hangers designed for PEX—avoid copper hangers, which can cause corrosion. |
| Teflon Tape | To seal threaded connections (e.g., PEX to copper adapters) | Wrap tape clockwise around threads to prevent unraveling when tightening. |
| Adjustable Wrench | To tighten threaded fittings | Use a pipe wrench for extra leverage, but be careful not to over-tighten (you could crack the fitting). |
| Safety Glasses & Gloves | To protect your eyes and hands | Deburring pipes can send plastic shards flying—safety first! |
Now, let's gather your materials. Start by calculating how much pipe and how many fittings you'll need. Draw a rough sketch of your project (e.g., a new bathroom vanity or a whole-house water line) and note the length of each pipe run and the number of tees, elbows, and couplings required. Don't forget to include:
Before you start cutting pipes, take a few minutes to prepare your workspace and ensure safety:
Now that you're prepared, it's time to start installing your PEX pipes and fittings. We'll walk through the process using clamp fittings (cinch method), as they're the most beginner-friendly. If you're using crimp or push-fit fittings, the steps are similar—just adjust the connection method as needed.
Start by measuring the distance between the two points you're connecting (e.g., from the main water line to your bathroom sink). Use your measuring tape to get an accurate length, then add 1 inch to account for the pipe inserting into the fitting. Mark the pipe with a marker, then place it in the PEX cutter. Line up the mark with the cutter's blade, squeeze the handles, and let the ratchet do the work—no need to force it. The cut should be straight and clean. If it's jagged, recut the pipe (a clean cut is critical for a tight seal).
Pro tip: If you're cutting PEX in a tight space (e.g., under a sink), use a mini PEX cutter—they're smaller and easier to maneuver than standard cutters.
After cutting, use your deburring tool to remove any burrs from the inside and outside of the pipe. Burrs can damage the O-ring inside the fitting, leading to leaks. insert the tool into the pipe and twist it clockwise to smooth the inside edge, then run the outside edge along the tool to remove any plastic shavings. Wipe the pipe end with a clean cloth to remove debris.
Take your clamp ring (the stainless steel band that secures the fitting) and slide it over the end of the PEX pipe. Make sure the ring is at least ½ inch from the pipe end—you'll slide it down later to secure the fitting. Next, take your fitting (e.g., a tee, elbow, or coupling) and check that the O-ring is intact (it should be seated in the groove inside the fitting). If the O-ring is missing or damaged, replace the fitting—never use a fitting with a faulty O-ring.
Push the pipe end firmly into the fitting until it hits the stop (you'll feel a slight resistance). To ensure it's fully inserted, check the fitting's insertion depth mark (most fittings have a line indicating how far the pipe should go). If there's no mark, measure the fitting's socket depth and mark the pipe accordingly before inserting. Once inserted, give the pipe a gentle tug to confirm it's secure—it shouldn't pull out easily.
Slide the clamp ring down the pipe until it's centered over the fitting's barb (the raised ridge where the pipe meets the fitting). Place the cinch tool over the clamp ring, with the tool's jaws aligned with the ring's tab. Squeeze the tool handles until the ring is fully compressed—the tab should break off, indicating a tight seal. Release the tool and inspect the ring: it should be evenly crimped around the pipe and fitting. If the tab doesn't break, squeeze the tool again (you may need to adjust your grip).
Pro tip: If you're using a crimp tool instead, place the crimp ring over the pipe, insert the fitting, then position the crimp tool over the ring and squeeze until the tool releases. For push-fit fittings, simply push the pipe into the fitting until it clicks—no clamp or crimp needed!
Continue measuring, cutting, and connecting pipes and fittings until your entire system is assembled. For branching lines (e.g., splitting a main line to feed a toilet and sink), use a tee fitting: cut the main pipe, insert the tee, and connect the two new branches. For corners, use an elbow fitting, and for extending a line, use a coupling.
Remember to leave some slack in the pipes—PEX expands and contracts with temperature changes, so rigidly securing every inch can cause stress and leaks. Use pipe hangers to support the pipes every 3–4 feet horizontally and 1–2 feet vertically, but avoid over-tightening the hangers (they should hold the pipe securely without crushing it).
When connecting PEX to existing plumbing (e.g., copper pipes or threaded valves), use an adapter fitting. For example, if you're connecting PEX to a copper pipe, use a PEX-to-copper adapter: solder the copper end to the existing pipe (or use a push-fit adapter if you don't want to solder), then connect the PEX end using your chosen method. Wrap threaded connections with Teflon tape before tightening to prevent leaks.
For fixtures like faucets or toilets, use a PEX stub-out bracket to secure the pipe to the wall, then connect the fixture with a braided supply line. Make sure the stub-out is straight and at the correct height (typically 8–10 inches above the vanity for a sink, or 6 inches above the toilet flange).
Before you call the project done, you need to test for leaks. Here's how:
If everything checks out, congratulations—you've installed your PEX pipe fittings! If you run into issues, don't panic—most leaks are caused by simple mistakes (e.g., a loose clamp or under-inserted pipe) that are easy to fix.
The success of your installation depends largely on the quality of your materials. A cheap, poorly made PEX pipe or fitting might save you money upfront, but it could fail prematurely, leading to costly water damage. That's why choosing a reputable pex pipe and fitting supplier is so important. Here's what to look for:
Look for suppliers whose products meet industry standards, such as NSF/ANSI 61 (for safe drinking water) and ASTM F876/F877 (for PEX pipe and fittings). These certifications ensure the materials are tested for durability, corrosion resistance, and safety. Reputable suppliers will display these certifications on their websites or product packaging—don't hesitate to ask for proof if you don't see them.
The best pex pipe and fitting suppliers offer a wide range of products, including different PEX types (A, B, C), fitting methods (crimp, clamp, push-fit), and accessories (hangers, insulation, tools). They should also have knowledgeable staff who can help you choose the right materials for your project. For example, if you're installing PEX for radiant heating, they should recommend PEX-A (which handles high temperatures best) and compatible expansion fittings.
A good supplier stands behind their products with a strong warranty. Most PEX pipes come with a 25–50 year warranty, but the coverage varies by brand. Ask about warranty details (e.g., what's covered, how to file a claim) and ensure the supplier offers responsive customer support. If you have questions during installation, you want to be able to reach someone who can help.
Additionally, look for suppliers that offer pex pipe and fitting solutions tailored to your needs. Whether you're a homeowner tackling a small bathroom renovation or a contractor working on a commercial project, they should have the materials and expertise to support you. Many suppliers also offer bulk discounts, which can save you money on large projects.
Even with the best materials and tools, mistakes can happen. Here are the most common pitfalls to watch out for:
PEX systems are low-maintenance, but a little care will extend their lifespan:
Check fittings for leaks every few months, especially under sinks, behind appliances, and in unheated areas (e.g., crawl spaces). Look for water stains, mold, or musty odors—these are signs of a hidden leak.
PEX is more freeze-resistant than copper, but it can still burst if water freezes inside. If pipes freeze, turn off the water, open faucets, and thaw them slowly with a hair dryer (never use an open flame). Insulate pipes in unheated areas to prevent freezing.
If water flow slows down, mineral deposits may be building up in fittings. Flush the system by opening all faucets and letting water run for 10–15 minutes. For stubborn deposits, use a vinegar solution (mix equal parts vinegar and water, let sit in the pipes overnight, then flush).
Installing PEX pipe fittings might seem daunting at first, but with the right tools, materials, and guidance, it's a project any beginner can master. PEX's flexibility, durability, and ease of use make it the perfect choice for DIY plumbing, whether you're replacing a single pipe or installing a whole-house system. By following the steps in this guide, choosing quality materials from a reputable pex pipe and fitting supplier, and avoiding common mistakes, you'll have a leak-free plumbing system that lasts for decades.
Remember, every pro was once a beginner. Take your time, double-check your work, and don't be afraid to ask for help if you need it. You've got this—and when you turn on that faucet and see water flowing smoothly through your handiwork, you'll feel a sense of pride that's worth every minute of effort. Happy plumbing!
Recommend Products


