12 Types of PEX Pipe and Fittings and How to Choose Them
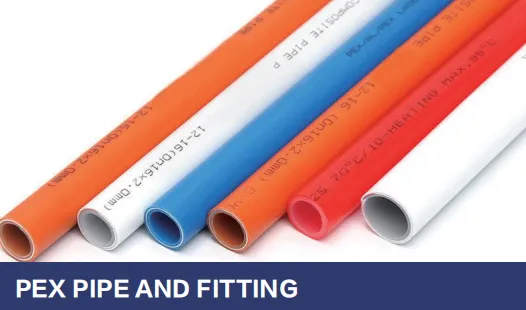
First, What Even is PEX Pipe?
Part 1: 6 Common Types of PEX Pipes
1. PEX-A Pipe
PEX-A is like the "luxury model" of PEX pipes. It's made using the peroxide cross-linking method, which makes it super flexible—you can bend it into a tight circle without cracking, even in cold weather. This flexibility is a lifesaver if you're installing pipes in tight spaces, like behind walls or under floors. It also has the best resistance to kinking and can expand up to 300% its diameter if it freezes, then shrink back without bursting. The downside? It's pricier than other types, so it's often saved for projects where flexibility is non-negotiable, like custom home builds or retrofits with tricky layouts.
2. PEX-B Pipe
PEX-B is the "everyday hero"—the most popular type for residential use. It uses the silane cross-linking method, which makes it a bit stiffer than PEX-A but still way more flexible than copper. It's durable, affordable, and works for most standard water supply systems (think kitchen sinks, showers, and toilets). Installers love it because it's easy to cut and connects well with crimp or clamp fittings. The only catch? It can't handle as much bending as PEX-A, so you might need more elbows and tees in tight corners. But for most homes, it's the sweet spot between cost and performance.
3. PEX-C Pipe
PEX-C is the "budget-friendly option" of the bunch. It's made with electron beam cross-linking, which is a faster manufacturing process, so it's usually cheaper than both PEX-A and PEX-B. It's flexible enough for basic installations, like running pipes in open walls or under cabinets, but it's not as tough against high temperatures or heavy pressure. You'll often see it in small-scale projects, like adding a wet bar or replacing a single fixture's supply line. Just note: It's not the best choice for main water lines or hot water systems that run all day.
4. PEX-AL-PEX (Aluminum Layered PEX)
PEX-AL-PEX is the "reinforced version"—it has a thin aluminum layer sandwiched between two layers of PEX. This aluminum layer makes it rigid enough to stand up straight on its own (no need for extra supports!) and helps it resist expansion from heat. It's perfect for radiant floor heating systems, where pipes are often embedded in concrete, or for outdoor installations where UV rays might damage regular PEX. The tradeoff? It's heavier and harder to bend than plain PEX, so you'll need special tools to cut and connect it.
5. Oxygen Barrier PEX Pipe
Oxygen barrier PEX (often called PEX-O) is like a "protective shield" for metal components in your system. It has an extra layer that blocks oxygen from seeping through the pipe and reacting with metal parts like boilers or radiators (which can cause rust and corrosion). This is a must-have for hydronic heating systems (think hot water baseboards or radiators) or any setup with iron or steel components. If you use regular PEX here, you might end up with a clogged system in a few years—definitely not worth the risk!
6. Non-Barrier PEX Pipe
Non-barrier PEX is the "simplest version"—no extra layers, just pure cross-linked polyethylene. It's ideal for cold and hot water supply systems where there are no metal components to worry about (like plastic or brass fixtures). It's lightweight, easy to install, and cheaper than oxygen barrier PEX. Most residential water lines use this type because it checks all the boxes: flexible, durable, and affordable. Just remember: Never use it for heating systems with metal parts—oxygen can sneak in and cause trouble.
Part 2: 6 Essential PEX Fittings
7. PEX Crimp Fittings
Crimp fittings are the "old reliable" of PEX connections. They're small metal rings (usually copper) that you slide over the pipe, then squeeze tight with a crimping tool to create a seal. They're affordable, widely available, and work with all PEX types (A, B, C). Installers like them because the crimp creates a super tight seal—if done right, they rarely leak. The downside? You need a specific crimping tool (which can cost $50–$200), and if you crimp too hard or too soft, you'll have to cut the pipe and start over. Pro tip: Always check the crimp with a gauge tool to make sure it's tight enough.
8. PEX Clamp (Cinch) Fittings
Clamp fittings (also called cinch fittings) are the "DIY-friendly alternative" to crimps. Instead of a copper ring, they use a stainless steel clamp with a small tab that you tighten with a cinch tool (a handheld device that looks like pliers). They're faster to install than crimps—no need to line up the tool perfectly—and the clamps are reusable if you make a mistake. They work well with PEX-B and PEX-C, though some pros prefer crimps for PEX-A. The only downside? The clamps can be harder to inspect than crimp rings, so you need to make sure the tab is fully tightened.
9. PEX Push-to-Connect Fittings
Push-to-connect fittings are the "no-tool wonder"—perfect for renters or anyone who hates dealing with special equipment. You simply cut the pipe, push it into the fitting, and a rubber O-ring inside seals the connection. They're great for quick repairs, like fixing a leaky shower valve, or for temporary setups. But here's the catch: They're more expensive than crimp or clamp fittings, and some plumbers warn that the O-rings can degrade over time, especially in hot water systems. Save these for emergencies or small projects, not your main water line.
10. PEX Expansion Fittings
Expansion fittings are the "match made for PEX-A." Since PEX-A is so flexible, you can use an expansion tool to stretch the pipe, slide the fitting in, and let the pipe shrink back to form a tight seal. No rings or clamps needed—just the pipe and fitting. This method creates a super strong connection that's resistant to leaks and can handle high pressure. The downside? The expansion tool is pricey (over $300), so it's mostly used by professional plumbers. If you're doing a big project with PEX-A, though, it's worth hiring someone who knows how to use these—your pipes will thank you later.
11. PEX Threaded Fittings
Threaded fittings are the "bridge between PEX and other materials." They have male or female threads on one end (like the kind you'd see on a garden hose) and a PEX connection on the other. Use them to connect PEX pipes to brass valves, copper fixtures, or even old galvanized steel pipes. For example, if you're replacing a copper water heater with a new one, you'd use a threaded PEX fitting to connect the PEX pipe to the heater's brass outlet. Just make sure to wrap the threads with Teflon tape or pipe dope to prevent leaks—threaded connections can be tricky with PEX, so don't skip this step!
12. PEX Manifold Systems
Manifold systems are the "central hub" of a modern PEX plumbing setup. Instead of running one main pipe that branches off with tees (like traditional plumbing), a manifold is a box with multiple outlets—each one feeds a single fixture (sink, toilet, shower). This means better water pressure (no more shower going cold when someone flushes the toilet!) and easier repairs (you can shut off one fixture without turning off the whole house). Manifolds are more common in new builds, but they're worth considering for renovations if you want a high-performance system. They work with all PEX types, but you'll need to size the manifold correctly (more outlets for bigger homes).
How to Choose the Right PEX Pipe and Fittings
Step 1: Figure Out Your Use Case
Start by asking: What's this pipe for? If it's for your main water supply (carrying cold and hot water to fixtures), PEX-B or PEX-A will work. For radiant floor heating, go with oxygen barrier PEX (to protect the boiler) or PEX-AL-PEX (for rigidity). If it's a small project, like a guest bathroom sink, PEX-C might be enough. And for outdoor systems (like a pool heater), make sure the pipe is UV-resistant—most PEX pipes degrade in direct sunlight, so you'll need a special coating or to bury them.
Step 2: Check Temperature and Pressure Needs
PEX pipes are rated for different temperatures and pressures. Most residential water systems run at 40–80 psi (pounds per square inch) and 140°F (hot water). PEX-A and PEX-B can handle this easily, but PEX-C might struggle with constant 140°F water. If you have a tankless water heater (which can heat water to 180°F), go with PEX-A (it's rated up to 200°F) or check the pipe's specs—look for a "temperature/pressure rating" (TPR) label. Fittings matter too: Make sure they're rated for the same pressure as the pipe—using a low-pressure fitting with a high-pressure pipe is a disaster waiting to happen.
Step 3: Think About Installation Environment
Where will the pipes go? If they're buried in concrete (like under a slab floor), oxygen barrier PEX is a must—oxygen can seep through regular PEX and rust the concrete. If they're in a crawl space or attic (where temperatures drop below freezing), PEX-A is better because it expands more when frozen. For walls, PEX-B is fine, but leave a little slack—pipes expand and contract with temperature changes, and tight pipes can kink. Also, avoid installing PEX near sharp edges (like metal studs) without a protective sleeve—even a small nick can cause a leak later.
Step 4: Consider Your Budget
PEX pipes and fittings range in price, so set a budget before you start. PEX-A is the most expensive (about $0.50–$1 per foot), followed by PEX-B ($0.30–$0.70 per foot) and PEX-C ($0.20–$0.50 per foot). Fittings add up too: crimp/clamp fittings cost $0.50–$2 each, push-to-connect cost $3–$8 each, and manifolds can be $50–$200. If you're on a tight budget, PEX-B with crimp fittings is the way to go. If you can splurge, PEX-A with expansion fittings will last longer and be easier to install in tricky spots.
Step 5: Make Sure Everything is Compatible
This is crucial: Pipes and fittings must work together. For example, PEX-A expands, so it pairs best with expansion fittings. PEX-B is stiffer, so crimp or clamp fittings work better. And always buy from a reliable pex pipe and fitting supplier —cheap, off-brand fittings might not seal properly, leading to leaks. If you're not sure, ask the supplier for a compatibility chart, or look for the "PEX" logo on both the pipe and fittings—this means they're tested to work together. Remember, the best pex pipe and fitting solutions are ones where every part is designed to fit.
Step 6: Check Local Plumbing Codes
Last but not least: Don't ignore local codes. Some areas have rules about which PEX types can be used. For example, California requires PEX pipes to meet certain fire safety standards, and some cities don't allow push-to-connect fittings for main water lines. Your local building department can give you a list of approved materials, or ask your plumber—they'll know the ins and outs. Skipping this step could mean failing an inspection, which is way more hassle than checking first.
Putting it all together: If you're building a new home with radiant heating and a manifold system, go with PEX-A oxygen barrier pipe and expansion fittings. For a kitchen renovation (new sink and dishwasher), PEX-B with crimp fittings will do the job. And for a quick bathroom repair, grab some PEX-C and push-to-connect fittings. No matter what, take your time choosing—your plumbing system is one place where cutting corners isn't worth it.
Final Thoughts
Tags:
Recommend Products


