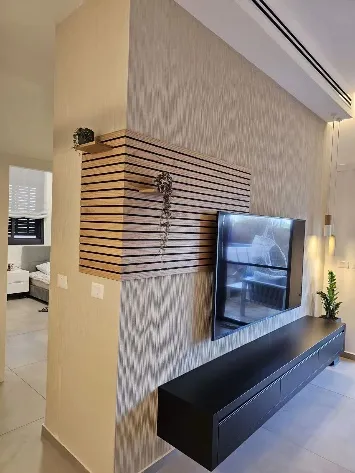
Picture rainwater dancing on wooden cladding after a storm. That beautiful visual hides a battle beneath the surface – wood fighting its archenemy moisture . Defined simply as "liquid diffused or condensed in relatively small quantity" (Merriam-Webster), this silent adversary warps, rots, and decays timber faster than you'd imagine. That's why professional wall cladding system installations depend entirely on mastering moisture-barrier techniques.
Just like surgeons focus on preventing infection during operations, builders must become moisture-control specialists. This 5000+ word guide explores battle-tested techniques for installing moisture-barrier membranes beneath sawn timber cladding. We'll move beyond theory into practical field wisdom that preserves wood's beauty and structural integrity for decades.
Why Moisture Management is Non-Negotiable
Wood behaves like a sponge – absorbing and releasing moisture based on environmental conditions. At around 25-30% moisture content, fungal decay activates, while constant wetting-drying cycles cause cupping, cracking, and checking. Moisture-barrier membranes serve as permanent shields against:
- Liquid water intrusion from rain, snow, and sprinklers
- Capillary action drawing groundwater upwards
- Condensation forming within wall assemblies
- Air-transported moisture infiltrating through gaps
The magic happens at the membrane interface between timber and sheathing. Quality moisture barriers allow incidental water to drain while blocking vapor diffusion – but only when installed correctly.
Selecting Your Moisture Barrier
Material Options Compared
Self-adhered membranes : Peel-and-stick rubberized asphalt systems offering maximum water resistance. Require pristine surfaces but eliminate fastener penetrations. Excellent for complex details.
Fluid-applied coatings : Seamless liquid membranes that conform perfectly to irregular surfaces. Need proper curing times before cladding installation.
Mechanically fastened sheets : Polypropylene or polyethylene fabrics installed with cap nails. Offer excellent drainage but require meticulous overlapping.
Critical Tip: Always pair moisture barriers with WRB (Weather-Resistive Barrier) systems creating a continuous water-managed assembly per IBC 1404.2 requirements.
Preparation: The Foundation of Success
90% of moisture barrier failures originate with inadequate prep work. Follow this checklist religiously:
- Pressure-wash substrates to remove dirt, oils, and loose material
- Fill cracks >1/8" wide with elastomeric sealant
- Sand rough surfaces to prevent membrane puncture
- Apply primer if specified by membrane manufacturer
- Establish drainage plane geometry ensuring 1/4" per foot slope
The surface should achieve a "clean-room" level where you'd feel comfortable applying surgical tape to your skin – that's the adhesion standard required.
Advanced Installation Techniques
Self-Adhered Membrane Application
When applying rubberized asphalt membranes:
- Maintain roll temperature above 50°F (10°C)
- Peel backing gradually as you roll – never fully expose large sections
- Use J-rollers with consistent 25-lb pressure vertically and horizontally
- Overlap seams by 4" minimum, sealing with manufacturer's bonding adhesive
- Terminate at flashing with fluid-applied sealant dam
Flashings Integration
Where membranes meet flashings:
- Apply membrane 1" past flashing edge onto adjacent surfaces
- Bed backer rod into corners before sealant application
- Install termination bars 3/4" from flashing edges
- Seal fastener heads individually with urethane sealant
Cladding Attachment Protocols
When fastening timber through the membrane:
Staples: Absolutely forbidden – they create microtears along crown points.
Screws: Only use corrosion-resistant types with integral washers. Drive perpendicular to surface – never angled.
Blind fastening: Clip systems allow installation without membrane penetrations. Ideal for self-adhered membranes.
⚠️ Crucial: Never exceed 20% membrane compression under fastener plates. Over-compression fractures rubberized asphalt over time.
Testing & Quality Assurance
Conduct these field tests before proceeding:
- Peel test: 24 hrs post-installation, attempt lifting at corners – minimum 15 pli adhesion required
- Water column test: Apply water pond against seams – zero penetration after 10 minutes
- Visual inspection: All seams sealed, no wrinkles >1/4" high, no exposed substrate
- Fastener pattern: Verify spacing matches engineering design
Document results with timestamped photos stored in project archives. This becomes invaluable warranty documentation.
Regional Adaptation Strategies
Coastal areas: Use fluid-applied membranes with zinc additives preventing salt-induced degradation. Increase fastener spacing by 15% to account for accelerated corrosion.
Freeze-thaw zones: select membranes rated for movement >15% elongation. Install sacrificial drainage mats beneath timber.
Arid climates: Prioritize vapor permeability – select membranes exceeding 20 perms rating to allow interior moisture escape.
Long-Term Maintenance Protocols
Effective moisture barriers require periodic monitoring:
- Quarterly inspection of termination points and penetrations
- Infrared thermography scans to detect hidden moisture accumulation
- Record changes in timber moisture content (target: 12-15%)
- Reseal perimeter joints every 5-8 years
- replace damaged membrane sections immediately using double-bonded patches
The most durable installations include design features that make future membrane access possible without cladding removal.
Economic Value & Environmental Impact
While quality membranes add 5-10% to initial installation costs, they extend cladding lifespan by decades. Compared to cladding replacement, properly installed moisture barriers:
- Reduce life cycle costs by 30-45%
- Save mature timber resources (1 sq.ft cladding = 7 board ft wood)
- Prevent fungal spores and mildew improving air quality
- Enable deconstruction/reuse instead of demolition at end-of-life
This makes moisture-barrier installation simultaneously an economic investment and environmental stewardship action.
Conclusion
Moisture-barrier installation for timber cladding operates at the intersection of science and craft. While physics determines material behavior, human diligence guarantees performance. When you install these hidden barriers:
- Prepare surfaces like preparing fine furniture
- Apply membranes like laying priceless art canvas
- Seal details like sealing historic documents
This attention transforms moisture management from building code requirement to legacy craft. The techniques shared here create protective layers that honor both nature's material gift and humanity's building traditions.


