
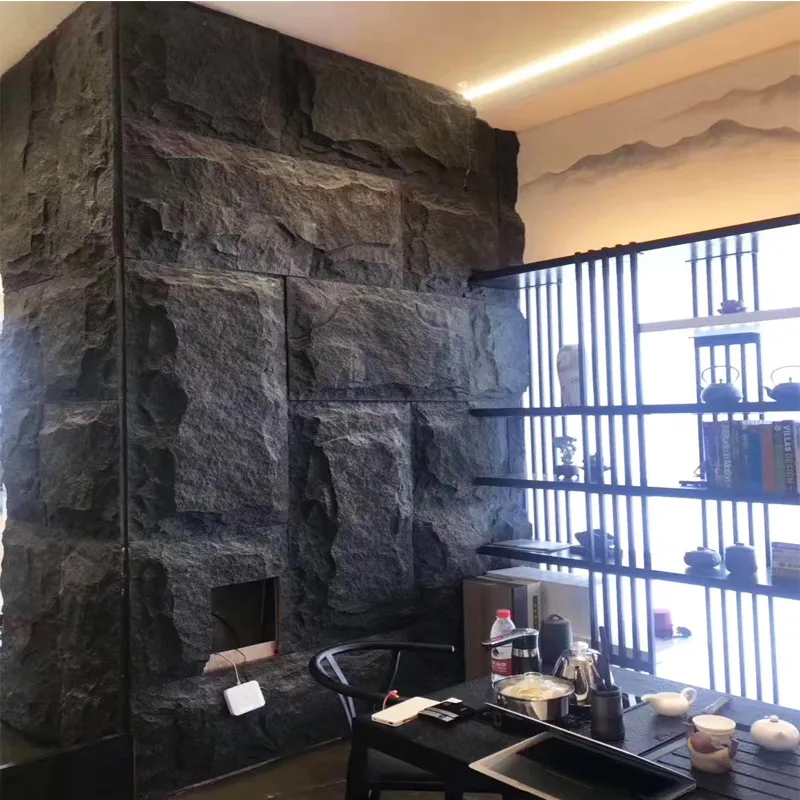
You know that beautiful mushroom stone accent wall in your garden or the rustic stone pathway leading to your front door? There's nothing quite like the timeless, earthy charm of natural stone. But let's be honest—after a season or two, that gorgeous texture starts collecting dust like a magnet, and before you know it, moss and lichen are throwing a green party all over your carefully placed stones. If you've ever run your hand over that rough surface only to come away with a gritty residue, you know exactly what I'm talking about.
Unlike smooth surfaces where dust and moisture slide right off, mushroom stone practically invites these unwelcome guests. Its porous, irregular surface creates perfect little hideouts for dust particles, organic debris, and moisture—creating the ultimate VIP lounge for moss and algae. And once they settle in, they're about as easy to remove as that sticky gum from the bottom of your shoe. But here's the good news: understanding how to fight dust and moss doesn't require a chemistry degree or heavy equipment. With some simple methods and the right approach, you can keep your mushroom stone looking fresh and natural for years.
Picture this: you've just had stunning mushroom stone installed around your fireplace or along your garden path. For the first few months, everything looks perfect—natural, textured, and full of character. But then the seasons change. Dust blown by the wind settles into every nook and cranny. Then comes the rain, and that trapped moisture becomes a cozy home for moss spores. Slowly, that beautiful stone starts looking like it belongs in a forgotten forest rather than your well-kept outdoor space.
The rough surface of mushroom stone is both its greatest asset and biggest vulnerability. While we love how it catches the light and adds rustic charm, those same crevices are dust magnets. According to construction experts, rough surfaces like mushroom stone can trap up to 40% more dust and particulate matter compared to smooth stone finishes. And when moisture enters the picture? You've basically rolled out the welcome mat for moss, algae, and lichens.

You might be tempted to grab that stiff-bristled brush from your garage, but hold on—mushroom stone needs a softer touch. I learned this the hard way when I accidentally scraped the surface of my own stone feature wall. Instead, choose a brush with soft nylon bristles, and work in gentle circles. The Australian tombstone restoration approach shows how effective this can be—just plain water and careful circular brushing restored centuries-old stone without abrasion damage.
Start at the top of your mushroom stone feature and work your way down. Why? Gravity becomes your ally. As you loosen dust and organic matter, it naturally falls downward, so you won't be re-cleaning areas you've already done. Keep a bucket of clean water nearby to rinse your brush frequently, and be prepared for it to take time. That intricate texture means you'll need patience to work into all the crevices—think of it as meditation with visible results!
Now, I know what you're thinking—power washing sounds like the perfect shortcut. But hear me out before you fire up that machine. Power washers can be too aggressive for mushroom stone's delicate surface, potentially blasting away the natural texture that makes it special. Instead, opt for a garden hose with a wide-spray nozzle or a low-pressure electric washer set below 1500 PSI.
Keep the nozzle at least 18 inches from the stone surface and use sweeping motions—never focus the stream in one spot for more than a couple seconds. The goal is to rinse away what you've loosened with brushing, not to pressure-blast the stone. An important note: always check the stability of your stone before wetting it. If you notice loose sections in a dry-laid installation, water pressure could wash away stabilizing sand between stones.

Sometimes water and elbow grease aren't enough, especially when moss has really dug its heels in. That's when carefully chosen cleaning solutions can help—but not all are created equal for delicate mushroom stone. Forget harsh acids or chlorine bleach; they'll damage the stone's natural color and integrity faster than you can say "regret." Instead, turn to gentler options.
Remember that vinegar sitting in your pantry? It's about to become your stone's best friend. A simple solution of equal parts white vinegar and water is shockingly effective against mild moss and algae without damaging the stone. For tougher growth, bump it up to a 2:1 vinegar-water ratio. Apply with a spray bottle, let it sit for 10-15 minutes (no longer, or it could start etching the surface), then gently scrub and rinse thoroughly.
Another winner? Baking soda paste. Mix baking soda with just enough water to create a spreadable paste, apply to affected areas with an old paintbrush, and let it sit for 15-20 minutes. The alkaline nature helps dissolve organic growth. For extra stubborn moss patches, I've had great results with this recipe:
How you apply these solutions matters just as much as what you use. Instead of drenching the entire surface, use a targeted approach . Dip a soft-bristled brush into your cleaning solution and apply only to visibly affected areas. This prevents oversaturation of the stone. Work in sections no larger than 4 square feet at a time, and always rinse completely before moving to the next section.
Watch carefully for color changes—if you notice any whitening or lightening, stop immediately and rinse thoroughly with water. And whatever you do, avoid mixing cleaning solutions unless explicitly directed. Combining vinegar with hydrogen peroxide or bleach creates harmful fumes, and mushroom stone definitely isn't worth a trip to the emergency room!
For extreme cases where moss has established deep roots in the stone's pores, you might need professional stone restoration products. Look for quaternary ammonium-based cleaners (like Wet & Forget) that kill biological growth without bleaching or damaging the stone. These work slowly—over weeks rather than hours—but effectively choke out moss at the root level without chemical runoff damage to nearby plants.
We've all heard it a thousand times: prevention beats cure. But when it comes to mushroom stone, this isn't just a cliché—it's a maintenance lifesaver. The trick lies in understanding what attracts dust and moss in the first place and creating conditions they hate.
Moss needs three things to thrive: moisture, shade, and a surface to cling to. While we can't change the stone's texture, we absolutely can manage moisture. Proper drainage around your stone installation makes all the difference. For paths or walls, ensure at least 1-2% slope away from structures to prevent standing water. Installing simple French drains along elevated stone features can redirect runoff efficiently.
Consider physical moisture barriers too. Thin zinc or copper strips installed just above mushroom stone wall panels (especially useful for wall panel installations) release trace metals during rain that naturally inhibit moss growth—a trick borrowed from traditional roofing methods. They're virtually invisible but incredibly effective, working for years without maintenance.
Construction studies show consistent watering schedules reduce airborne dust by up to 85%, and the same principle applies to existing stone features. If you live in a dusty area, lightly misting mushroom stone paths or walls every few days during dry seasons prevents fine particles from settling deep into textures.
For permanent dust control in high-exposure areas, consider stone-safe anti-dust treatments. Polymer-based solutions form invisible bonds with the stone's surface, reducing dust adhesion by creating a microscopic barrier without changing appearance. Apply using the "damp sponge method"—lightly wipe the solution onto clean, dry stone with a barely damp sponge. Reapply annually for sustained protection.
Never underestimate the power of smart landscaping either. Trimming overhanging branches reduces shade and organic debris accumulation, while planting drought-resistant, low-dust ground cover near stone features creates a natural dust barrier. Succulents like sedum or thyme work wonderfully and add beauty without constant maintenance.

Even with perfect prevention, nature can be relentless. If you discover cracks, chips, or deep discoloration that gentle cleaning won't resolve, there are still solutions beyond replacement. Professional stone consolidants can stabilize and strengthen compromised stone structures. These are typically silane or siloxane-based solutions that penetrate the stone's matrix, binding loose particles without creating a surface film.
For extensive damage requiring partial replacement, source matching mushroom stone and hire restoration specialists. The process involves carefully removing damaged sections without disturbing surrounding stone, then bedding new pieces with color-matched mortar. Though costly, this approach preserves your feature's integrity—often at half the cost of complete reinstallation.
Think of maintaining your mushroom stone like caring for a beloved piece of wooden furniture. Just a little regular attention keeps it looking its best without ever needing drastic intervention. If you're installing new mushroom stone features, consider using stone sealers specifically formulated for porous textures. While they don't make stone "stain-proof," they significantly reduce surface porosity, making routine cleaning much easier.
Maintaining beautiful mushroom stone isn't about harsh chemicals or power tools—it's about understanding how its unique texture interacts with the environment. By starting with the gentlest possible methods, customizing solutions to specific problems, and consistently implementing preventive measures, you can keep that gorgeous natural stone looking spectacular for decades. When treated with respect, mushroom stone's rough texture isn't a cleaning challenge; it's the secret to its enduring, organic beauty.
So next time you see those first dust bunnies gathering in the crevices, don't dread it. Grab your soft brush and that bottle of vinegar, put on some good music, and think of it as meditation time—the calm, repetitive motions are surprisingly therapeutic. And when you step back to admire the results? That clean, natural stone surface will make every minute feel worthwhile.
Recommend Products












