
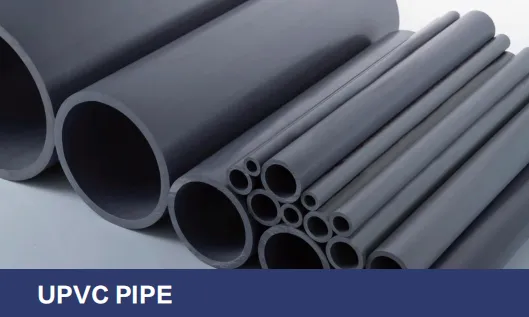
If you've spent any time on a construction site, you know the backbone of any building's plumbing or drainage system lies in the pipes. They're the unsung heroes—quietly carrying water, waste, and essential fluids day in and day out. And when it comes to reliability, cost-effectiveness, and durability, UPVC (Unplasticized Polyvinyl Chloride) pipes have become a go-to choice for contractors across residential and commercial projects. But here's the thing: even the best UPVC pipe solutions are only as good as their installation. A single misstep can lead to leaks, pressure issues, or even system failure down the line—costing you time, money, and your reputation.
In this guide, we're breaking down the installation process step by step, tailored specifically for contractors like you. We'll cover everything from prepping your site to testing the final system, with real-world tips to avoid common pitfalls. Along the way, we'll also touch on why partnering with a trusted UPVC pipe supplier and pipes fittings supplier matters—because quality materials are the foundation of a job well done. Whether you're working on a small residential renovation or a large commercial complex, this guide will help you install UPVC pipe solutions that stand the test of time.
Before you even pick up a pipe cutter, preparation is key. Rushing into installation without proper planning is like building a house without a blueprint—you're setting yourself up for headaches. Let's walk through the prep work that will make the rest of the process smooth sailing.
Start by reviewing the project's blueprints and specifications. What's the purpose of the UPVC system? Is it for potable water supply, drainage, or something else? For example, PVC DWV (Drain, Waste, Vent) pipes are designed for gravity-fed drainage systems, while standard UPVC pipes are better suited for pressurized water lines. Knowing the difference ensures you select the right UPVC pipe solutions for the job.
Next, visit the site to measure the space where pipes will run. Check for obstacles like structural beams, electrical wiring, or existing plumbing that might interfere with your layout. Note any tight corners or vertical runs—these will affect how you cut and join pipes later. It's also smart to mark the pipe routes on walls or floors using a marker and level to keep lines straight.
Here's a truth every contractor learns the hard way: cheap materials lead to expensive problems. When it comes to UPVC pipes and fittings, cutting corners on cost can result in brittle pipes, ill-fitting joints, or pipes that can't handle the required pressure. That's why partnering with a reliable UPVC pipe supplier is non-negotiable.
A trusted UPVC pipe supplier will provide pipes that meet industry standards (like ASTM or DIN specifications) and come with clear labeling of size, pressure rating, and material composition. The same goes for fittings—elbows, tees, couplings, and valves. Work with a pipes fittings supplier who offers a full range of compatible parts; mixing and matching brands or materials can cause leaks. For example, if you're installing a drainage system, ask your PVC DWV pipe supplier about the thickness and slope requirements for the specific project—residential systems often have different needs than commercial ones.
Pro Tip: Always inspect materials upon delivery. Look for cracks, warping, or discoloration in pipes and fittings. If something looks off, contact your UPVC pipe supplier immediately—don't compromise on quality to stay on schedule.
Having the right tools on hand saves time and ensures precision. Here's a breakdown of the essentials, organized by task:
| Tool Category | Essential Tools | Why You Need Them |
|---|---|---|
| Cutting & Measuring | Pipe cutter (ratchet or wheel-type), hacksaw, measuring tape, level, marker | Straight, clean cuts are critical for tight joints. A level ensures pipes slope correctly (especially for drainage). |
| Deburring & Cleaning | Deburring tool, sandpaper (120-grit), cleaning solvent/primer | Removes burrs (rough edges) that can block water flow or damage gaskets. Solvent cleans dirt/oil for better cement adhesion. |
| Joining | Solvent cement (UPVC-specific), applicator brushes, gloves | Solvent cement chemically bonds pipes and fittings—choose one rated for your pipe size and system type. |
| Securing | Pipe clamps/hangers, drill, screws, pipe straps | Prevents pipes from shifting or sagging, which can cause stress on joints. |
| Safety | Safety glasses, work gloves, dust mask, knee pads | Protects against flying debris (from cutting), chemical exposure (solvent cement), and knee strain (from crawling under floors). |
Now that you're prepped, it's time to start cutting pipes to length. This step might seem simple, but even a slightly angled cut can throw off your entire system. Let's break it down.
Measure twice, cut once—you've heard it before, but it bears repeating. Use a measuring tape to determine the length of each pipe run, adding a small buffer (about 1/4 inch) to account for fitting depth. For example, if a pipe needs to span 3 feet between two elbows, measure 3 feet, then mark where the pipe will insert into each fitting (the "socket depth") and subtract that from the total length. Most fittings have a socket depth marked on the side, but if not, a quick check with your pipes fittings supplier can clarify.
Once measured, mark the cut line using a marker and level. Wrap the marker around the pipe to create a straight, even line—this ensures your cut is perpendicular to the pipe's axis. For larger pipes (4 inches or more), using a pipe-marking tool can help keep the line straight.
For UPVC pipes, a ratchet-style pipe cutter is your best bet for clean, straight cuts. Here's how to use it:
If you're using a hacksaw (common for smaller pipes or in tight spaces), use a miter box to keep the cut straight. Saw slowly and evenly, letting the blade do the work—applying too much pressure can bend the pipe or create a jagged edge.
After cutting, use a deburring tool to remove burrs from both the inside and outside of the pipe. Burrs on the inside can restrict water flow, while external burrs can prevent fittings from seating properly. Run the deburring tool around the edge until it's smooth, then use 120-grit sandpaper to lightly sand the outside of the pipe end (about 1 inch from the edge). This roughs up the surface, helping solvent cement adhere better.
Next, clean the pipe end and the inside of the fitting with a lint-free cloth dampened with UPVC cleaning solvent or primer. This removes dirt, oil, and moisture—any of which can weaken the bond between the pipe and fitting. Let the solvent dry for 10-15 seconds (it should look dull) before moving to the next step.
Pro Tip: Never skip cleaning! Even fingerprints can leave oil residues that break down solvent cement over time. A clean surface = a strong joint.
Dry fitting is exactly what it sounds like: assembling the pipes and fittings without using solvent cement to check alignment, length, and fit. Think of it as a dress rehearsal—this is your chance to catch mistakes before they're permanent.
Start by inserting the prepped pipe end into the fitting socket. Push firmly until it hits the bottom of the socket (you'll feel resistance). Mark the pipe and fitting with a small line where they meet—this helps you realign them during the final gluing step. Check the entire assembly for straightness using a level. For drainage systems, ensure the slope is correct (typically 1/4 inch per foot for horizontal runs). If something feels off—a pipe is too short, a fitting is misaligned—now's the time to adjust. Trim pipes or swap out fittings as needed.
Pro tip: Take photos of the dry-fitted system before disassembling. This serves as a reference when you're gluing everything together, especially if you're working with complex layouts.
Solvent cement isn't just glue—it's a chemical that melts the surface of the UPVC, fusing the pipe and fitting into a single piece. Do this step right, and the joint will be stronger than the pipe itself. Do it wrong, and you'll be dealing with leaks.
Not all solvent cements are created equal. Check the label to ensure it's compatible with UPVC pipes and rated for the pipe size and system pressure. For example, low-viscosity cement works best for small pipes (1/2 to 1 inch), while medium or high-viscosity cement is better for larger diameters (2 inches and up). Your UPVC pipe supplier can recommend the right product for your project.
Work in a well-ventilated area—solvent fumes are strong! Follow these steps:
Align the pipe and fitting using the marks you made during dry fitting. Push the pipe into the fitting with a firm, twisting motion (about 1/4 turn) until it hits the bottom of the socket. Hold the joint in place for 30-60 seconds—resist the urge to adjust it, as this can break the bond. You'll notice a small bead of cement oozing out of the joint—this is normal and indicates a tight seal. Wipe away excess cement with a clean cloth dampened with solvent (don't let it dry, as it will harden).
Pro Tip: Work quickly! Solvent cement dries fast—especially in warm weather. If you're working on a long run, glue one joint at a time to avoid rushing.
Even the best joints will fail if pipes aren't properly supported. Sagging pipes can cause water to pool, leading to clogs or leaks, while unsupported vertical runs can pull joints apart over time. Here's how to secure UPVC pipes correctly:
Use pipe clamps, hangers, or straps designed for UPVC—avoid metal supports that can scratch or corrode the pipe. For horizontal runs, the spacing between supports depends on pipe size:
For vertical runs, use wall-mounted brackets every 6-8 feet. Always attach supports to structural elements (studs, joists) rather than drywall or insulation.
Place supports within 12 inches of fittings—these are stress points and need extra reinforcement. Use a level to ensure pipes are straight before tightening supports—over-tightening can warp the pipe, so snug is better than tight. For drainage systems, maintain the required slope (1/4 inch per foot) while securing the pipes—adjust hangers as needed to keep the slope consistent.
You're almost done, but testing is non-negotiable. Even if everything looks perfect, hidden leaks can cause major issues once the system is in use. Here's how to test UPVC pipe solutions effectively:
For pressurized systems (like potable water lines), conduct a pressure test:
For PVC DWV systems, a water test is standard:
A well-installed UPVC system can last 50 years or more with minimal maintenance, but a little care goes a long way. Here are tips to share with your clients (or keep in mind for future inspections):
Installing UPVC pipe solutions isn't just about connecting pipes—it's about delivering a system that works reliably for decades. By following these steps—preparing thoroughly, using quality materials from a trusted UPVC pipe supplier and pipes fittings supplier, and testing rigorously—you'll ensure every job meets the highest standards. Remember, the difference between a good contractor and a great one is in the details: a straight cut, a clean joint, a properly supported pipe. These are the things that make clients recommend you to others and keep coming back.
So the next time you're on site, take pride in the process. Your UPVC installation isn't just part of a building—it's part of your legacy. And with the right approach, it will stand strong for years to come.
Recommend Products


