
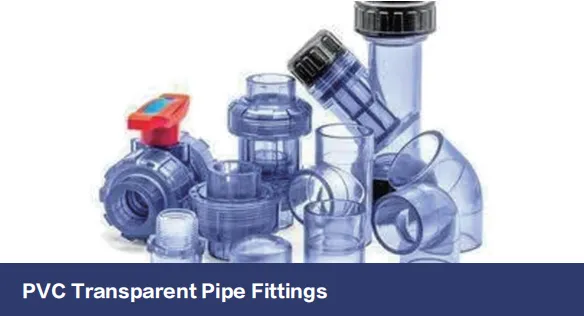
Hey there, DIY enthusiast! If you've noticed your plumbing making funny noises or spotted suspicious damp patches around your pipes, you've come to the right place. Those trusty PVC pipes that quietly carry water around your home? Yeah, they don't last forever, especially those clear ones that let you see the water flowing through. Don't worry though—with some basic know-how and a weekend afternoon, you can tackle this job yourself. I've helped hundreds of homeowners through this process, and I'm going to walk you through it step-by-step with real talk and practical tips.
Transparent PVC pipes give you a sneaky advantage—you can actually see problems developing before they turn into major leaks. But they also require specific handling techniques compared to their opaque cousins. I'll cover all that and more, including how to spot trouble early, choose replacement parts wisely, and do the job safely so you won't be mopping up your basement afterward. Let's roll up our sleeves!
Those see-through pipes in your home? They're typically made from clear PVC (Polyvinyl Chloride) or CPVC (Chlorinated Polyvinyl Chloride). The transparency comes with trade-offs—you gain visibility but lose some UV resistance. If sunlight hits these pipes regularly, they become brittle much faster. Chemical exposure from cleaners or fertilizers can also cloud or weaken them over time.
Here's the life expectancy reality check: standard PVC pipes last 50-80 years, but transparent versions typically need replacement after just 15-25 years. That cloudy appearance? That's your warning sign. Discoloration means the plastic is breaking down internally. Ignore those subtle changes and you'll eventually hear that dreaded POP followed by water gushing everywhere.
Before we start playing plumber, let's get organized. You don't need professional-grade equipment, but having these items ready will make the job infinitely smoother:
| Tool/Material | Purpose | Why It Matters |
|---|---|---|
| PVC Ratchet Cutter | Making clean cuts | Gives precise edges without cracking brittle pipes |
| Clear PVC Primer & Cement | Bonding replacement pieces | Formulated specifically for transparent pipes |
| Tubing Deburrer | Smoothing cut edges | Prevents micro-cracks and ensures tight seals |
| Non-Marking Pipe Grips | Handling pipes | Avoids scratches that weaken transparent material |
| Laser Temperature Gun | Checking material stress | Heat weakens PVC - this spots hidden trouble areas |
| UV-Resistant Pipe Wrap | Protecting replacement | Blocks sunlight degradation where pipes are exposed |
Pro Tip: When buying replacements, look for NSF-61 certified clear PVC pipes—this means they're approved for potable water contact. The minor price difference is worth avoiding chemical leaching.
Your inspection starts with the obvious—look for these visual red flags:
Run your fingers along the pipe—gently! Brittle transparent PVC will feel like delicate antique glass when nearing failure. Healthy pipes have slight flexibility. If your fingernail leaves a permanent mark, replacement is overdue.
Turn off all appliances and get quiet. Place a mechanic's stethoscope or screwdriver against the pipe and your ear. Popping, clicking, or creaking sounds mean internal turbulence from roughness—micro-abrasions worn by flowing water.
Safety Alert: Don't climb ladders alone during inspections! Always have someone spot you, especially when checking ceiling pipes. Wet surfaces around pipes become slip hazards—wear shoes with non-marking rubber soles.
Okay, you've found trouble spots—now let's create the right workspace:
First, contain the water damage if you have leaks already. Place baking sheets beneath drip zones—they'll catch water and reveal flow patterns. Spread old towels over your waterproof flooring (especially important near electrical outlets).
Next, clear a workspace extending at least 3 feet beyond your pipe section. Remove everything under the work area—water travels unpredictably during repairs. Cover nearby electronics with plastic sheeting secured with painter's tape.
Smart Trick: Put your phone in a zip-top bag before starting—you'll still be able to check tutorials or take pictures while keeping it dry!
Locate your main shutoff valve—usually where the water line enters your house or near your water heater. Turn it clockwise until snug. Now open the faucet closest to your repair spot to relieve pressure. Go test faucets throughout your house to ensure water stopped flowing everywhere.
Measure and mark 2 inches beyond any visible damage on both sides—cracks often extend further than they appear. Use your ratchet cutter for clean cuts. Apply gentle pressure—transparent PVC cracks easily when overstressed. Support both sides of the cut to prevent shifting pipes.
For stubborn glue joints: Apply heat carefully with a hair dryer set to medium, moving constantly. Don't use open flames! PVC releases toxic fumes when overheated. After warming, twist fittings slowly while pulling apart.
Measure twice, cut once! Leave 1/4-inch extra length for fittings—compression fittings need this space. Deburr both inner and outer edges after cutting—micro-tears cause slow leaks later.
Before gluing, dry-fit everything. Check for alignment issues—transparent pipes magnify crooked connections. Rotate fittings for best orientation—you want any manufacturer markings hidden from view.
Clear PVC cement needs special handling. Work quickly but precisely—you have only about 15 seconds before the cement starts setting.
Apply clear primer to the pipe end and fitting interior—you'll see it turn translucent white as it penetrates. Immediately follow with clear cement—the primer must stay wet! Give it a slight twist as you push the pipe home to distribute cement evenly. Hold firmly for 30 seconds—don't wiggle! Wipe excess immediately with a clean rag before it dries cloudily.
Wait 2 hours before turning water back on—clear PVC cures slower than opaque. When restoring water, do it slowly! Turn your main valve partially open for 5 minutes before fully opening.
Check joints with toilet paper—it reveals tiny leaks paper towels miss. Pay special attention to transparent joints—look for stress "spiderwebs" around connections.
Prevent future headaches with these practices:
Remember, investing in quality materials from a reputable pvc pipe manufacturer makes all the difference. Their certified products undergo rigorous testing for clarity retention and impact resistance that generic brands skip. Saving a few dollars now often costs ten times more when leaks happen later.
Bonus Trick: Apply a thin coat of food-grade mineral oil annually—wipe it on transparent pipe surfaces to preserve flexibility and clarity. Just avoid joints where it might interfere with adhesion!
Even the most skilled DIYer needs backup sometimes. Call a professional if:
These signal potential systemic issues beyond a simple pipe swap. The inspection fee is worthwhile insurance against water damage nightmares.
Clear PVC pipes are like the canaries in your plumbing coal mine—they reveal problems others hide. By understanding their unique aging signs and replacement needs, you've taken control of your home's plumbing health.
Remember the core truth: preventive replacement saves money. Waiting until pipes leak causes water damage costs averaging $5,000-$70,000 per insurance claim. Your weekend effort today prevents that financial headache tomorrow.
You're now equipped to spot trouble early, replace pipes safely, and extend their lifespan dramatically. Keep those pipes flowing clear and your home dry!
Recommend Products












