


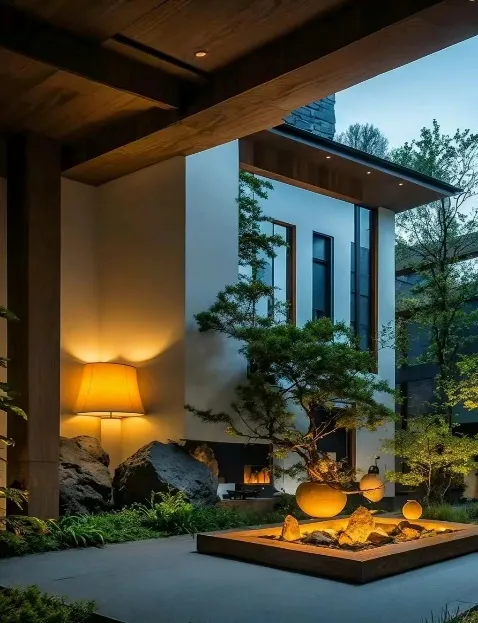
Transform Your Outdoor Space from Dusk Till Dawn
Ever stepped into your garden as the sun dips below the horizon and felt like the magic disappears? Or maybe navigating your path feels a bit like an adventure in the dark? You're not alone. Lighting isn't just about banishing the darkness; it's the secret ingredient that unlocks the full potential of your garden or landscape long after sunset. It sets the mood, highlights your garden's best features, keeps everyone safe, and extends those precious hours you can enjoy your personal outdoor sanctuary.
Think of lighting as the jewelry for your landscape. It doesn't change the structure, but it showcases its beauty in a whole new, often more dramatic, light. Whether you have a sprawling estate, a cozy cottage garden, a sleek modern patio, or just a welcoming front path, the right outdoor lighting strategy can make it feel like a completely different – and utterly enchanting – place at night. And the best part? With options like energy-sipping LED lights and sun-powered solar panels , creating this atmosphere can be surprisingly accessible and eco-friendly. Ready to cast your garden in the best possible light? Let's dive in!
Crafting the Perfect Nighttime Ambiance: Different Lighting Techniques
Great garden lighting isn't about blasting everything with bright light. It's about creating layers, painting with shadows as much as illumination, and guiding the eye. Think of it like setting the stage for your garden's nightly performance. Here’s how different techniques can play their part:
1. Moonlighting: Soft & Natural Radiance
Imagine the gentle, silvery glow of a full moon filtering softly through the branches of a tall tree, dappling the ground below. That's the essence of moonlighting. It creates a broad, natural-feeling wash of light that feels organic and serene.
- How it's Done: Place fixtures (like small spotlights or specially designed "moonlight" fixtures) high up – in the crook of a sturdy tree branch, on an eave, or mounted high on a post or structure. The light shines downwards, mimicking moonbeams.
- Perfect For: Illuminating seating areas subtly, washing light over a lawn or groundcover, creating depth by lighting pathways indirectly, lighting beneath specimen trees or shrubs. Creates a relaxed, romantic mood.
- Fixtures: Wide-angle LED spots, downlights with diffusers, low-voltage landscape lights designed for downlighting. LED lights are ideal here for their cool operation and efficiency, especially when paired with dimmers.
2. Uplighting: Drama & Sculptural Beauty
Uplighting is the drama queen of landscape lighting. By placing a light source low and directing its beam upwards, you highlight the unique textures, shapes, and heights of features, casting intriguing shadows.
- How it's Done: Position fixtures at ground level, aimed upwards at architectural elements, trees with interesting bark or branching patterns, sculptures, textured walls, or tall ornamental grasses.
- Perfect For: Creating focal points, adding architectural interest to a plain wall, showcasing specimen plants like Japanese maples or palms, emphasizing water features. Creates a sense of grandeur and mystery.
- Fixtures: Well lights (recessed into the ground), bullet lights, adjustable spotlights. Waterproof fixtures rated for burial or submersion near water are essential. Consider patio lighting fixtures designed for uplighting features around seating areas.
3. Path & Step Lighting: Safety & Subtle Guidance
This is the practical backbone, ensuring safe passage, but it can be done beautifully. The goal is illumination without glare, guiding feet without blinding eyes.
- How it's Done: Place low-level fixtures along the edges of paths, driveways, and stairs. Light should shine *across* the walking surface, not straight into the eyes of someone approaching. Fixtures are typically staggered on either side for balanced coverage.
- Perfect For: Safe navigation through gardens and yards, marking stair edges clearly, lighting entrances and exits, adding subtle definition to boundaries.
- Fixtures: Path lights (bollards), recessed tread lights for steps, low-profile deck lights, markers. Fixtures should be sturdy and well-anchored. Solar path lights can be very effective here, leveraging solar panels for hassle-free installation. LED lights ensure bright, efficient, and long-lasting illumination.
4. Downlighting: Security & Area Definition
Similar to moonlighting but often more focused and practical, downlighting provides task-oriented illumination from above.
- How it's Done: Mount fixtures on walls, eaves, pergolas, gazebos, or trees directly above the area needing light. The beam is directed downwards.
- Perfect For: Lighting outdoor cooking and dining areas (task lighting), illuminating doorways for security, defining the boundaries of a deck or patio ( patio lighting ), providing security lighting over driveways or side yards.
- Fixtures: Wall sconces, adjustable spotlights mounted under eaves, recessed ceiling lights in covered structures, pendant lights over dining tables. Integrated motion sensors are excellent for security zones.
5. Silhouetting & Shadowing: Intrigue & Artistry
These techniques play with negative space and form, creating captivating visual effects.
- Silhouetting: Place a light source *behind* an object (like a shrub, sculpture, or unique plant form) and aim it towards a plain background (like a wall or fence). The object appears as a dark silhouette against a softly lit background.
- Shadowing: Place a light source *in front* of an object (on the viewer's side) but low to the ground, casting the object's intriguing shadow onto a vertical surface (wall, fence, hedge) behind it.
- Perfect For: Adding depth and dimension, creating artistic focal points, highlighting plants with unique shapes (grasses, palms, ferns), enhancing texture on walls. Works wonders with simpler, well-defined forms.
- Fixtures: Spotlights, well lights. Adjustability is key.
6. Grazing: Highlighting Texture & Depth
Grazing light skims across a surface at a very shallow angle, dramatically emphasizing texture, patterns, and depth that would be invisible under overhead light.
- How it's Done: Place a fixture very close to the base of a wall, fence, or tree trunk, directing the light beam upwards and parallel to the surface.
- Perfect For: Showing off stonework, brickwork, wood grain on fences or siding, textured concrete walls, fluted columns, the craggy bark of mature trees. Creates high contrast and strong visual impact.
- Fixtures: Well lights, wall washes, or bullet spots mounted very close to the surface.
Navigating the Options: Choosing Your Garden Lights
With so many fixtures available, knowing your options helps make smart choices for style, function, and budget.
| Fixture Type | Best For | Placement | Power Options | Key Considerations |
|---|---|---|---|---|
| Path Lights (Bollards) | Illuminating walkways, driveways, garden borders | Staggered along path edges, ~18-24" high | Low-Voltage Wired, Solar | Choose shielded tops to minimize glare; consider height/style for garden size |
| Spotlights | Uplighting trees/features, Accent lighting, Security | Ground level (well lights), mounted on posts/structure | Low-Voltage Wired, Solar (smaller) | Look for adjustable beam angles; crucial for uplighting/drama |
| Well Lights (Recessed) | Discreet uplighting, Grazing walls, Highlighting plants from below | Recessed into ground or hardscape | Low-Voltage Wired | Require proper drainage; IP68 waterproof rating is ideal |
| Deck & Step Lights | Marking stairs, railings, edges of decking/patios ( patio lighting ) | Recessed into steps/risers, mounted on posts/railings | Low-Voltage Wired, Solar | Must be low-glare; low profile for safety; excellent IP rating essential |
| Downlights | Moonlighting effect, Security over doors/gates, Task lighting over areas | Mounted high: trees, eaves, pergolas | Low-Voltage Wired, Line Voltage (professional) | Use wide beam angles/diffusers for soft light; IP rating for weather exposure |
| Wall Sconces & Lanterns | Flanking doors/gates, Illuminating walls, Adding architectural style | Mounted to house/structure walls, posts, pillars | Line Voltage, Low-Voltage Wired | Match architectural style; choose appropriate size and brightness |
| Pendant Lights | Over dining tables, Kitchen prep areas, Entryways | Suspended from ceiling structures: pergolas, gazebos, covered patios | Line Voltage (most), Low-Voltage | Ensure appropriate scale; require robust overhead mounting; weatherproof |
| String Lights / Festoons | Creating festive atmosphere overhead, Patios, Dining areas, Trees | Strung between trees, posts, structures | Line Voltage (Plug-in), Low-Voltage, Solar | Look for commercial grade/weatherproof; LEDs prevent overheating |
Powering Your Lights: Choices & Trade-offs
The energy source affects cost, installation complexity, and running efficiency. Think of it as choosing the engine for your lighting system:
-
Line Voltage (120V):
- Pros: High power, longer wire runs possible (if using heavy gauge), bright lights readily available, simpler wiring for multiple fixtures.
- Cons: Requires burying conduit deep (18"+ often local code), must be installed by a licensed electrician for safety , higher voltage risk, higher energy consumption compared to LED options.
- Best For: Large areas needing high brightness (security floodlights, large patio hanging lights), areas where extensive wiring isn't practical for low-voltage due to voltage drop, integration with existing household circuits.
-
Low-Voltage (12V):
- Pros: Much safer DIY potential (consult codes!), lower risk of shock, easier cable burial (6" often sufficient), highly flexible for fixture movement/addition, works perfectly with LED lights ( energy efficient appliances at their best).
- Cons: Requires a transformer to step down household voltage, limited cable run lengths due to "voltage drop" (requires thicker gauge wire for long runs), transformers need placement (garage, protected area).
- Best For: The vast majority of residential landscape lighting projects – paths, steps, uplights, downlights, accent lighting. Flexible and efficient. Look for weatherproof, corrosion-resistant brass or copper fixtures.
-
Solar Powered:
- Pros: Truly wire-free installation, incredibly low operating cost ($0 electricity!), easy to move/reposition, automatic dusk-to-dawn operation, eco-friendly.
- Cons: Light output and duration heavily depend on location/quality of the integrated solar panels and sun exposure, battery life degrades over time (2-4 years often), illumination levels generally lower than wired options, consistency can be affected by cloudy weather/winter months.
- Best For: Standalone path lights, accent lights in sunny locations, areas where trenching wires is impossible or undesirable, temporary lighting, eco-conscious setups. Buy quality: Look for larger panels and higher-lumen LED outputs. Remember, more sun = more reliable nightly light.
The LED Advantage: Shining Bright for Efficiency
Gone are the days of dim, power-hungry garden lights melting frost on cold nights. Modern LED lights have revolutionized outdoor illumination:
- Energy Superstars: LEDs use a fraction of the electricity of traditional halogen or incandescent bulbs. This translates directly into significantly lower electricity bills. They are the epitome of energy efficient appliances for your landscape.
- Long Life Champions: Expect years, often 20,000-50,000 hours or more, of reliable operation. You'll spend far less time wrestling with bulbs on ladders or replacing fixtures prematurely.
- Cool Operators: LEDs generate very little heat. This is safer (no accidental burns!), prevents insect attraction, reduces fire risk near foliage or structures, and protects the fixture housing itself.
- Bright & Color True: Available in a range of brightness levels (lumens) and color temperatures. Choose warm white (2700K-3000K) for a cozy, traditional feel, or cool white (4000K+) for a modern, crisp ambiance.
- Dimmable Options: Many LED fixtures are dimmable, providing ultimate control over mood and brightness. Perfect for tuning down security lights or creating intimate dining settings.
Investing in quality LED fixtures and bulbs upfront pays off handsomely in energy savings and years of hassle-free, beautiful light.
Lighting Zones: Tailoring the Experience for Every Part of Your Garden
A cohesive garden lighting design considers different zones and their unique purposes after dark. Think about how you actually use your space:
1. Entrances & Front Pathways: First Impressions & Safety
This zone sets the tone and ensures safe arrival. Light should be welcoming, clear, and secure.
- Goals: Clearly identify the path to the door, illuminate key features (like house numbers), eliminate dark corners for security, create a welcoming feel.
-
Techniques:
- Path Lights: Along the main walkway. Consistent spacing and brightness for uniform guidance.
- Step Lights: On porch steps or any elevation changes. Essential for safety.
- Porch Lights/Wall Sconces: Flanking the main entry door. Provides task lighting and ambiance.
- Uplighting: Subtly on architectural features (columns, textured walls) or small specimen trees near the entrance.
- Motion Sensors: Strategically placed for security lighting on driveways or side paths. Use dusk-to-dawn or dedicated sensors.
- Fixtures: Path lights, recessed step lights, wall lanterns, bullet spots, well lights (discreet uplighting).
- Brightness: Functional and bright enough for safety, but avoid harsh glare. Warm white creates welcome.
2. Patios & Decks: Extending Your Living Space
This is your primary outdoor relaxation and entertainment zone. Lighting needs to be multi-layered: ambient for atmosphere, task for activities, and maybe a hint of accent.
Here's where patio lighting becomes key:
- Goals: Create comfortable ambiance for relaxing and socializing, provide functional lighting for dining/BBQ/reading, highlight surrounding landscape features, define the space boundaries.
-
Techniques:
- Ambient Lighting: Downlights mounted on adjacent eaves or trees (moonlight effect), string lights/festoons overhead, subtle path lighting around perimeter.
- Task Lighting: Focused downlights or pendants over the dining table or grill area, integrated lighting on built-in countertops.
- Accent Lighting: Uplighting plants bordering the patio, wall washing on nearby textured walls, low-level step/deck lights.
- Integrated Deck/Step Lights: For safety around edges and steps.
- Fixtures: String lights, downlights, pendant lights, wall sconces, deck lights, step lights, bullet spots for accenting, adjustable floodlights for task areas.
- Brightness & Color: Dimmability is crucial! Adjustable from bright task mode to softer ambient mood. Warm white is generally preferred for relaxation.
3. Garden Beds & Borders: Revealing the Nighttime Garden
This zone celebrates the plants and structures that define your landscape. Light transforms familiar daytime views.
- Goals: Highlight the beauty and structure of key plants/specimens, create depth and perspective, add texture and shadows, make the garden feel alive at night.
-
Techniques:
- Uplighting: The star technique here. Showcase trees, shrubs with interesting forms, textured trunks, or tall grasses. Position carefully to see the illuminated shape.
- Spotlighting: Focus light on focal points like sculptures, water features, or a particularly stunning plant.
- Moonlighting: Filtered down through canopy trees to illuminate plants below.
- Grazing: Skim light along textured walls, fences, or rock formations bordering beds.
- Silhouetting/Shadowing: Place lights behind or in front of plants to create dramatic effects against walls or backgrounds.
- Fixtures: Well lights (recessed uplights), bullet spots (adjustable), low-profile bollards for subtle bordering, path lights weaving through beds.
- Brightness & Color: Varies. Highlights need enough punch to stand out. Softer washes for background ambiance. Consistent color temperature (warm white often preferred) creates harmony.
4. Water Features: Liquid Light & Reflection
Water introduces movement and sound. Lighting it properly creates mesmerizing effects.
- Goals: Enhance the movement of water (falls, streams, fountains), highlight the water surface and reflections, illuminate surrounding landscaping, create a magical focal point.
-
Techniques:
- Underwater Lighting: Fixtures submerged in the water or placed within a basin to light the moving water from below . Creates dramatic illumination of falling or flowing water. Essential: Fixtures MUST carry the highest IP rating (IP68 minimum) and be specifically designed for underwater/submersion use.
- Submersible Fixtures: Placed directly in the water at the base of falls or jets.
- Surface Mounted Fixtures: Placed in dry areas within a basin structure.
- Uplighting / Grazing: From nearby banks or surrounding areas to illuminate the feature indirectly, highlighting textures around it (rocks, coping) or plants beside it.
- Reflection: Strategically placed uplights across the water can create beautiful reflections of surrounding trees or structures on a still pond surface.
- Fixtures: Specialized IP68 submersible LED lights are essential. Surface mount underwater LEDs, bullet spots, well lights for surrounding illumination.
- Brightness & Color: Can vary from subtle shimmer to dramatic spotlights on waterfalls. Color-changing LEDs can be fun for fountains but use sparingly. Ensure fixtures don't create glare above water level.
- Critical Safety Note: Never attempt underwater lighting unless using fixtures explicitly rated and UL-listed for permanent underwater submersion (IP68). Hire a professional specializing in landscape lighting with water features if unsure.
Beyond the Glow: Practical Planning & Installation Tips
A stunning design only delivers if executed well. Thoughtful planning and smart installation ensure your lighting is beautiful, reliable, and long-lasting.
Planning is Paramount
- Start Simple, Dream Big: Begin with the essentials – entrance paths, key steps, safety lights. Phase your project, adding layers like uplighting later.
- Walk the Paths at Dusk & Night: Literally walk around your property at night with a flashlight. Identify dark spots that need illumination for safety. Notice what garden elements disappear and what features might look stunning lit.
- Sketch It Out: Draw a basic plan of your garden. Mark existing trees, structures, paths, beds, and desired lighting locations. Note fixture types and power sources.
-
Photocell? Timer? Smart Control?
Decide how the system will turn on/off:
- Photocell: Built-in dusk-to-dawn sensor. Simple and reliable.
- Timer: Set specific on/off times. Good if you want lights off later in the evening.
- Smart Control: Wi-Fi/BLE enabled. Control via phone app, set schedules, group zones, integrate with voice assistants, dim remotely. Offers maximum flexibility but adds cost and complexity.
- Consider Lighting Pollution: Be a good neighbor and steward. Shield fixtures to point light downwards and towards your property. Avoid excessive uplighting that scatters light upwards. Choose warm-white LEDs which are less disruptive to nocturnal wildlife than cool white/blue light.
Installation Savvy
-
DIY vs. Pro:
- Solar Lights: Almost always DIY-friendly. Just stake them in.
- Low-Voltage Wired: Definitely DIY-possible for smaller systems. Requires understanding transformer sizing/gauge/wire, trenching, and making proper connections. Know your limits; a complex system needs expertise.
- Line Voltage Wiring: Must be done by a licensed electrician. Digging depths, conduit types, connections – it's all strictly governed by electrical code for safety. Don't mess with 120V outdoors unless you are licensed.
-
Transformer Talk (Low Voltage):
- Sizing: Crucial! Add up the total wattage of all LEDs on the circuit. The transformer wattage should be 20-25% higher than this total to avoid overloading and ensure longevity. Factor in potential expansion.
- Placement: Needs protection from weather but adequate ventilation. Mount near a GFCI outlet. Keep central to circuits for efficiency.
-
Wire Wisely:
- Gauge Matters: Use thicker gauge wire (lower number, e.g., 12/2 or 10/2) for longer runs to prevent voltage drop (lights becoming dimmer the farther they are from the transformer). Refer to voltage drop charts.
- Trenching: Bury low-voltage wire (usually in PVC conduit for extra protection) at least 6" deep, deeper under paths/driveways or in vulnerable areas. Avoid sharp bends. Use landscape flags to mark the route afterward.
- Connections: Use waterproof wire nuts or specialized waterproof connectors ( gel-filled wire nuts or heat shrink crimp connectors ). Seal thoroughly. Bury connections if possible.
-
Durability First:
- IP Ratings are NOT Optional: Check the fixture's IP rating (Ingress Protection) against water and solids. IP65 (Water jets) is good for most above-ground fixtures. IP67 (Immersion up to 1m) or IP68 (Continuous immersion) is required for underwater features and fixtures in splash zones. No IP rating? Don't buy it!
- Material Matters: Choose solid brass, copper, or high-quality powder-coated aluminum fixtures. Avoid cheap plastics that become brittle.
- Securely Mount: Ensure fixtures are firmly staked or mounted to withstand wind and weather.
Keeping the Sparkle: Care & Maintenance
Like any part of your garden, your lighting needs a little TLC to perform its best year after year.
-
Seasonal Check-ups:
- Spring/Fall: The ideal time. Turn off power. Check fixtures for grime (dirt, bird droppings, cobwebs) or damage. Wipe lenses and bodies with a soft, damp cloth. Gently clean solar panels.
- Winter (Harsh Climates): Consider removing fragile solar lights/stakes to prevent breakage from freezing or snow plows. Ensure buried wire connections remain dry. Inspect transformer drainage/ventilation.
- Trim Back Growth: Plants grow! Regularly prune back foliage encroaching on fixtures. Plants blocking light or pressing against fixtures can cause damage, reduce effectiveness, or even become fire hazards near hot bulbs (rare with cool LEDs).
- Bulb Lifespan: While LED lights last years, they eventually dim. Keep an eye on brightness. Have a few spare bulbs compatible with your fixtures on hand for quick replacements.
- Solar Care: Regularly wipe solar panels clean of dust, pollen, and debris – this is often the #1 reason solar lights dim. Ensure panels receive maximum sun. replace rechargeable NiMH batteries every 1-3 years as their capacity diminishes.
- Stay Alert: Notice flickering lights? Dimming unexpectedly? Areas suddenly dark? This often indicates loose wiring, corrosion at connections, or a failing component. Investigate promptly or call a pro.
- Connection Checks: Periodically (especially after storms or ground movement), check exposed connections at fixtures and splices for signs of corrosion or looseness. Re-seal waterproof connections as needed.
Lighting with a Conscience: Sustainability & Eco-Conscious Choices
Creating a beautiful nightscape doesn't have to cost the earth or harm your local ecosystem. Making smart choices benefits your wallet and the environment.
- Embrace the LED: This is the single biggest step. Choosing low-wattage LED lights dramatically slashes energy consumption compared to old halogen systems. They truly function as energy efficient appliances in your landscape. This translates directly to lower electricity bills and reduced carbon footprint.
- Solar Power: Harness the Sun: Utilize solar panels integrated into path lights or accent lights. This offers truly zero operational energy costs and zero grid strain. While they might not be suitable for demanding task lighting areas, they are perfect for ambient paths, subtle uplights in sunny spots, or decorative elements. Reduce your reliance on wired power where possible.
-
Timing is Everything:
Even with efficient LEDs, unnecessary burning wastes energy.
- Photocells: Ensure lights turn off at dawn automatically.
- Timers: Set lights to turn off after you typically go to bed. No need for pathways to blaze at 2 AM.
- Smart Controls: Offer the ultimate precision – schedule lights only for when you need them, group zones independently, or turn them on/off remotely. Easily prevent unnecessary runtime.
- Motion Sensors: Ideal for security lighting. Light only triggers upon movement, saving energy versus dusk-to-dawn floodlights.
-
Reduce Light Pollution & Glare:
- Dark Sky Friendly: Shield fixtures so all light is directed downwards and onto your property . Avoid unshielded bulbs that blast light sideways or upwards, which wastes energy illuminating the sky and disturbs neighbors and wildlife.
- Warm Whites Win: Choose LED color temperatures of 2700K-3000K (warm white). Cool white/blue-rich light is far more disruptive to nocturnal animals (insects, birds, mammals) and interferes with natural night vision.
- Aim Accents Thoughtfully: Focus uplighting beams precisely on features, minimizing stray light spill.
- Prioritize Quality & Longevity: Investing in well-made, durable fixtures (solid brass, copper, quality coated aluminum) prevents frequent replacements, reducing resource consumption. Robust fixtures withstand weather better, needing less intervention. High-quality LEDs last for decades under proper conditions.
Step into Your Nighttime Garden Sanctuary
The transformation that well-designed outdoor lighting brings is nothing short of magical. It's not just about seeing; it's about feeling. It’s turning familiar daytime views into enchanting nocturnal landscapes. It's extending the hours you can enjoy the peace of your garden sanctuary or the laughter of friends gathered on the patio. It’s ensuring that every step on your path is safe and confident after dark.
From the gentle guidance of path lights and the subtle drama of uplighting a beautiful tree, to the functional glow over your grill and the mesmerizing sparkle of water features, lighting is the invisible hand shaping your experience of the night garden. With the incredible efficiency and longevity of modern LED lights and the accessibility of solar panels for wire-free ambiance, creating this magic has become more achievable and sustainable than ever. Thoughtful patio lighting turns a simple outdoor area into a true extension of your living room under the stars.
Embrace the layers – the ambient glow, the practical task light, the dramatic accent. Plan carefully, choose durable, waterproof components designed to last, power them wisely (consider solar!), and remember that less is often more. A little light, strategically placed, creates far more impact and atmosphere than flooding everything with brightness.
So, take that first step. Illuminate your path. Highlight that favorite magnolia. Watch your pond glow from within. Craft that perfect patio lighting atmosphere. Transform your garden into a captivating destination that beckons you long after the sun has set. Your nighttime retreat awaits!










