
Walk into any modern building—whether it's a bustling hospital, a busy school, a cozy home, or a sleek commercial space—and you'll find an unsung hero working behind the scenes: plastic valve systems. These unassuming components control the flow of water, gas, and other fluids, ensuring everything from your morning shower to the HVAC system in a shopping mall runs smoothly. But like any hardworking team member, they need care to keep performing at their best. As a plastic valve system supplier with years of experience supporting projects across Saudi Arabia, we've seen firsthand how proactive maintenance can turn a system that lasts 5 years into one that serves reliably for 15 or more. In this guide, we'll break down practical, actionable strategies to extend the lifespan of your plastic valve systems, drawing on insights from our plastic valve system solutions and the needs of clients ranging from residential developers to hospital administrators.
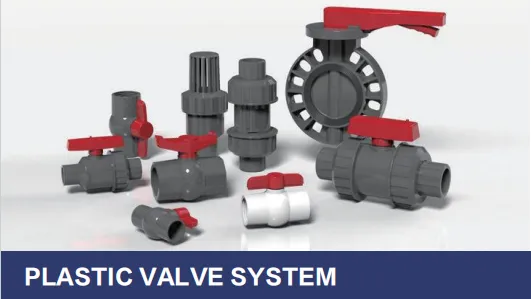
Before diving into care, let's get familiar with what we're working with. Plastic valve systems are a network of valves, pipes, and fittings designed to regulate fluid flow. Unlike metal systems, they're lightweight, corrosion-resistant, and cost-effective—qualities that make them a top choice for everything from residential plumbing to high-demand settings like hospitals (where Class A fireproof CPL inorganic board for hospital and school solutions often pair with plastic valves for safety). The most common types you'll encounter include UPVC pipe solutions (known for durability in cold water systems), PPR pipe and fitting solutions (ideal for hot water), and PVC DWV pipes (drainage, waste, and vent systems). Each type has unique needs, but the core principles of care apply across the board.
Think of your plastic valve system as a symphony. Each valve, pipe, and fitting has a role to play, and if one component falters, the whole performance can suffer. A small crack in a valve might start as a slow drip but escalate into a flood; a clogged fitting could reduce water pressure, straining other parts of the system. That's why proactive care isn't just about fixing problems—it's about preventing them from happening in the first place.
Imagine coming home to find a puddle under your sink—annoying, right? Now imagine that puddle is in a hospital's operating room or a school's science lab. The stakes jump from "inconvenient" to "critical." Regular inspections are how you catch these issues early. Here's what to look for:
How often should you inspect? For residential systems, a quick monthly check (during your routine chores) and a deeper quarterly inspection should suffice. For commercial or high-use systems (like in hospitals or schools), weekly spot checks and monthly detailed inspections are wise. To keep track, we've put together a handy maintenance schedule:
| Maintenance Task | Frequency (Residential) | Frequency (Commercial/High-Use) | Key Actions |
|---|---|---|---|
| Visual leak check | Monthly | Weekly | Inspect valves, joints, and under-sink areas for moisture. |
| Valve operation test | Quarterly | Monthly | Turn valves fully open/closed to ensure smooth movement; clean if stiff. |
| Pressure testing | Annually | Semi-annually | Use a pressure gauge to check for drops, indicating leaks or blockages. |
| Exposure inspection | Bi-annually | Quarterly | Check outdoor/exposed pipes for UV damage, cracks, or pest nesting. |
Even the best systems accumulate gunk over time. Minerals in water, sediment, or debris can build up in valves and pipes, restricting flow and causing valves to stick. The good news? Cleaning is simple and often prevents costly repairs. For most plastic systems, warm soapy water and a soft brush are all you need. Avoid harsh chemicals like bleach or abrasive cleaners—they can degrade the plastic, especially in UPVC pipe solutions and PPR pipe and fitting solutions , which are sensitive to strong solvents.
For stubborn buildup, try a vinegar solution (equal parts water and white vinegar) to dissolve mineral deposits. Let it sit for 30 minutes, then flush with clean water. If you're dealing with a clogged drain valve, a plunger or a plumber's snake (used gently!) can dislodge debris without damaging the plastic. Remember: prevention is easier than cure. Installing filters on incoming water lines can catch sediment before it reaches your valves—a small investment that pays off big in reduced cleaning time.
Plastic is tough, but it has limits—especially when it comes to temperature and pressure. Most plastic valves and pipes are rated for specific ranges (e.g., UPVC typically handles 0–60°C, while PPR can go up to 95°C). Exceeding these limits weakens the material, leading to warping, cracking, or leaks. In residential settings, this often happens when hot water is set too high or when outdoor pipes freeze in winter. In commercial spaces, industrial equipment or HVAC systems might create sudden temperature spikes.
To protect your system:
A quick tip: If you notice pipes sweating (condensation) in humid areas, that's a sign of temperature differences. Adding insulation here can prevent moisture buildup, which over time can lead to mold or corrosion on nearby materials (even if the pipe itself is plastic).
You wouldn't build a house on a shaky foundation, and the same goes for plastic valve systems. Poor installation is one of the biggest reasons systems fail prematurely. Even the best plastic valve system solutions from a top plastic valve system supplier can underperform if installed incorrectly. Here's what to watch for:
Over-tightening fittings: Plastic threads are delicate. Cranking a fitting too hard can strip the threads or crack the valve body. Hand-tighten first, then give a quarter-turn with a wrench—no more.
Misalignment: Pipes and valves should be straight and aligned to avoid stress on joints. Bending or forcing components into place creates weak points that will fail over time.
Using the wrong tools: Metal tools can scratch or dent plastic. Opt for plastic or rubber mallets when tapping pipes into place, and use adjustable wrenches with soft jaws to avoid damaging valves.
If you're unsure about installation, don't hesitate to call in a professional. Many UPVC pipe suppliers and PPR pipe and fitting suppliers offer installation guidance or can recommend certified installers—investing in expertise now saves headaches later.
Even the best maintenance can't save a system made with low-quality materials. That's why partnering with a reputable plastic valve system supplier is foundational to longevity. At our core, we believe a supplier's job isn't just to sell products—it's to provide solutions that stand the test of time. For example, our UPVC pipe solutions are made with high-grade PVC resin that resists UV damage and chemical corrosion, while our PPR pipe and fitting solutions use heat-stabilized materials designed for decades of hot water use.
When choosing a supplier, ask: Do they offer technical support? Can they provide material certifications (like ISO or ASTM standards)? Do they have experience with your specific industry (e.g., hospitals, schools, residential)? A supplier who understands your needs will not only deliver better products but also share maintenance tips tailored to your system—like how to care for valves in a hospital's sterile environment or a school's high-traffic restrooms.
Even with proactive care, issues can pop up. The key is to address them fast. Here are common problems and how to fix them:
Leaky valves: Start by tightening the packing nut (the nut just below the handle). If that doesn't work, the washer or O-ring inside may need replacing. Most hardware stores carry replacement kits, and it's a 10-minute fix.
Blocked pipes: For minor clogs, use a plunger or a baking soda-vinegar mix (1 cup baking soda, 1 cup vinegar—let sit 15 minutes, then flush with hot water). For stubborn clogs, a plumber's snake (auger) is safer than chemical drain cleaners, which can damage plastic over time.
Discolored water: If water from your taps is cloudy or tinted, it could mean sediment buildup in the system. Flush the lines by opening all taps for 5–10 minutes to clear out debris. If it persists, check for pipe damage.
Remember: When in doubt, call a professional. Trying to fix a complex issue without experience can turn a small problem into a major repair.
Let's talk numbers. A typical residential plastic valve system costs $500–$1,000 to install. A major repair? $2,000–$5,000, not counting water damage. For commercial systems, the stakes are even higher—a shutdown in a hospital or school due to a valve failure can cost tens of thousands in lost productivity or compliance issues. Proactive care isn't just about extending lifespan; it's about protecting your investment.
Beyond cost, there's peace of mind. Knowing your valve system is in good shape means you won't lie awake worrying about leaks during a storm or deal with the stress of unexpected repairs. It also makes your building safer—no mold from hidden leaks, no water damage to structural materials, and reliable fluid control for critical systems like fire sprinklers or medical gas lines.
Plastic valve systems may not be glamorous, but they're the backbone of modern buildings. With a little attention—regular inspections, gentle cleaning, temperature/pressure management, and quality materials from a trusted plastic valve system supplier —you can ensure they serve you reliably for decades. Think of it as giving your system a little "tender loving care" each month. After all, when your valves work, everything else does too.
Whether you're a homeowner, a facility manager, or a contractor, the strategies here are designed to be simple and actionable. Start with a quick inspection today—you'll be glad you did when your system is still going strong 15 years from now. And when you're ready to upgrade or install a new system, remember: the best plastic valve system solutions are those backed by a supplier who cares as much about your system's longevity as you do.
Recommend Products


