
If you've ever looked under your sink or behind your toilet and thought, "How do all those pipes even work?" you're not alone. Plumbing can feel like a mysterious world of twists, turns, and technical jargon—especially when it comes to something as crucial as your home's Drain-Waste-Vent (DWV) system. But here's the good news: installing PVC DWV pipes yourself is totally doable, even if you're new to DIY projects. No need for a fancy plumbing license or years of experience—just a little patience, the right tools, and this friendly guide to walk you through it.
First things first: What is a DWV system, anyway? Simply put, it's the network of pipes that carries wastewater away from your sinks, showers, toilets, and appliances (that's the "drain" and "waste" part) and allows fresh air to enter the system to prevent gurgling drains and odors (the "vent" part). Without a properly working DWV system, you'd be dealing with slow drains, backups, and even harmful sewer gases seeping into your home. So, whether you're remodeling a bathroom, adding a new fixture, or replacing old, leaky pipes, getting your DWV installation right is key.
In this tutorial, we'll break down the process into simple, beginner-friendly steps. We'll cover everything from planning your layout to testing for leaks, with plenty of tips to keep you confident along the way. And don't worry—we'll even talk about how to choose the best materials (hint: a reliable pvc dwv pipe supplier and quality pipes fittings supplier make all the difference) so your hard work lasts for years. Let's dive in!
Before you grab your toolbelt, let's make sure you have everything you need. Having the right supplies on hand will save you trips to the hardware store and keep your project moving smoothly. Here's a breakdown of the essentials:
| Tool/Material | Purpose | Pro Tips |
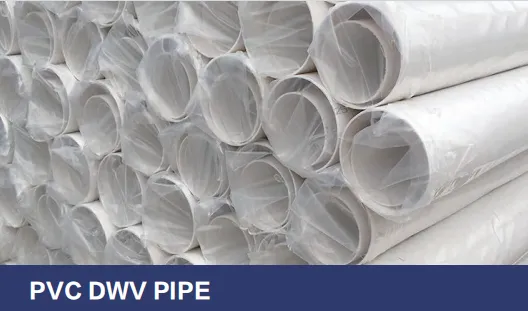
| PVC DWV Pipes | The main pipes that carry waste and vent air. | Stick to Schedule 40 or Schedule 80 PVC (check local codes!). Buy from a trusted pvc dwv pipe supplier for durability. |
| PVC DWV Fittings | Elbows, tees, couplings, traps, and vent adapters to connect pipes. | Get pipes fittings from a reputable pipes fittings supplier—quality pipes fittings solutions prevent leaks. |
| PVC Primer & Cement | Primer cleans and softens pipes; cement bonds them permanently. | Use "DWV-specific" cement—regular PVC cement may not hold up to wastewater chemicals. |
| Pipe Cutter or Hacksaw | To cut pipes to the right length. | A ratchet-style pipe cutter gives cleaner cuts than a hacksaw (less sanding needed!) |
| Deburring Tool | Smooths rough edges after cutting to prevent leaks. | Even a simple utility knife can work—just run it around the inside and outside of the cut. |
| Tape Measure & Pencil | To measure and mark pipes before cutting. | Measure twice, cut once! (You'll thank us later.) |
| Level | Ensures pipes slope correctly (critical for drainage). | A 2-foot level works best for small sections; longer levels for straight runs. |
| Pipe Hangers & Straps | Secures pipes to walls/ceilings to prevent sagging. | Use plastic or metal hangers rated for PVC—space them every 4–6 feet for horizontal pipes. |
| Safety Gear | Gloves, goggles, and a mask (primer/cement fumes can be strong). | Work in a well-ventilated area—open windows or use a fan! |
Before you start cutting pipes, take time to understand how your DWV system works. Trust us—this planning step will save you from headaches later. Let's break down the basics:
Drain Pipes: These carry wastewater from fixtures (sinks, showers, toilets) to the main sewer line or septic tank. They rely on gravity, so they must slope downward at a specific angle (usually 1/4 inch per foot for pipes 2 inches or smaller, and 1/8 inch per foot for larger pipes).
Waste Pipes: Similar to drain pipes but handle "solid" waste (like from toilets). They're larger (usually 3–4 inches in diameter) and need a steeper slope to prevent clogs.
Vent Pipes: These run from fixtures up to your roof, allowing air to enter the DWV system. Without vents, water would get stuck in traps (the U-shaped pipes under sinks), and sewer gases would build up. Vents must extend at least 6 inches above your roof to work properly.
Now, check your local building codes! Every area has rules about pipe sizes, slopes, vent heights, and even the types of materials allowed. You can usually find these online or at your city's building department. Ignoring codes could lead to failed inspections or costly re-dos, so don't skip this step.
Next, sketch your layout. Grab a piece of paper and draw where each fixture (sink, toilet, shower) will be, then map how the pipes will connect. Label pipe sizes (e.g., "2-inch drain for sink," "3-inch waste for toilet") and note where vents will go. If you're replacing old pipes, take photos of the existing setup first—this will help you replicate (or improve!) the layout.
Now that you have a plan, it's time to gather your materials. When shopping for PVC DWV pipes, head to a trusted pvc dwv pipe supplier. Look for pipes labeled "DWV" (not "pressure" pipes—those are for water lines, not waste!). A good supplier will also offer pvc dwv pipe solutions like guides or tech support if you have questions about sizing.
For fittings, go with a reputable pipes fittings supplier. You'll need elbows (45° or 90° angles), tees (to split pipes), couplings (to join straight pipes), P-traps (the U-shaped traps under sinks), and vent adapters. Make sure fittings match your pipe size—most are labeled (e.g., "2-inch slip tee"). Pipes fittings solutions matter here: cheap, poorly made fittings can crack or leak, so invest in quality.
Once you have all your materials, prep your workspace. Clear the area around where you'll be working—move boxes, rugs, or furniture to avoid tripping. Lay down a drop cloth to catch debris (PVC shavings can be sharp!). If you're working in a tight space (like under a sink), use a small stool to sit comfortably—you'll be there a while!
You've probably heard the saying "measure twice, cut once"—and nowhere is that truer than with PVC pipes. A single wrong cut can mean wasted materials and extra trips to the store, so take your time here.
Start by measuring the distance between two fittings (e.g., from a tee to an elbow). Use your tape measure to get the exact length, then subtract the length of the fittings themselves. For example, if the distance between two fittings is 24 inches, and each fitting inserts 1 inch into the pipe, your pipe should be 24 – (1 + 1) = 22 inches long. Write this measurement down on the pipe with a pencil—no guessing!
Now, it's time to cut. If you're using a ratchet pipe cutter: place the pipe in the cutter, line up the blade with your mark, and squeeze the handles. Rotate the cutter slightly after each squeeze to ensure an even cut. For a hacksaw: clamp the pipe in a vice (or hold it steady with a friend), and saw slowly with smooth, straight strokes. Try to keep the cut perpendicular to the pipe—crooked cuts can lead to leaks.
After cutting, use a deburring tool (or a utility knife) to smooth the edges. Run the tool around the inside and outside of the pipe to remove burrs (those rough plastic bits). Burrs can catch debris and cause clogs, so don't skip this step!
Dry fitting is like a "dress rehearsal" for your pipes—assembling everything without glue to make sure it fits. This is critical for beginners. Even if you measured perfectly, pipes can shift, or fittings might not align as expected. Dry fitting lets you adjust before you commit to cement.
Start by connecting your cut pipe to the fittings. Push each pipe into the fitting as far as it will go—you should feel a slight "stop" when it's fully inserted. (Pro tip: Mark the pipe with a pencil at the fitting edge so you know how far to push when gluing later!)
Check the slope with your level. For drain pipes, the bubble should lean slightly toward the direction of flow (e.g., toward the main sewer line). If it's flat or sloping the wrong way, adjust the pipe length or add/remove fittings. For vent pipes, they should slope upward toward the roof (at least 1/4 inch per foot) to prevent water from pooling.
Walk around your dry fit and double-check: Do all fixtures connect properly? Are there any kinks or sharp bends? Is there enough space for future access (like under a sink, where you might need to reach the trap)? If something feels off, now's the time to fix it—don't wait until the glue is dry!
Now comes the part that makes beginners nervous: using PVC primer and cement. But don't stress—it's easier than it looks, as long as you follow these steps:
1. Ventilate the area: Primer and cement fumes are strong! Open windows, turn on fans, and wear your mask and gloves.
2. Clean the pipes and fittings: Wipe the ends of the pipes and the inside of the fittings with a clean rag to remove dirt, oil, or moisture. Even a little dust can weaken the bond.
3. Apply primer: Dip the included brush into the primer can and coat the outside of the pipe end (about 2 inches from the edge) and the inside of the fitting. Primer looks like clear or purple liquid—it softens the PVC so the cement can bond.
4. Apply cement: Immediately after priming (don't let it dry!), apply cement to the same areas. Use a thick, even coat—too little and the bond will be weak; too much and it will drip or create globs (which can block pipes).
5. insert and twist: Push the pipe into the fitting as far as it will go (use your earlier pencil mark as a guide!), then give it a 1/4-inch twist. This spreads the cement evenly. Hold the pipe and fitting together for 30 seconds—PVC cement sets fast, but it needs a moment to grab.
6. Wipe excess cement: Use a rag to wipe off any cement that oozes out of the joint. Excess cement can harden and block water flow, so clean it up immediately.
Work in small sections—don't prime/cement all pipes at once! PVC cement dries quickly (in 15–30 seconds for small pipes), so focus on one joint at a time. If you make a mistake (like misaligning a pipe), you have about 10 seconds to twist it into place before it sets—after that, you'll need to cut the joint and start over.
With your joints cemented, it's time to install the pipes permanently. If you're working on a wall or ceiling, use pipe hangers or straps to secure the pipes. Here's how:
Horizontal pipes: Space hangers every 4–6 feet (check your local code—some areas require 3 feet for small pipes). Use plastic hangers for PVC—metal hangers can scratch the pipe. Screw the hanger into the wall stud or ceiling joist, then rest the pipe in the hanger. Don't overtighten—you want the pipe to have a little room to expand/contract with temperature changes.
Vertical pipes: Use straps (like "J-hooks") every 8–10 feet to keep them from swaying. For vent pipes going through the roof, install a roof flashing to prevent leaks—this is a metal or rubber seal that goes around the pipe and under shingles.
If you're connecting to existing pipes (like the main sewer line), make sure the old pipe is clean and dry. You may need a "transition coupling" if the old pipe is a different material (e.g., cast iron). Ask your pipes fittings supplier about compatible pipes fittings solutions for mixed materials.
You're almost done! Now it's time to test your DWV system to make sure there are no leaks. Most building codes require a "water test" or "air test," but for DIY projects, a simple water test works well:
1. Plug the ends: Use rubber caps or inflatable test plugs to seal the open ends of your pipes (like the main drain leading to the sewer). For fixtures, fill sinks/tubs with 2–3 inches of water and plug drains.
2. Let the cement cure: Wait at least 24 hours for the cement to fully dry. Rushing this can cause joints to fail during testing.
3. Release the plugs and run water: Remove the plugs, then run water in sinks, showers, and flush toilets. Walk around and check every joint for drips or moisture. If you see a leak, mark it with a pencil—you'll need to let the system dry, then cut out the faulty joint and re-cement it.
4. Check vents: Have a friend go outside while you run water—they should hear air rushing out of the roof vent. No air flow means a blocked vent, which can cause slow drains.
Installing PVC DWV pipes might seem intimidating at first, but as you've seen, it's all about planning, patience, and following the steps. By choosing quality materials from a trusted pvc dwv pipe supplier and reliable pipes fittings supplier, you've set yourself up for a system that will last for decades. And remember—even pro plumbers started as beginners. Every cut, measurement, and cement application is a skill you're building.
If you run into snags, don't hesitate to reach out to your supplier—many offer pvc dwv pipe solutions and pipes fittings solutions like technical support or online guides. And when you're done, take a step back and admire your work: You've not only saved money on labor but also gained the confidence to tackle more DIY projects in the future.
So go ahead—turn on that faucet, flush that toilet, and enjoy the peace of mind that comes with knowing your DWV system is strong, safe, and installed by you . Happy plumbing!
Recommend Products


