Detailed Explanation of TV Cabinet Surface Treatments: Lacquer, Oil Wax, Open‑Coat, etc.
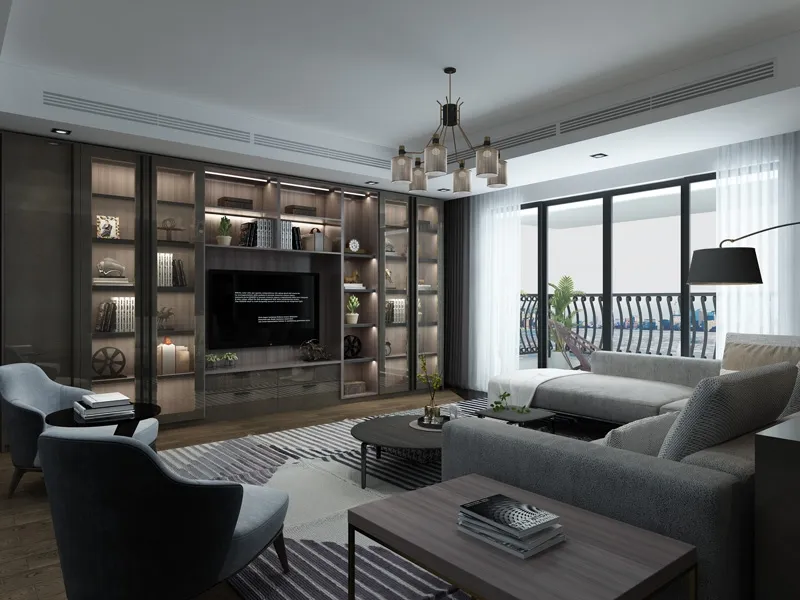
Hey there, fellow DIY enthusiast! If you're like me, you've spent weekends carefully selecting or building that perfect tv cabinet only to hit the wall when it comes to finishing choices. Between lacquer's glossy shine, wax's soulful warmth, and all the options in between, picking the right treatment can feel overwhelming.
Don't worry—I've been down this rabbit hole countless times. Let's demystify finishes together in plain English, no technical jargon. I'll share hands-on tips that transform cabinets from "meh" to "wow" while protecting your investment for years. Whether you're a weekend warrior or woodworking pro, you'll find real-world advice that skips the fluff.
Why Your TV Cabinet Finish Matters More Than You Think
Before we dive into types, let's talk about why finish selection isn't just about aesthetics. Over the years restoring furniture, I've seen beautiful pieces ruined by poor finishing—water rings from sweaty glasses, scratches from remotes, even humidity cracks in solid wood.
A properly chosen finish does three heavy lifts:
- Beauty Enhancement: Like a good photographer, finish brings out the wood's natural character. Open-grain oak looks dramatically different under wax versus lacquer
- Daily Armor: From soda spills to scratched controllers, your cabinet takes more abuse than most furniture. The right finish is body armor against daily life
- Long-Term Protection: Humidity changes cause wood to expand/contract like breathing. Quality finishes flex with these movements, preventing cracks
The A-Z of TV Cabinet Finishes
Lacquer - The Protective Shield
Lacquer has been my go-to for modern tv cabinets for years. Think of it as liquid glass—it creates a hard, protective shell that laughs off drink spills and cleaning sprays. Modern water-based lacquers like EMTECH® HSF5000PSFS have become my favorites because:
- Dries fast enough that dust won't ruin your finish between coats
- Offers incredible build without looking plastic-y
- Water cleanup means no smelly solvents filling your workspace
Application Tips:
Light mist coats are key! I learned from old-timers at woodworking shops to keep coats thin—four thin layers beat two thick ones every time. Wait 30 minutes between coats, then sand lightly with 220-grit paper. For cabinets, satin finish hides fingerprints best.
Oil Wax - The Soulful Classic
There's a reason this traditional finish has endured for centuries. Wax treatment creates warmth you can feel—a soft glow that screams "handcrafted." Unlike lacquer's perfection, wax celebrates the wood's natural imperfections, which is why it often works beautifully with rustic designs.
I adore wax for cabinets where you want texture and depth, but approach with eyes open:
- Monthly reapplications needed to maintain protection
- Water spots show easily—use coasters religiously!
- Heat resistant but scratches easier than modern finishes
My Go-To Technique:
Apply generously with 0000 steel wool, working with the grain. Let haze (30 mins), then buff aggressively with clean rags. Apply second coat the next day for heirloom protection.
Open-Coat - The Breathable Beauty
Traditional finishes often hide wood's character beneath plastic-like layers. Open-coat treatments (like sanding sealers) preserve the tactile experience—you'll feel the actual grain under your fingers. It's perfect when you have beautifully figured wood or want to maintain the wood's natural feel.
What sets open-coat apart:
- Leaves pores exposed, avoiding the "plastic wood" look
- Maintains breathability, great for humid climates
- Easier touch-ups since repairs blend seamlessly
Application Wisdom:
Start with EM1000 Universal Sanding Sealer to lock down uneven spots. Then build with transparent top coats. Two sealer layers, two top coats create durable yet open-pore magic.
Pigmented Lacquer Paint - The Color Chameleon
Want that Scandinavian white look or bold navy statement? Pigmented lacquer like EM6500 gives you color with factory-like durability. I've used this on dozens of cabinets where customers wanted to match Pantone colors or create bold statements.
Why designers love it:
- Brilliant opaque colors with durable protection
- Custom shades possible by adding universal tints
- Easy cleanup without sacrificing durability
Mixing Tip:
Strain every batch through paint filters—tiny pigment clumps will ruin a sprayed finish. For cabinets, multiple thin coats prevent drips near edges.
The Finish Showdown: How Treatments Compare
| Treatment Type | Durability | Touch-Ups | Look & Feel | Best Use Cases |
|---|---|---|---|---|
| Lacquer | ★★★★★ (Years of protection) | Hard (requires sanding/blending) | Glossy to satin smoothness | Modern cabinets, high-traffic homes |
| Oil Wax | ★★★☆☆ (Reapply yearly) | Easy (buff in damaged areas) | Warm matte with texture | Traditional designs, heirloom pieces |
| Open-Coat | ★★★★☆ (Good protection) | Moderate (fill/sand before coat) | Natural wood feel | Exotic woods, tactile surfaces |
| Pigmented Lacquer | ★★★★★ (Industrial strength) | Hard (color matching required) | Painted appearance | Color block designs, modern units |
| Conversion Varnishes | ★★★★★ (Maximum protection) | Hardest (professional repair) | Glass-like perfection | Luxury built-ins, high-end designs |
Transforming Your Cabinet Step-by-Step
Ready to dive in? Here's my battle-tested routine refined from years in workshops—applicable whether you're refreshing a thrift store find or finishing a custom build:
- Clean Like Surgeon: Wipe with naphtha to remove invisible oils (hand cream residue ruins finishes)
- Sand Smart: Start at 120-grit, jump to 180, finish at 220. Too smooth? Finishes won't grab properly
- Pre-Stain Conditioner: Mandatory for maple/cherry unless you love splotches
- Seal Like Pro: Apply EM1000 sanding sealer with foam brush. Wood should drink it slowly
- Build Systematically: For lacquer, spray three mist coats 10 minutes apart. For wax, buff out haze religiously
- The Final Pass: Rub with 0000 steel wool & paste wax for liquid-smooth surfaces. Buff to warmth
Avoid the temptation to rush! Skipping steps leads to regret when flaws appear months later. Good finishing demands patience but pays off every time you admire your work.
Advanced Finishing Techniques
For the detail-obsessed (like me!), take cabinets from good to gallery-worthy with professional touches:
Layered Finishes
Combine lacquer's protection with wax's depth—popular among bespoke cabinetmakers. Seal with lacquer, then burnish paste wax into the surface. Creates depth unmatched by single-process finishes.
Texturing Magic
Hide imperfections with wire-brushing techniques. Drag wire brush with grain before sealing to accentuate softer grain lines. Makes oak grain "pop" dramatically.
Troubleshooting Corner: Sticky finish? Humidity likely trapped beneath coats. Strip gently with denatured alcohol, sand, and reapply in drier conditions. Finish lifting? Surface oils were likely overlooked—clean better next time!
Your Wood-Finish Decision Guide
Different woods play differently with finishes—here's my cheat sheet from cabinet projects:
- Oak/Chestnut: Open-pore beauties—use oil wax to highlight grain texture
- Maple/Cherry: Tight grains prone to blotching—water-based lacquer behaves best
- Walnut: Rich tones—preserve with protective lacquer or satin wax
- Pine/Softwoods: Dents easily—use tough conversion varnishes
- Exotics: Oily woods (teak/rosewood)—clean with acetone before sealing
Remember: Prep always beats product. $50 finish on poor prep looks worse than $15 finish properly applied!
Why Finishing is Your Secret Weapon
In 15+ years restoring furniture, I've learned finishes determine whether pieces become family heirlooms or landfill candidates. The care you put into finishing resonates for decades—literally. Wax develops richer glow with yearly maintenance, lacquer maintains pristine lines for Netflix marathons.
When people run their hands over your tv cabinet and say "Wow, that's beautiful!"—that moment comes from your finishing choices. Don't rush it. Find joy in the methodical ritual of sanding, sealing, and burnishing. There's magic in transforming raw wood into something that lives in your family's story.
Now grab those brushes—your masterpiece awaits!
Tags:
Recommend Products


