
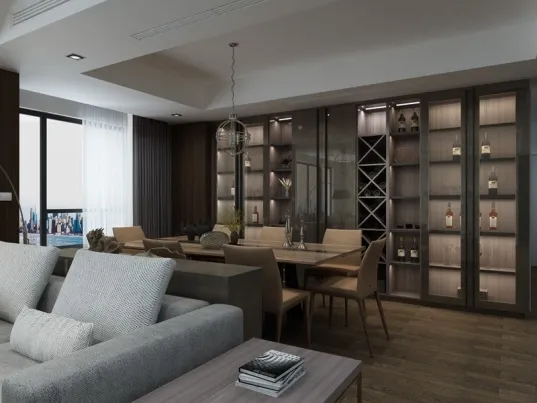
Hey there, fellow wine enthusiasts! If you're reading this, chances are you're about to embark on the exciting journey of installing a custom wine cabinet. Let's be real – this isn't just another piece of furniture. Your wine cabinet is essentially a hospital for your precious bottles, where the right conditions make the difference between a beautifully aged vintage and a disappointing vinegar experiment.
Over the years, I've seen too many collectors treat installation as an afterthought – like they're just plugging in a toaster. Big mistake. Without proper attention to the three pillars of installation – power supply, ventilation, and ground stability – you might as well be storing your prized Bordeaux in a broom closet. In this deep dive, we'll explore everything I've learned about setting up the perfect environment for your liquid treasures to age gracefully.
Let's talk electricity first because without consistent power, your fancy climate-controlled cabinet is just an expensive wooden box. When I installed my first professional-grade wine unit years ago, I made the classic rookie mistake – plugging it into a regular kitchen outlet shared with my microwave. The voltage fluctuations from other appliances caused my cabinet's compressor to work overtime, cutting its lifespan in half.
Treat your wine cabinet like the sensitive medical equipment it is. That means dedicated, clean power free from the interference of household appliances cycling on and off.
Your installer might tell you "any outlet will do" – don't buy it. Demand a 15-20 amp dedicated circuit installed by a licensed electrician. Think of this as creating a private highway for your cabinet's power needs rather than forcing it to compete in rush-hour traffic.
Wine cabinets are Goldilocks machines – they need their voltage just right (typically 110-120V). Fluctuations cause compressors to short-cycle, increasing wear by up to 300% according to HVAC studies. Consider installing a voltage regulator if your area suffers brownouts.
I know how tempting it is to stretch that cord to reach an outlet – resist! Most manufacturers will void warranties for cord use. The voltage drop over distance makes compressors run harder and hotter. No shortcuts here.
The irony of power issues is that they're completely preventable. Unlike spontaneous cork failures or unexpected tannin evolution, setting up proper electricity requires just one thoughtful installation session. Do it right once and you'll forget about it – until you're enjoying perfectly preserved wine decades later.
Here's where most installations go wrong. People focus so much on the interior temperature that they forget the machinery creating that cold environment generates significant heat. That heat has to go somewhere. I've seen cabinets installed in enclosed spaces slowly bake themselves to death over 12-18 months.
Manufacturers will give minimum clearances (usually 2-3 inches). Treat these as survival specs, not performance specs. For every inch below recommended clearance, efficiency drops 5-7% and heat buildup increases exponentially. Always exceed recommendations when possible.
Your wine cabinet hates ovens, dishwashers, and heaters like vampires hate sunlight. Even radiators on opposite walls create micro-climates. Always install at least 3 feet away from these – measured diagonally through airspace, not just straight walls.
Many homes incorporate wine cabinets into their south-facing windows for the "lifestyle look." This is aesthetic self-sabotage. Direct sunlight adds unnecessary heat load making compressors work constantly. Install away from sunlit areas regardless of view appeal.
When helping clients, I use the "hand test" method – after installation, run your hand around the cabinet perimeter. If any spot feels warmer than room temperature, you've got airflow issues. That's your wine cabinet crying for help. Correct ventilation isn't just about space; it's about placement psychology.
Last year I consulted on a beautiful custom cellar where the owners ignored ventilation clearance. Their $15,000 cabinet started failing after 18 months. The repair cost nearly equaled a replacement – all because they squeezed it into a space that was "almost" big enough.
We've all seen wonky supermarket carts with that annoying wobbly wheel – imagine that effect on wine sediment over years. Uneven installation accelerates crystallization and sedimentation, visibly impacting wine quality. That slight tilt you barely notice? It matters on a microscopic level every single day.
Use a digital level not your grandpa's spirit level. We're measuring hundredths of an inch, not just "good enough." Budget units may tolerate slight unevenness but premium models with compressor suspensions demand precision for vibration control.
Vinyl or tile floors require different shimming techniques than concrete. Suspended wooden floors introduce vibration issues needing isolation pads. Professional installers should analyze your flooring type before even unloading equipment.
Fully loaded premium cabinets can weigh 600+ pounds. That's two NFL linebackers standing in one spot! Reinforce older floors with plywood spreaders. Some high-end installations require structural engineers to verify load capacity.
During one consultation, I met a collector who complained of premature bottle deterioration. Turned out his wine cabinet shared a wall with his washing machine. The subtle vibrations transmitted through the floor accelerated sediment agitation. We solved it with anti-vibration feet and rearranging his laundry schedule. Small details, huge impact.
Those peel-and-stick cabinet leveling pads at hardware stores are terrible solutions. They compress unevenly over time creating more instability. Invest in machined stainless steel leveling feet specifically weighted for your cabinet.
Beyond the Big Three, several subtle installation details separate good from great environments:
Dry environments cause corks to shrink while excessive humidity promotes label mold. Most collectors don't realize that installation location significantly impacts humidity control efficiency. Kitchens and laundry rooms have wild humidity swings – avoid them.
Home theaters, gyms, and children's playrooms near your cabinet? Bad news. Low-frequency bass vibrations disturb sediment even when you can't feel them. When possible, create buffer zones between vibration sources and your wine sanctuary.
Speaking of vibrations, remember that installing your wine cabinet requires careful consideration of **built-in wine cabinet** integration in custom cabinetry versus freestanding placement. The built-in approach creates aesthetic harmony but introduces ventilation challenges compared to standalone units. Always prioritize function over form.
I've seen too many collectors design wine spaces that look spectacular but feel terrible to use. Basic rules:
My favorite client solution? An architect who designed his wine wall with graduated shelving – everyday wines at eye level, special occasions up top, investment bottles in temperature-controlled drawers below. Pure ergonomic genius with accessibility for their custom furniture layout.
After planning comes execution. Based on hundreds of installations, here's my field-tested checklist:
Measure doorways, stairs, and corners. Remove doors if needed. One client had to remove 6 inches of door molding – cheaper than returning a cabinet that wouldn't fit!
Place your cabinet on its final spot before plugging in. Let it settle 24-48 hours – especially important on new flooring that may compress slightly under weight.
Run your climate system for 72 hours before loading wine. This establishes thermal mass and humidity baselines. Don't rush this step!
The work doesn't end when the installer leaves:
I recommend simple tools like IR thermometers ($20-40) and standalone temperature/humidity loggers ($50-100). They're insurance policies for your insurance policy.
90% of cabinet failures show symptoms unrelated to actual problems. What looks like a faulty thermostat is often inadequate ventilation. Strange noises frequently trace back to uneven leveling. Address root causes, not symptoms.
Likely Causes:
Undersized power, insufficient clearance, or ambient temperatures too high
Fix:
Verify voltage stability, improve ventilation, consider relocation
Likely Causes:
Inadequate airflow or blocked vents
Fix:
Increase clearance, vacuum condenser coils, verify fan operation
Likely Causes:
Uneven leveling or structural vibration transmission
Fix:
Re-level with precision tools, install vibration isolation pads
Remember that technician hourly rates make diagnosis expensive. Systematic elimination of environmental factors saves money. Always start with installation factors before assuming equipment failure.
All this technical talk boils down to one simple truth: correctly installed wine cabinets preserve not just bottles, but memories and investments. That Napa Cabernet you bought on your anniversary deserves perfect aging conditions. That Burgundy you're saving for your child's graduation requires protection.
Years from now when you pull a perfectly aged bottle from your cabinet, you won't think about electrical wiring or leveling shims. You'll experience the magic only wine collectors understand – liquid time travel. But that magic requires foundations we've discussed today.
As one sommelier client told me while tasting a perfectly preserved 1990 Barolo: "Great wine starts in the vineyard but lives or dies in the cellar." Let your careful installation be the silent guardian ensuring those future perfect moments.
Recommend Products












