
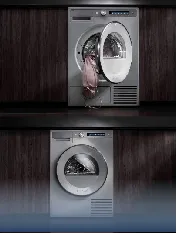
Hey there! So you've got a shiny new washing machine ready to tackle those mountains of laundry? Awesome! But hold up—before you start celebrating, let's talk installation. Getting this step wrong can turn your laundry dream into a leaky, noisy nightmare. I've seen too many folks skip crucial steps only to face flooded floors or appliances that walk across rooms mid-cycle!
Today, we're diving deep into the three biggest trip-ups people face: the faucet connection , making sure your machine sits on stable ground , and the often-overlooked but oh-so-critical horizontal adjustment . Whether you're DIY-inclined or just want to supervise a pro, you'll finish reading with eyes wide open to these common pitfalls.
Picture this: You excitedly unpack your machine, slide the hose toward the faucet, tighten it down, and boom—water everywhere. What gives? Many modern washing machines come with "specialized" faucets that seem like they should be foolproof... but plumbing quirks love to prove us wrong.
Pro tip : That little rubber washer inside your hose connection? If it's cracked or missing, say hello to leaks. Inspect it before hookup like you're searching for buried treasure!
And here's something folks rarely consider: galvanic corrosion . When different metals (like your bronze faucet and stainless steel fitting) meet water, they create a battery effect. Over time, this eats away at connections. One homeowner told me their leak started two years post-install—slow drips that hid until the kitchen ceiling collapsed!
You might’ve heard: "Cold water cleans just fine!" Sure, but most appliance brands explicitly require a hot water connection too. Why? Some sanitation cycles or specific detergents rely on warmer temps. Skipping this might void warranties or force you into expensive re-plumbing later.
I once inspected a home where the installer "saved time" by capping off the hot water line. Result? Moldy odors lingered even after cleaning because cold water alone couldn’t melt oily residues in synthetic fabrics. Moral? Always connect both lines unless your manual explicitly says otherwise.
Imagine spinning soaking wet jeans at 800 RPM. Without a rock-steady base, your washer vibrates like an excited puppy. Those adjustable feet underneath aren't decorative—they're stability guardians!
Here's the golden rule : After positioning, push diagonally on each top corner. If the machine rocks even slightly, retract its feet one by one. Test with a carpenter's level placed across the drum opening, not just the frame. I worked with a homeowner who fought noise for months—turned out an overlooked concrete ridge made one leg hover millimeters off the floor!
Sound-check secret : Place a glass of water on top during spin cycles. Rippling water? Keep adjusting those feet!
Never put a washer straight on hardwood or tile without a vibration pad! Even with perfect leveling, the machine "walks" from inertia shifts. I recommend thick rubber pads or specialized mats ($15-$30 at hardware stores)—they absorb kinetic energy like shock absorbers.
Basement install? Beware uneven slabs! A contractor client found cracks radiating from his machine after six months. Solution: Pour self-leveling compound over a small section to create a platform. It's tedious but cheaper than foundation repairs!
Manufacturers aren’t joking about that 39-inch minimum height requirement for your drain standpipe. Why? Physics! If your hose loops down before rising to the pipe, wastewater backflows into the drum. Gross? Absolutely. Expensive to fix? You bet.
Meet Bob (not his real name). Bob installed his standpipe at 32" because "it fit under the shelf." Six months later, murky water flooded his laundry room during every cycle. Why? Gravity always wins! After rerouting to 42", his issues vanished. Remember: Measure from the washer exit point, not the floor!
Let's bust two big ones:
Your washer gulps more electricity than a space heater on steroids. Most manufacturers mandate their own dedicated circuit (20 amps, GFCI protected). Piggybacking onto your dryer's outlet can trip breakers or melt cords.
A fire inspector recounted a case where an extension cord overheated beneath a washing machine, igniting lint. Moral: Pay an electrician $150-$300 for a dedicated outlet. Cheaper than house fires!
Hidden risk : Some condos/apartments share circuits per room. Hire an electrician to trace wirings first!
Rubber inlet hoses? replace them every 3-5 years—even without visible cracks! Hidden inner-wall fractures burst suddenly, flooding rooms at 60+ psi pressure. Ask anyone who's vacationed to find five inches of water in their finished basement!
For peace of mind, spend $20-$50 on stainless-steel-braided hoses. They withstand corrosion, high pressure, and won’t balloon over time like ordinary rubber. Remember: A burst hose pours 12 gallons per minute !
When choosing new home appliances, especially critical items like washing machines, prioritize proper installation and maintenance to avoid expensive repairs and hazards.
Laundry shouldn't feel like dodging booby traps. Nail these fundamentals, and you're golden!
Recommend Products












